> ## Documentation Index
> Fetch the complete documentation index at: https://docs.chatnode.ai/docs/llms.txt
> Use this file to discover all available pages before exploring further.
# Collect Leads
## Overview
Traditionally, lead collection happens at the start of a agent conversation (e.g., asking for name, email, or phone). With smart lead collection, the agent can now detect intent mid-conversation — such as when a user requests a product demo, pricing, or more details — and automatically prompt for relevant contact details.
Example: When will Product X be back in stock?
## How to Use Collect Leads
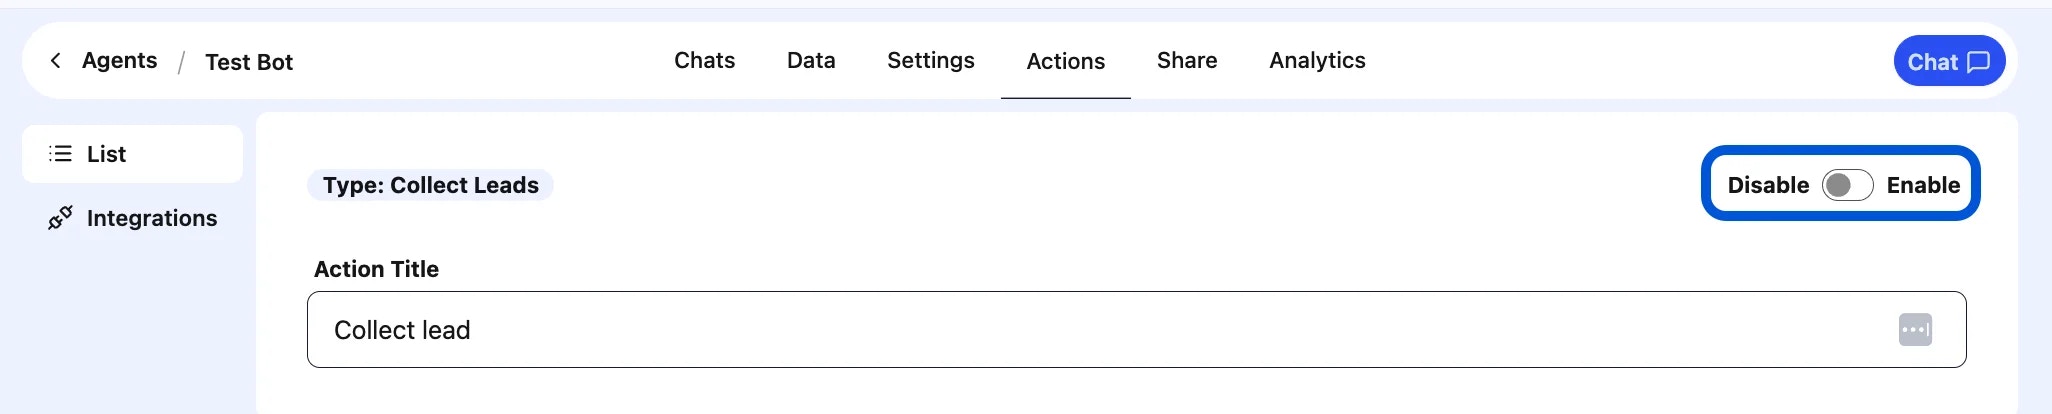
### Step 1: Create a Collect Leads Action
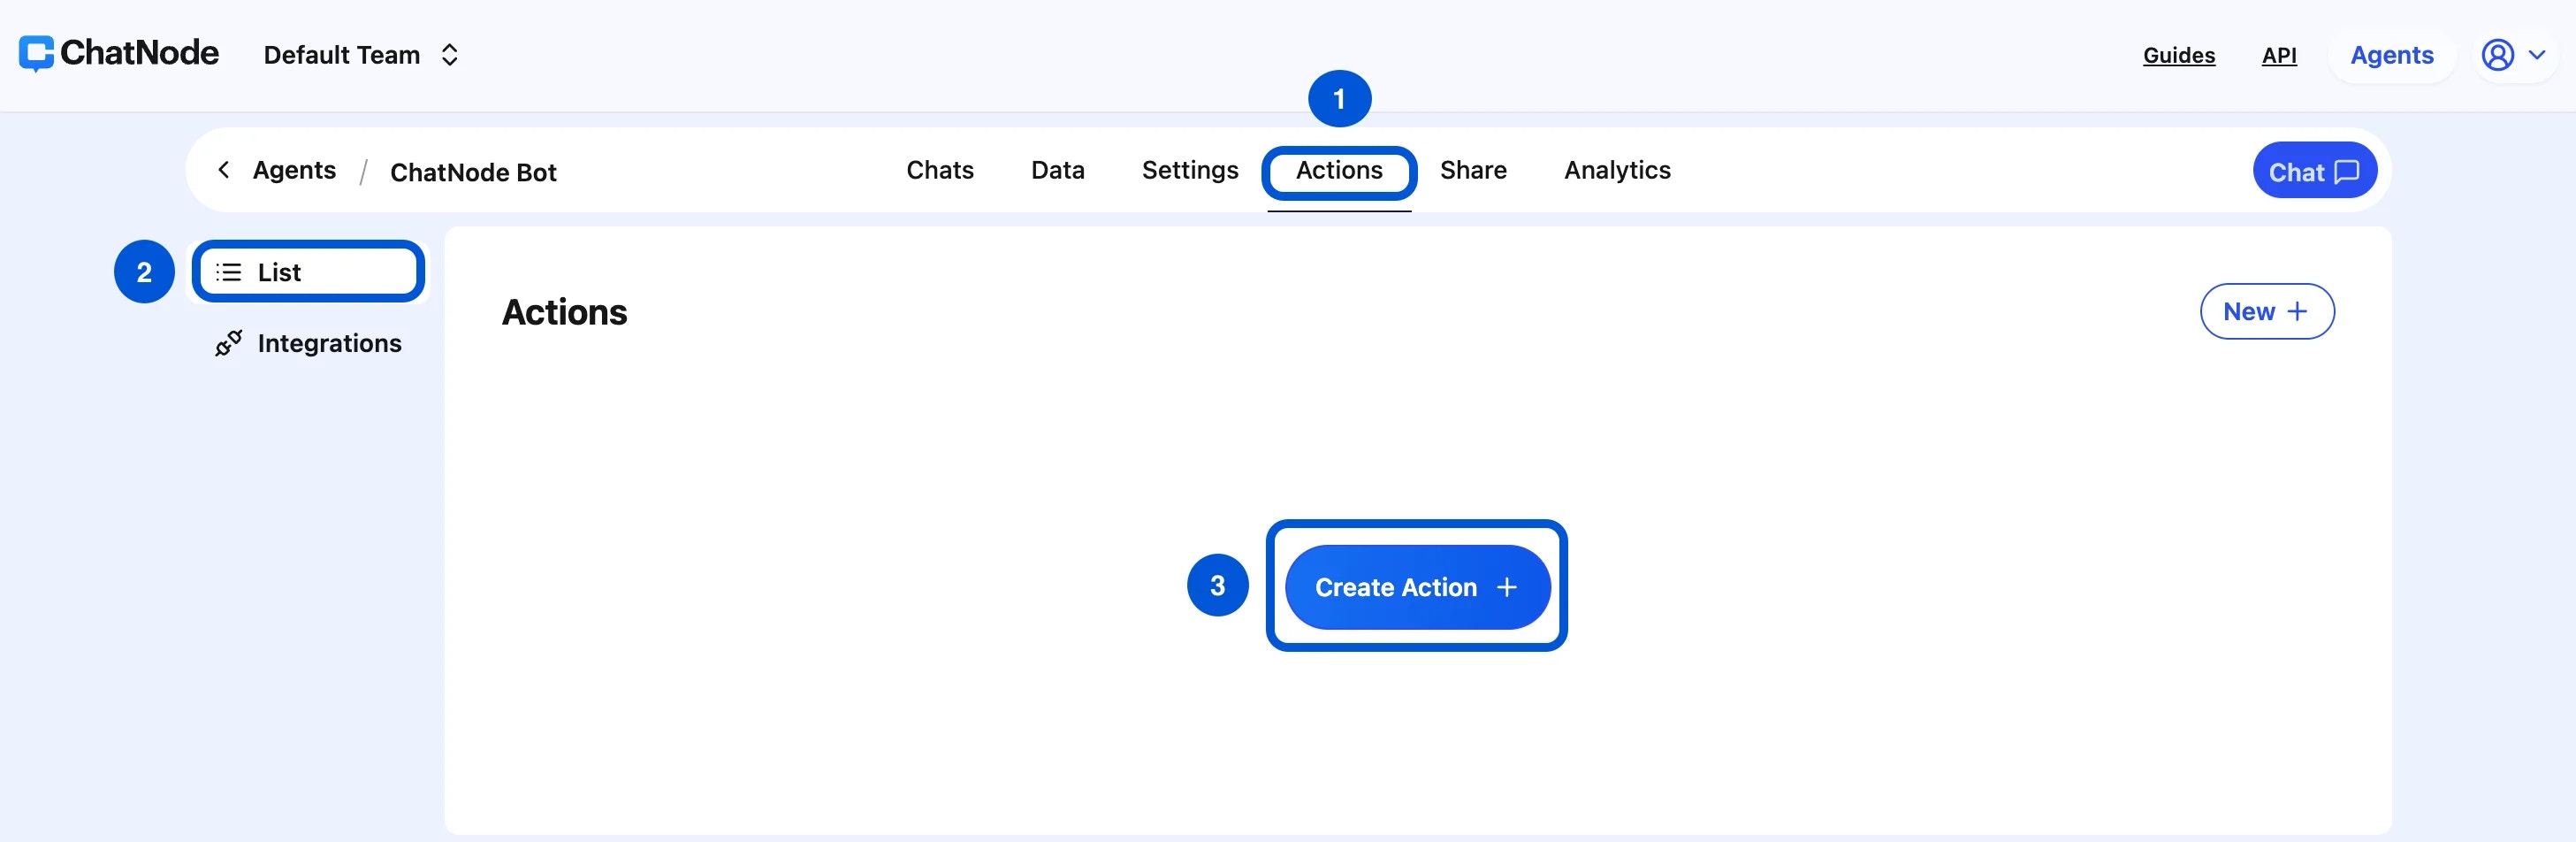
1. Go to the **Actions** tab.
2. Click **List** from the left-hand menu.
3. Select **Create Action**.
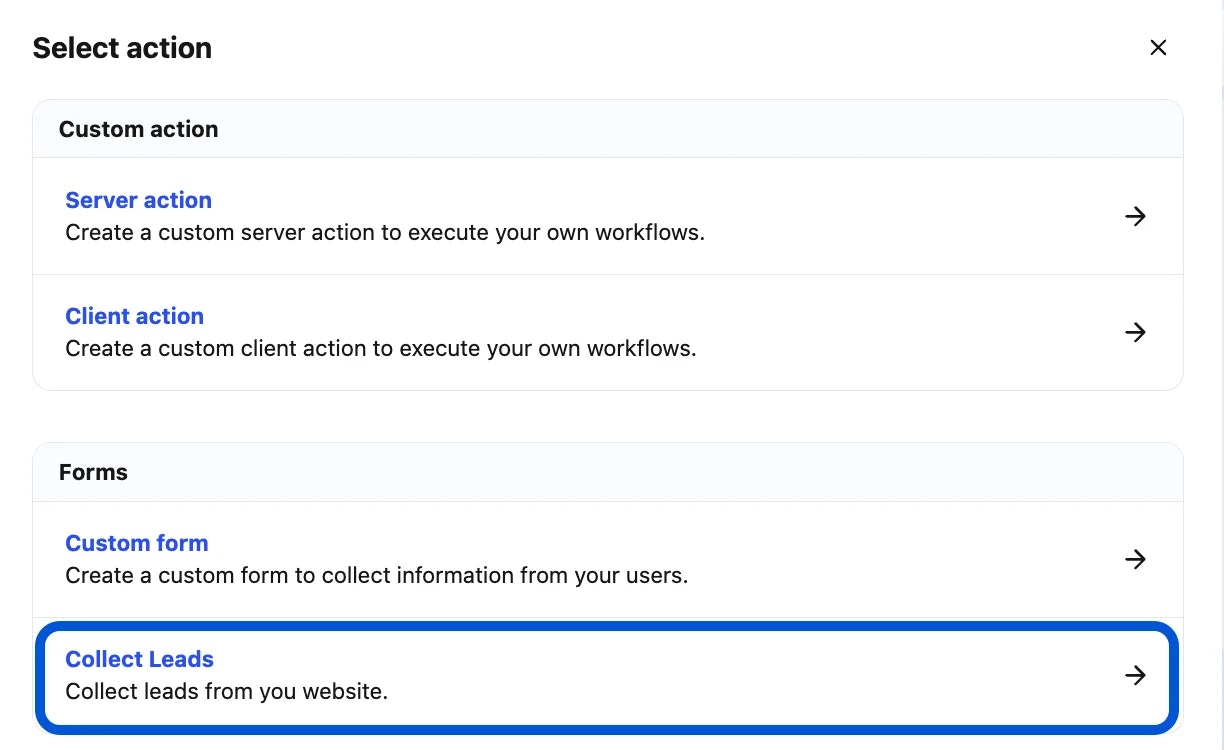
 4. Choose **Collect Leads**.
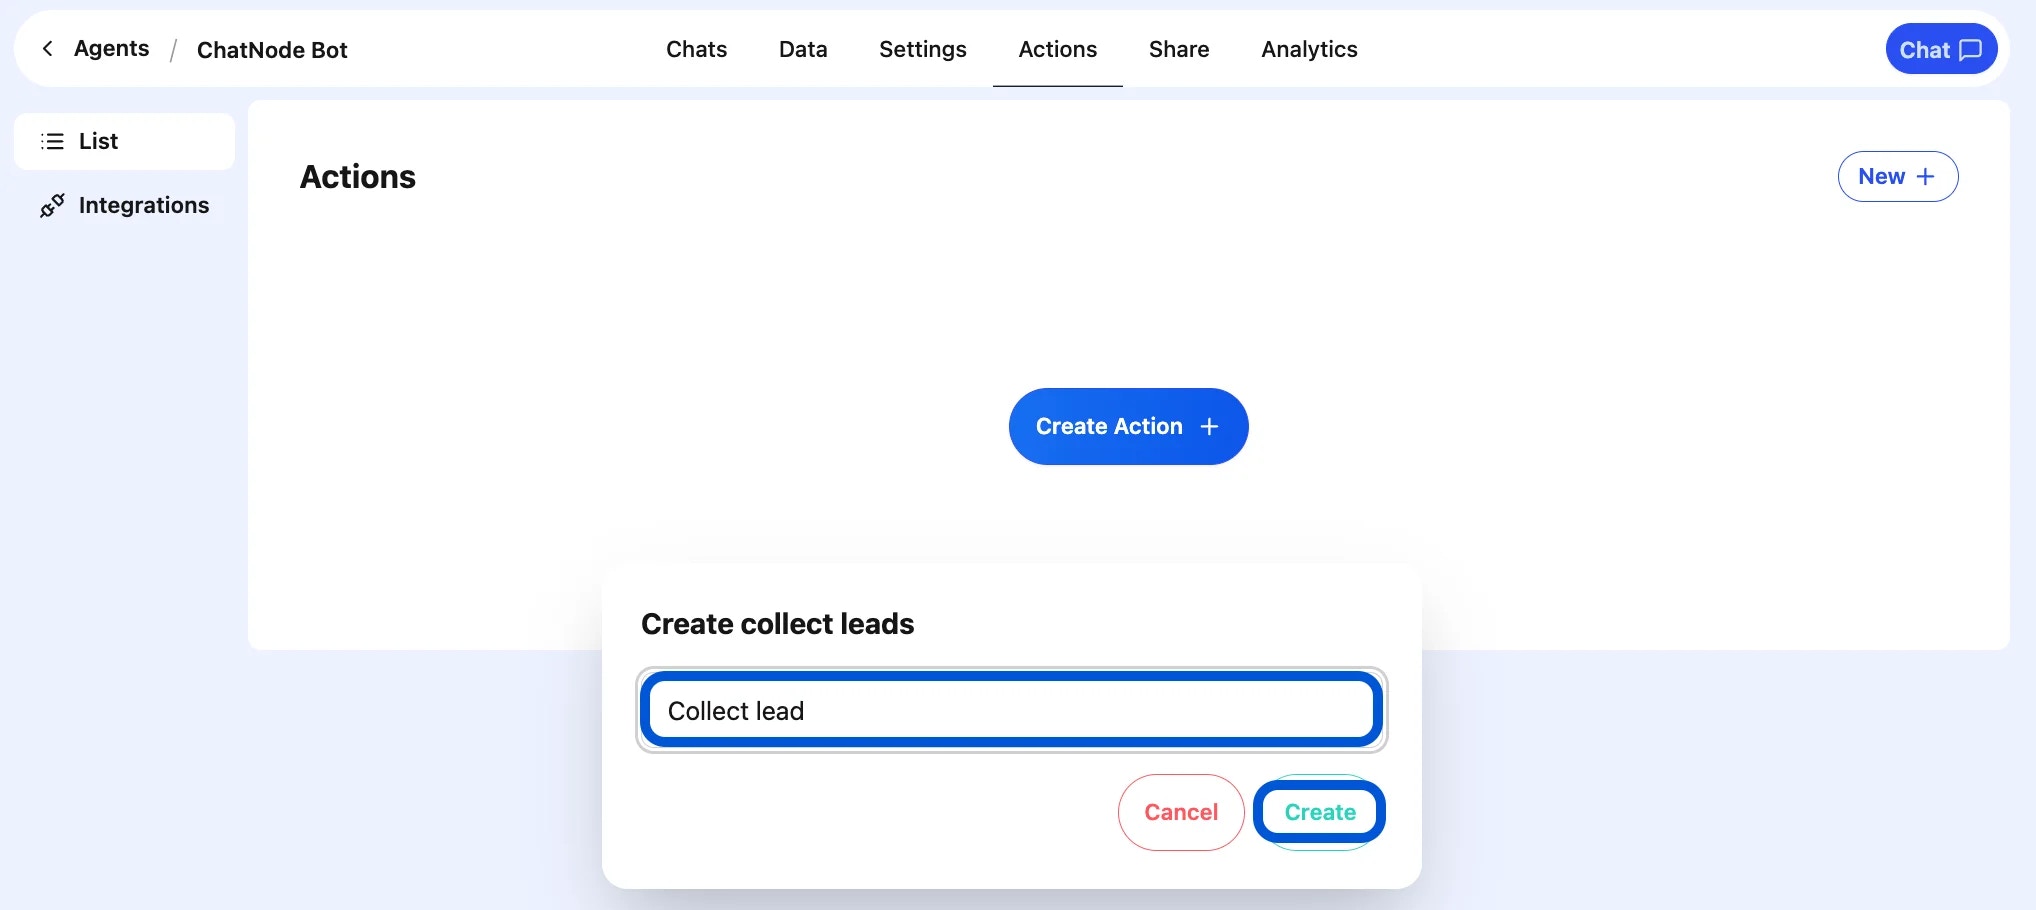
 5. Enter an **Action Title** in the pop-up window and click **Create**.
 6. You will be redirected to the configuration page.
### Step 2: Basic Settings
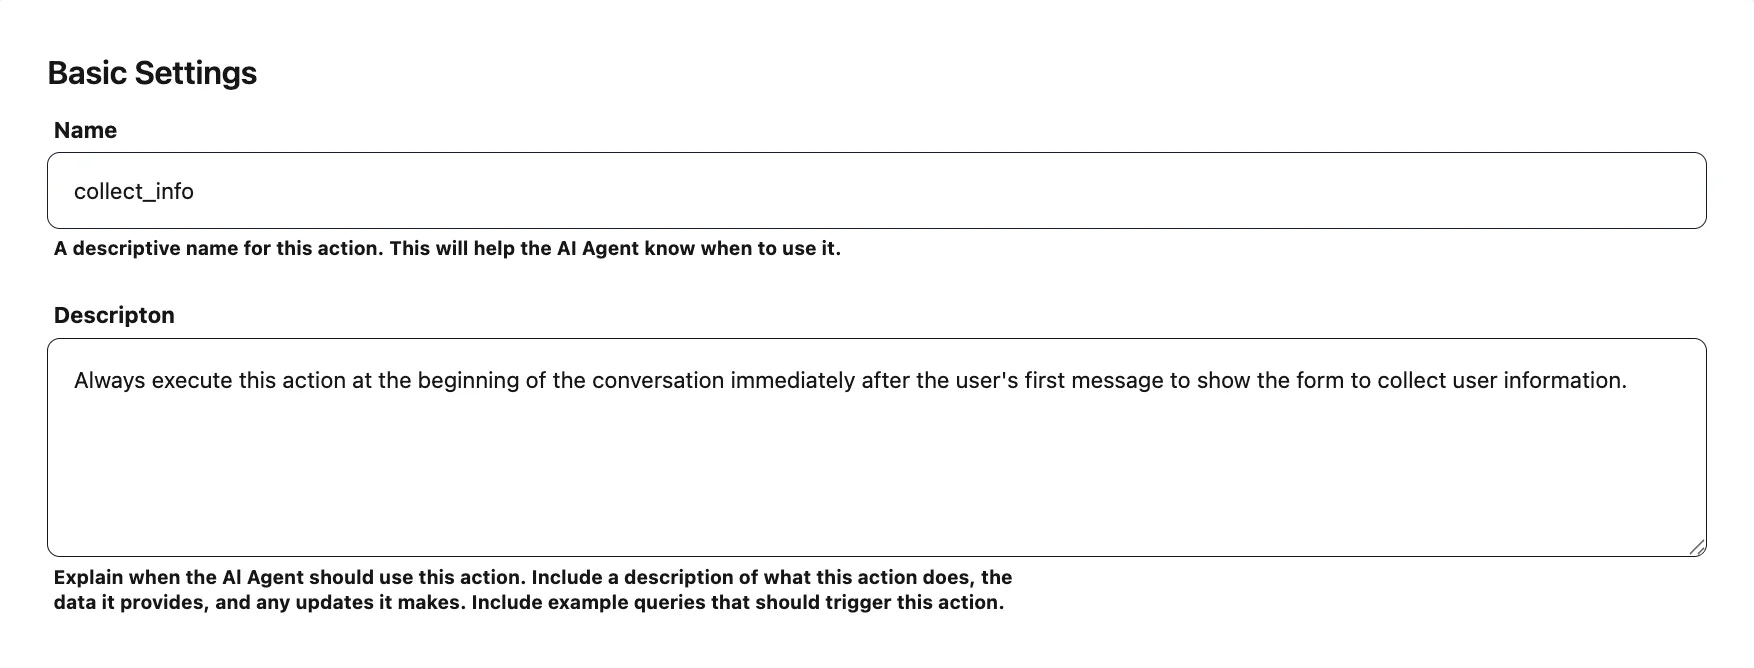
* **Name** → Enter a descriptive name for this action. (e.g., collect\_info)
* **Description** → Provide a short explanation of when to use this action.
* Example: Collects user contact details for the sales team.
6. You will be redirected to the configuration page.
### Step 2: Basic Settings
* **Name** → Enter a descriptive name for this action. (e.g., collect\_info)
* **Description** → Provide a short explanation of when to use this action.
* Example: Collects user contact details for the sales team.
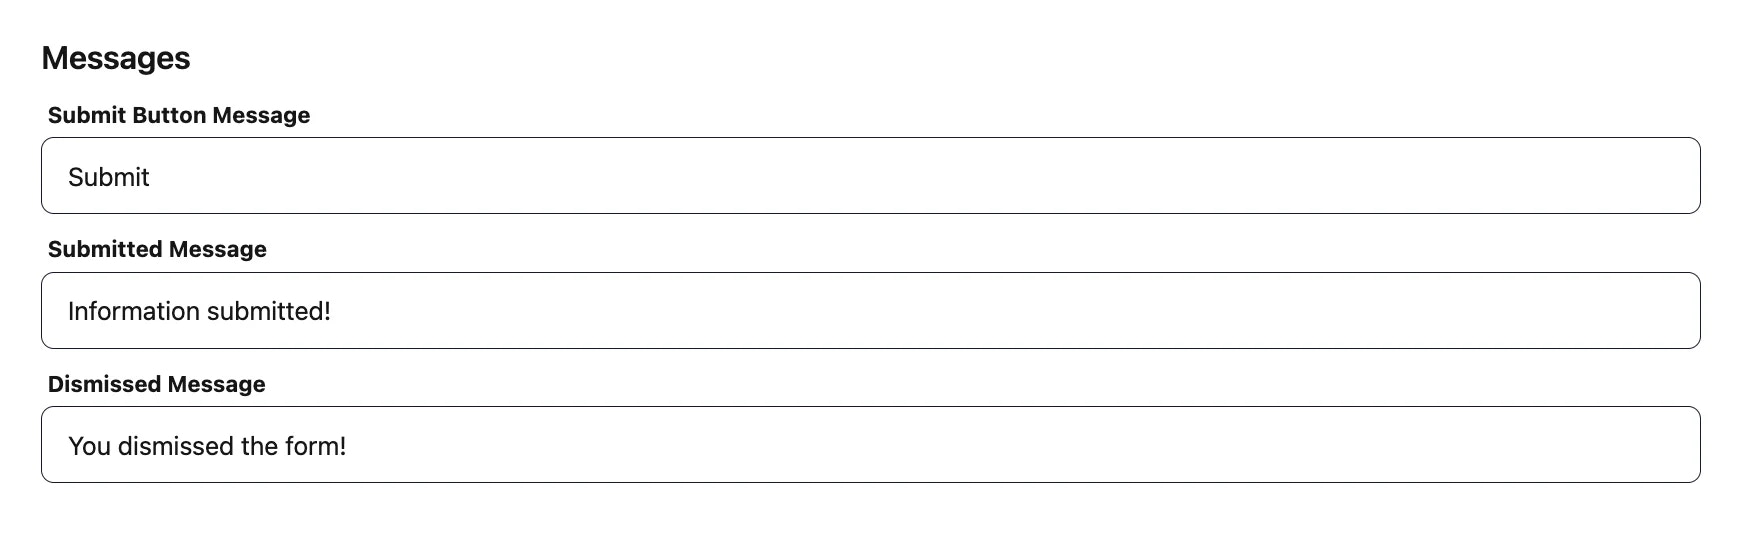
 ### Step 3: Messages
You can customize the messages shown during the lead capture process:
* **Submit Button Message** → Label for the submit button (e.g., **Submit Details**).
* **Submitted Message** → Confirmation shown after the user submits their information (e.g., **Thank you! We'll be in touch soon.**).
* **Dismissed Message** → Message displayed if the user closes the form without submitting (e.g., **You dismissed the form.**).
### Step 3: Messages
You can customize the messages shown during the lead capture process:
* **Submit Button Message** → Label for the submit button (e.g., **Submit Details**).
* **Submitted Message** → Confirmation shown after the user submits their information (e.g., **Thank you! We'll be in touch soon.**).
* **Dismissed Message** → Message displayed if the user closes the form without submitting (e.g., **You dismissed the form.**).
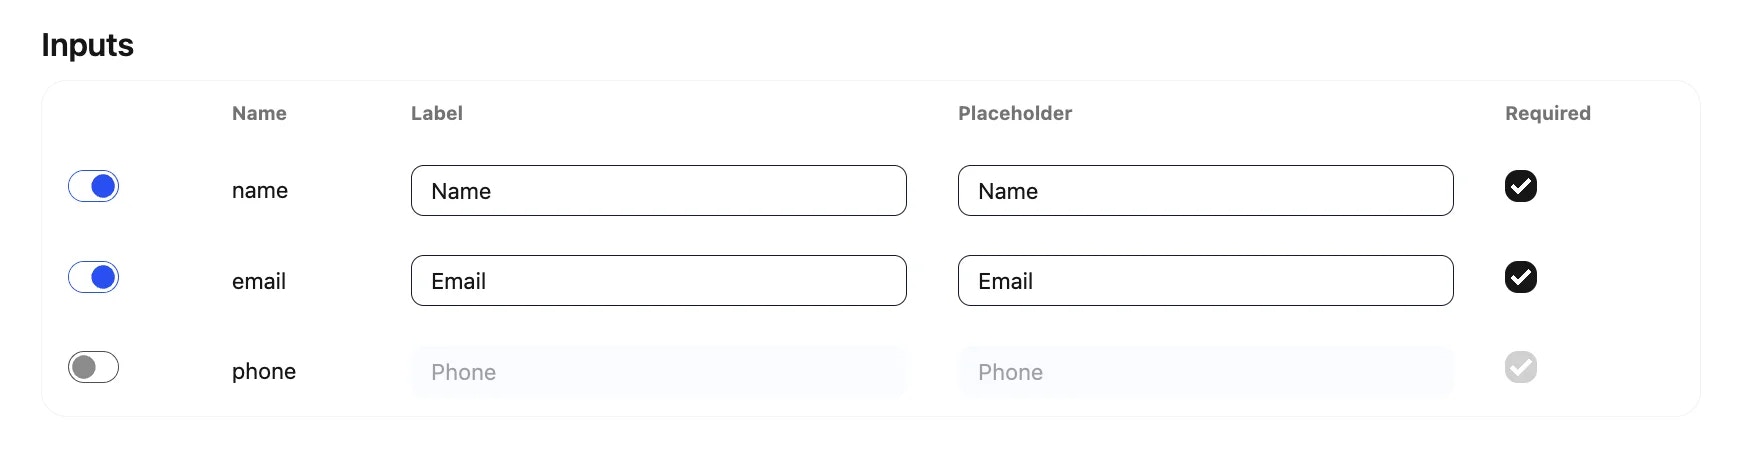
 ### Step 4: Inputs
Inputs are the fields that make up your lead form.
By default, common fields are provided:
* **Name**
* **Email**
* **Phone**
You can configure each field by editing:
* **Label** → What the user sees (e.g., **Your Email**).
* **Placeholder** → Example text inside the field (e.g., **Enter your email address**).
* **Required** → Toggle whether the field must be filled out before submission.
**Example Setup:**
* Name → Required text field.
* Email → Required email field.
* Phone → Optional text field.
### Step 4: Inputs
Inputs are the fields that make up your lead form.
By default, common fields are provided:
* **Name**
* **Email**
* **Phone**
You can configure each field by editing:
* **Label** → What the user sees (e.g., **Your Email**).
* **Placeholder** → Example text inside the field (e.g., **Enter your email address**).
* **Required** → Toggle whether the field must be filled out before submission.
**Example Setup:**
* Name → Required text field.
* Email → Required email field.
* Phone → Optional text field.
 ### Step 5: Webhook (Optional)
You can send collected lead data to an external system automatically.
* Submissions are sent as a POST request in JSON format.
* Configure your webhook endpoint in the settings tab.
* Example Event Name: collect\_info\_lead\_form
This is helpful if you want to sync leads with a CRM, Google Sheets, or another database.
### Step 5: Webhook (Optional)
You can send collected lead data to an external system automatically.
* Submissions are sent as a POST request in JSON format.
* Configure your webhook endpoint in the settings tab.
* Example Event Name: collect\_info\_lead\_form
This is helpful if you want to sync leads with a CRM, Google Sheets, or another database.
 ### Step 6: Enable the Action
At the top of the screen, switch from **Disable → Enable** to activate the lead collection action.
### Step 6: Enable the Action
At the top of the screen, switch from **Disable → Enable** to activate the lead collection action.
 ## Example Workflow
1. Visitor says: **I'd like more info.”**
2. AI Agent triggers the **Collect Leads** form.
3. User enters **Name, Email, and Phone Number**.
4. AI Agent confirms: **“Thanks! A team member will reach out to you shortly.”**
5. (Optional) Data is automatically pushed to your webhook endpoint.
With the **Collect Leads** action, you can turn conversations into valuable contacts, helping you grow your pipeline and engage potential customers more effectively.
## Example Workflow
1. Visitor says: **I'd like more info.”**
2. AI Agent triggers the **Collect Leads** form.
3. User enters **Name, Email, and Phone Number**.
4. AI Agent confirms: **“Thanks! A team member will reach out to you shortly.”**
5. (Optional) Data is automatically pushed to your webhook endpoint.
With the **Collect Leads** action, you can turn conversations into valuable contacts, helping you grow your pipeline and engage potential customers more effectively.