> ## Documentation Index
> Fetch the complete documentation index at: https://docs.chatnode.ai/docs/llms.txt
> Use this file to discover all available pages before exploring further.
# Notify
## Overview
The **Slack Notify** action allows your AI Agent to send automated messages directly to your Slack workspace. This is especially useful for **notifications, alerts, and updates** that need to be shared with your team in real time.
**Example**: Send a notification to a Slack channel whenever a new lead is collected or a customer requests support.
## How to Create a Notify
### Step 1: Create a Slack Notify Action
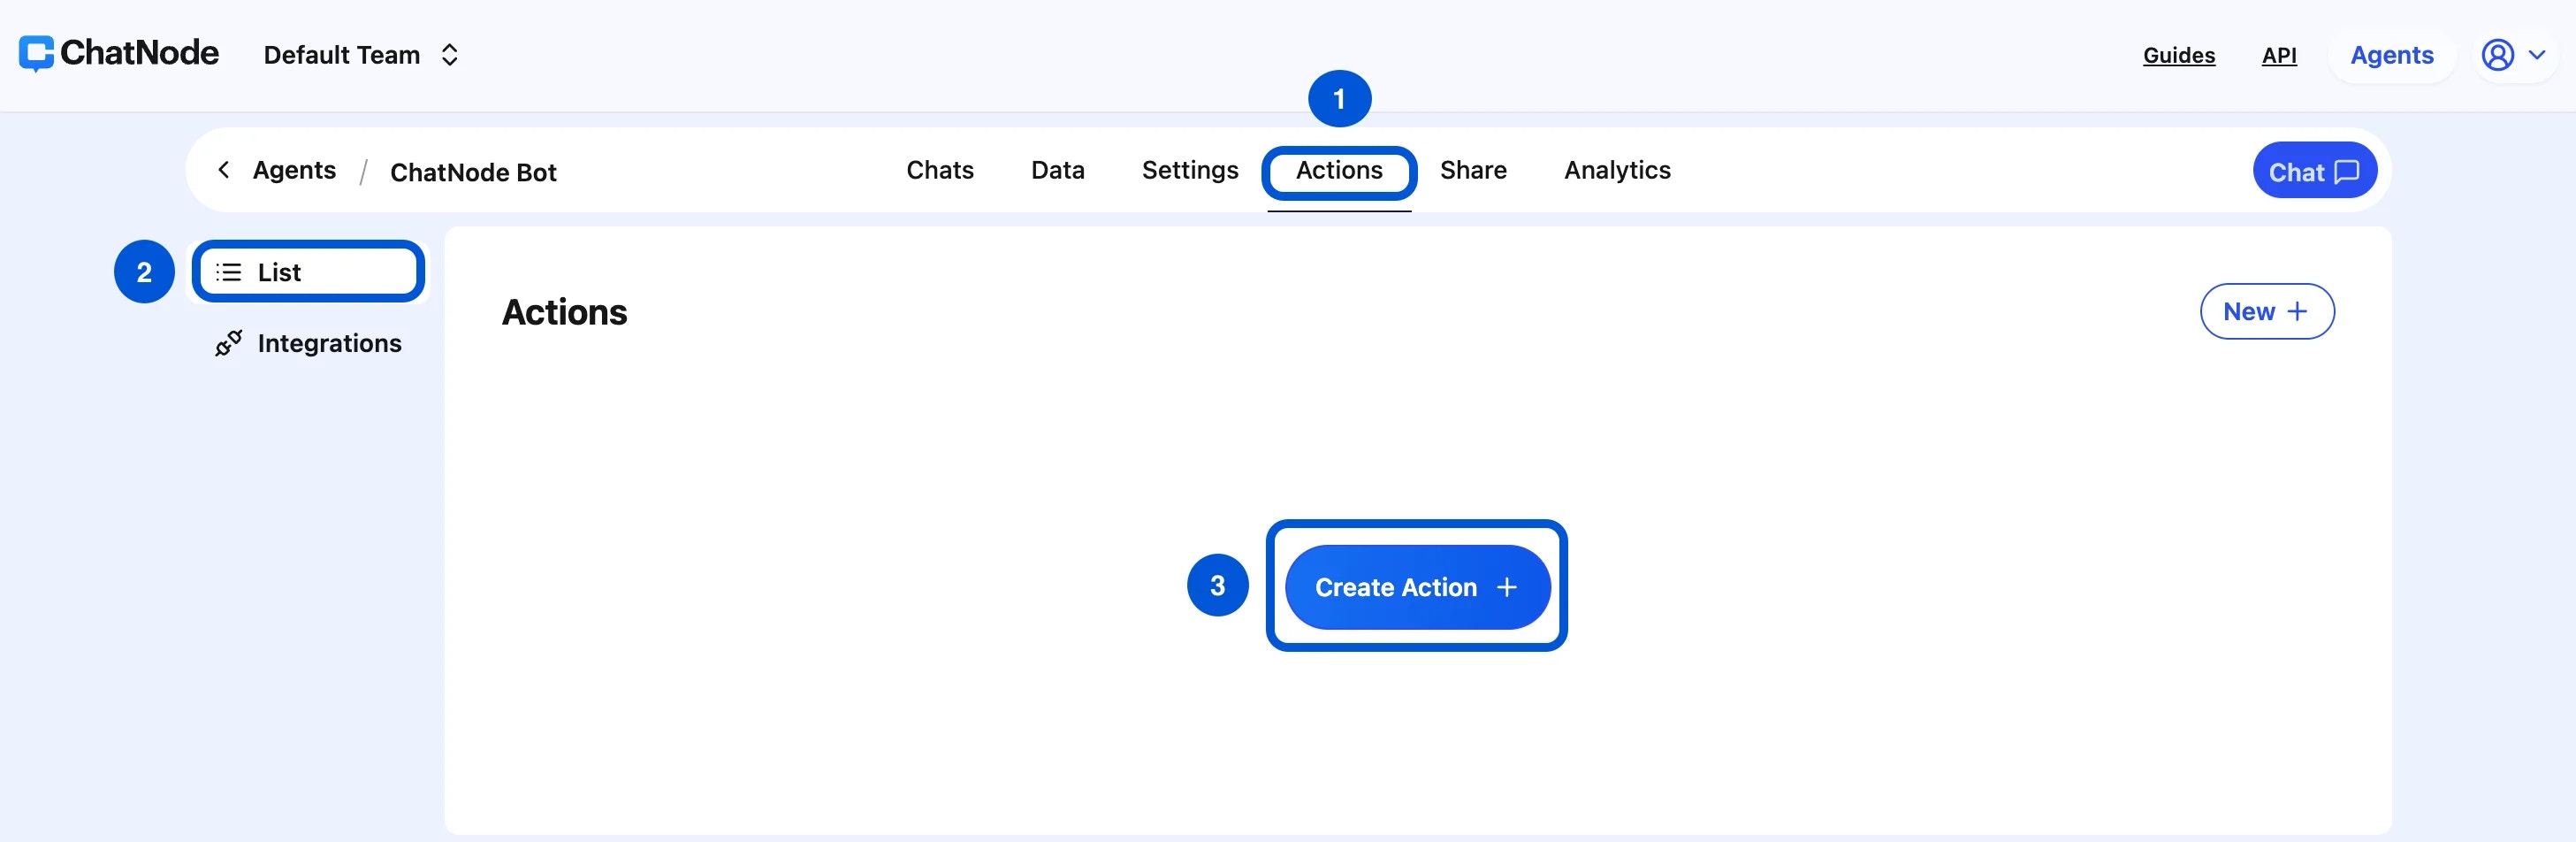
1. Go to the **Actions** tab.
2. Click **List** from the left-hand menu.
3. Select **Create Action**.
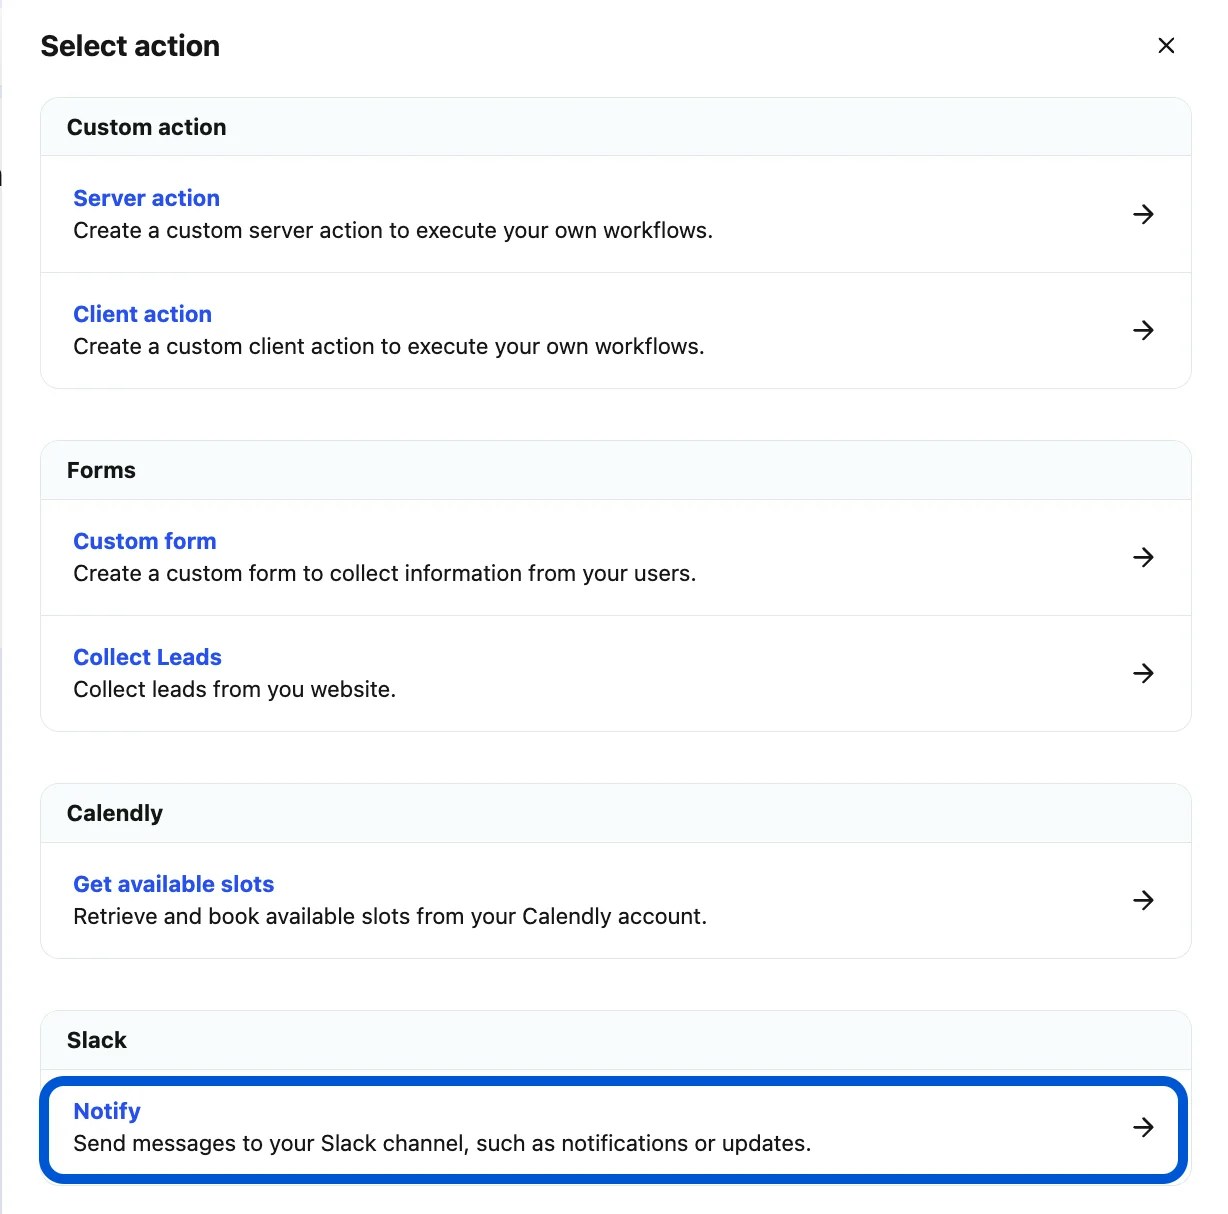
 4. Under **Slack**, choose **Notify**.
 5. Enter an **Action Title** in the pop-up window (e.g., Slack notify) and click **Create**.
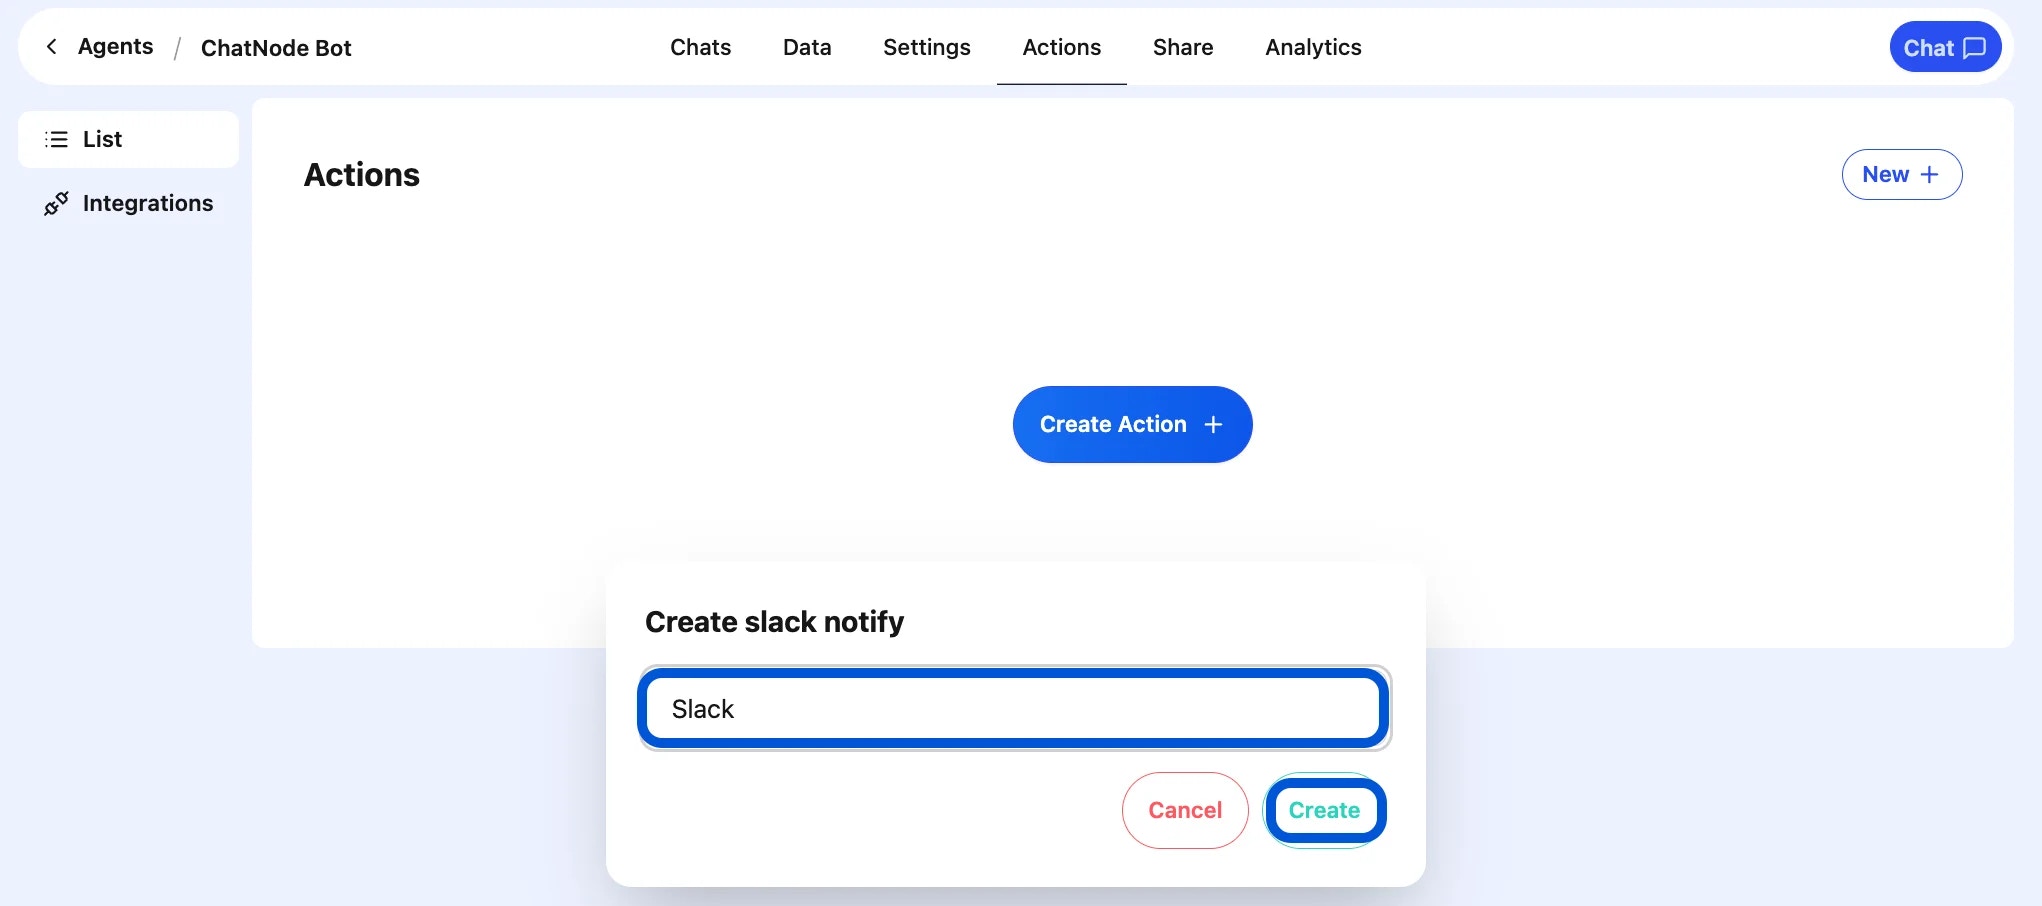 6. You'll now see the configuration screen for Slack notifications.
### Step 2: Basic Settings
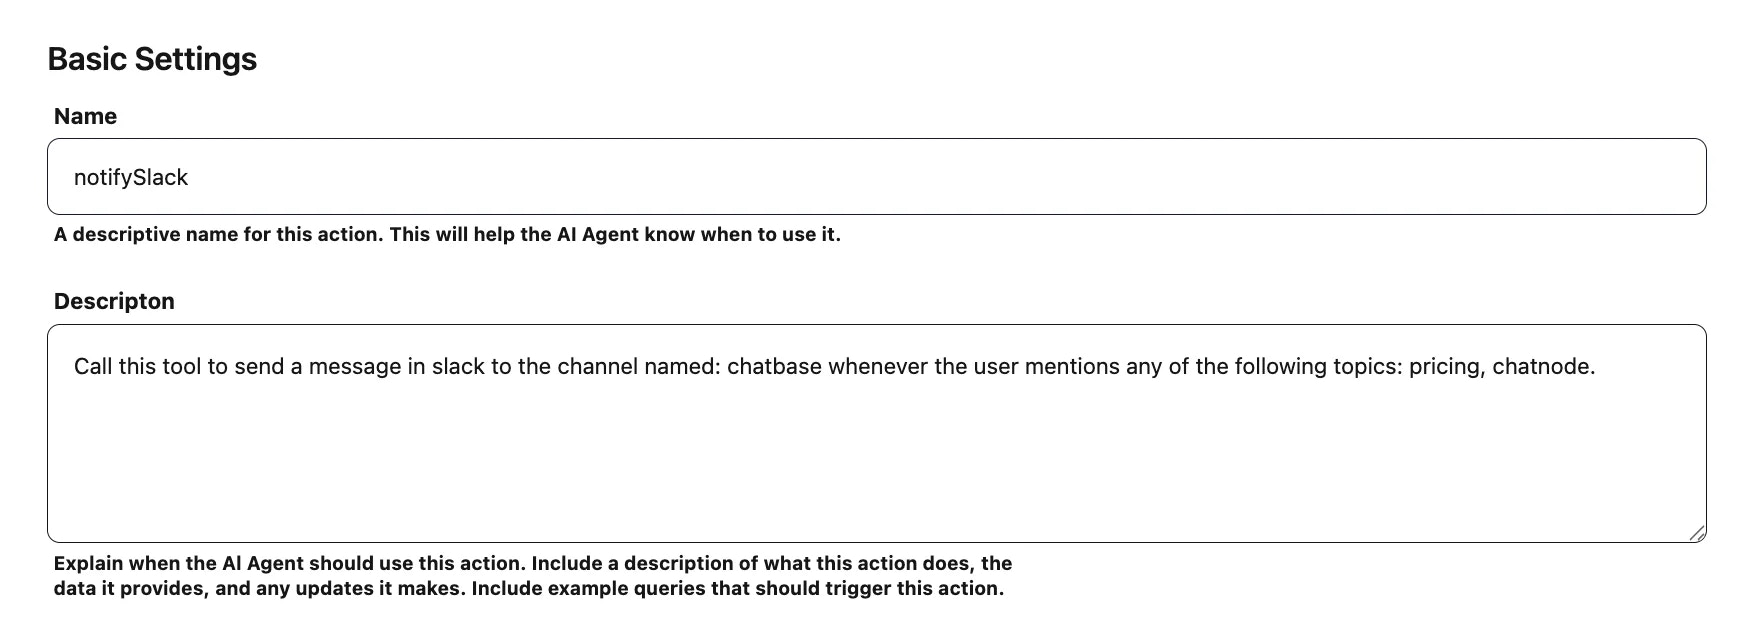
* **Name** → Enter a descriptive name.
* Example: newLeadSlack
* **Description** → Provide details about when the AI Agent should use this action.
* Example: Send a message to the sales Slack channel when a new lead is collected.
This ensures the action is triggered under the right conditions.
6. You'll now see the configuration screen for Slack notifications.
### Step 2: Basic Settings
* **Name** → Enter a descriptive name.
* Example: newLeadSlack
* **Description** → Provide details about when the AI Agent should use this action.
* Example: Send a message to the sales Slack channel when a new lead is collected.
This ensures the action is triggered under the right conditions.
 ### Step 3: Configure the Notification
Once Slack is connected, you can configure the notification content and define:
* Which **Slack channel** the message will go to.
* What **message content** should be sent (e.g., text updates, lead details, support ticket alerts).
### Step 4: Enable the Action
At the top of the configuration screen, toggle from **Disable → Enable** to activate Slack notifications.
### Step 3: Configure the Notification
Once Slack is connected, you can configure the notification content and define:
* Which **Slack channel** the message will go to.
* What **message content** should be sent (e.g., text updates, lead details, support ticket alerts).
### Step 4: Enable the Action
At the top of the configuration screen, toggle from **Disable → Enable** to activate Slack notifications.
 ## Example Workflow
1. A visitor submits a **lead form**.
2. AI Agent collects the information.
3. Slack Notify action is triggered.
4. A message is sent to the **#sales** channel:
**“New Lead Captured — Name: John Doe, Email: [john@example.com](mailto:john@example.com).”**
With the **Slack Notify** action, your AI Agent can automatically keep your team updated, ensuring important events are communicated in real time.
## Example Workflow
1. A visitor submits a **lead form**.
2. AI Agent collects the information.
3. Slack Notify action is triggered.
4. A message is sent to the **#sales** channel:
**“New Lead Captured — Name: John Doe, Email: [john@example.com](mailto:john@example.com).”**
With the **Slack Notify** action, your AI Agent can automatically keep your team updated, ensuring important events are communicated in real time.