> ## Documentation Index
> Fetch the complete documentation index at: https://docs.chatnode.ai/docs/llms.txt
> Use this file to discover all available pages before exploring further.
# Teams
> Creating Teams and Managing Users
Managing your team and users efficiently is crucial for seamless operations. ChatNode provides an intuitive interface for creating teams and managing user roles. This guide will walk you through the steps to set up and manage your team effectively.
### Step 1: Accessing the Team Management Interface
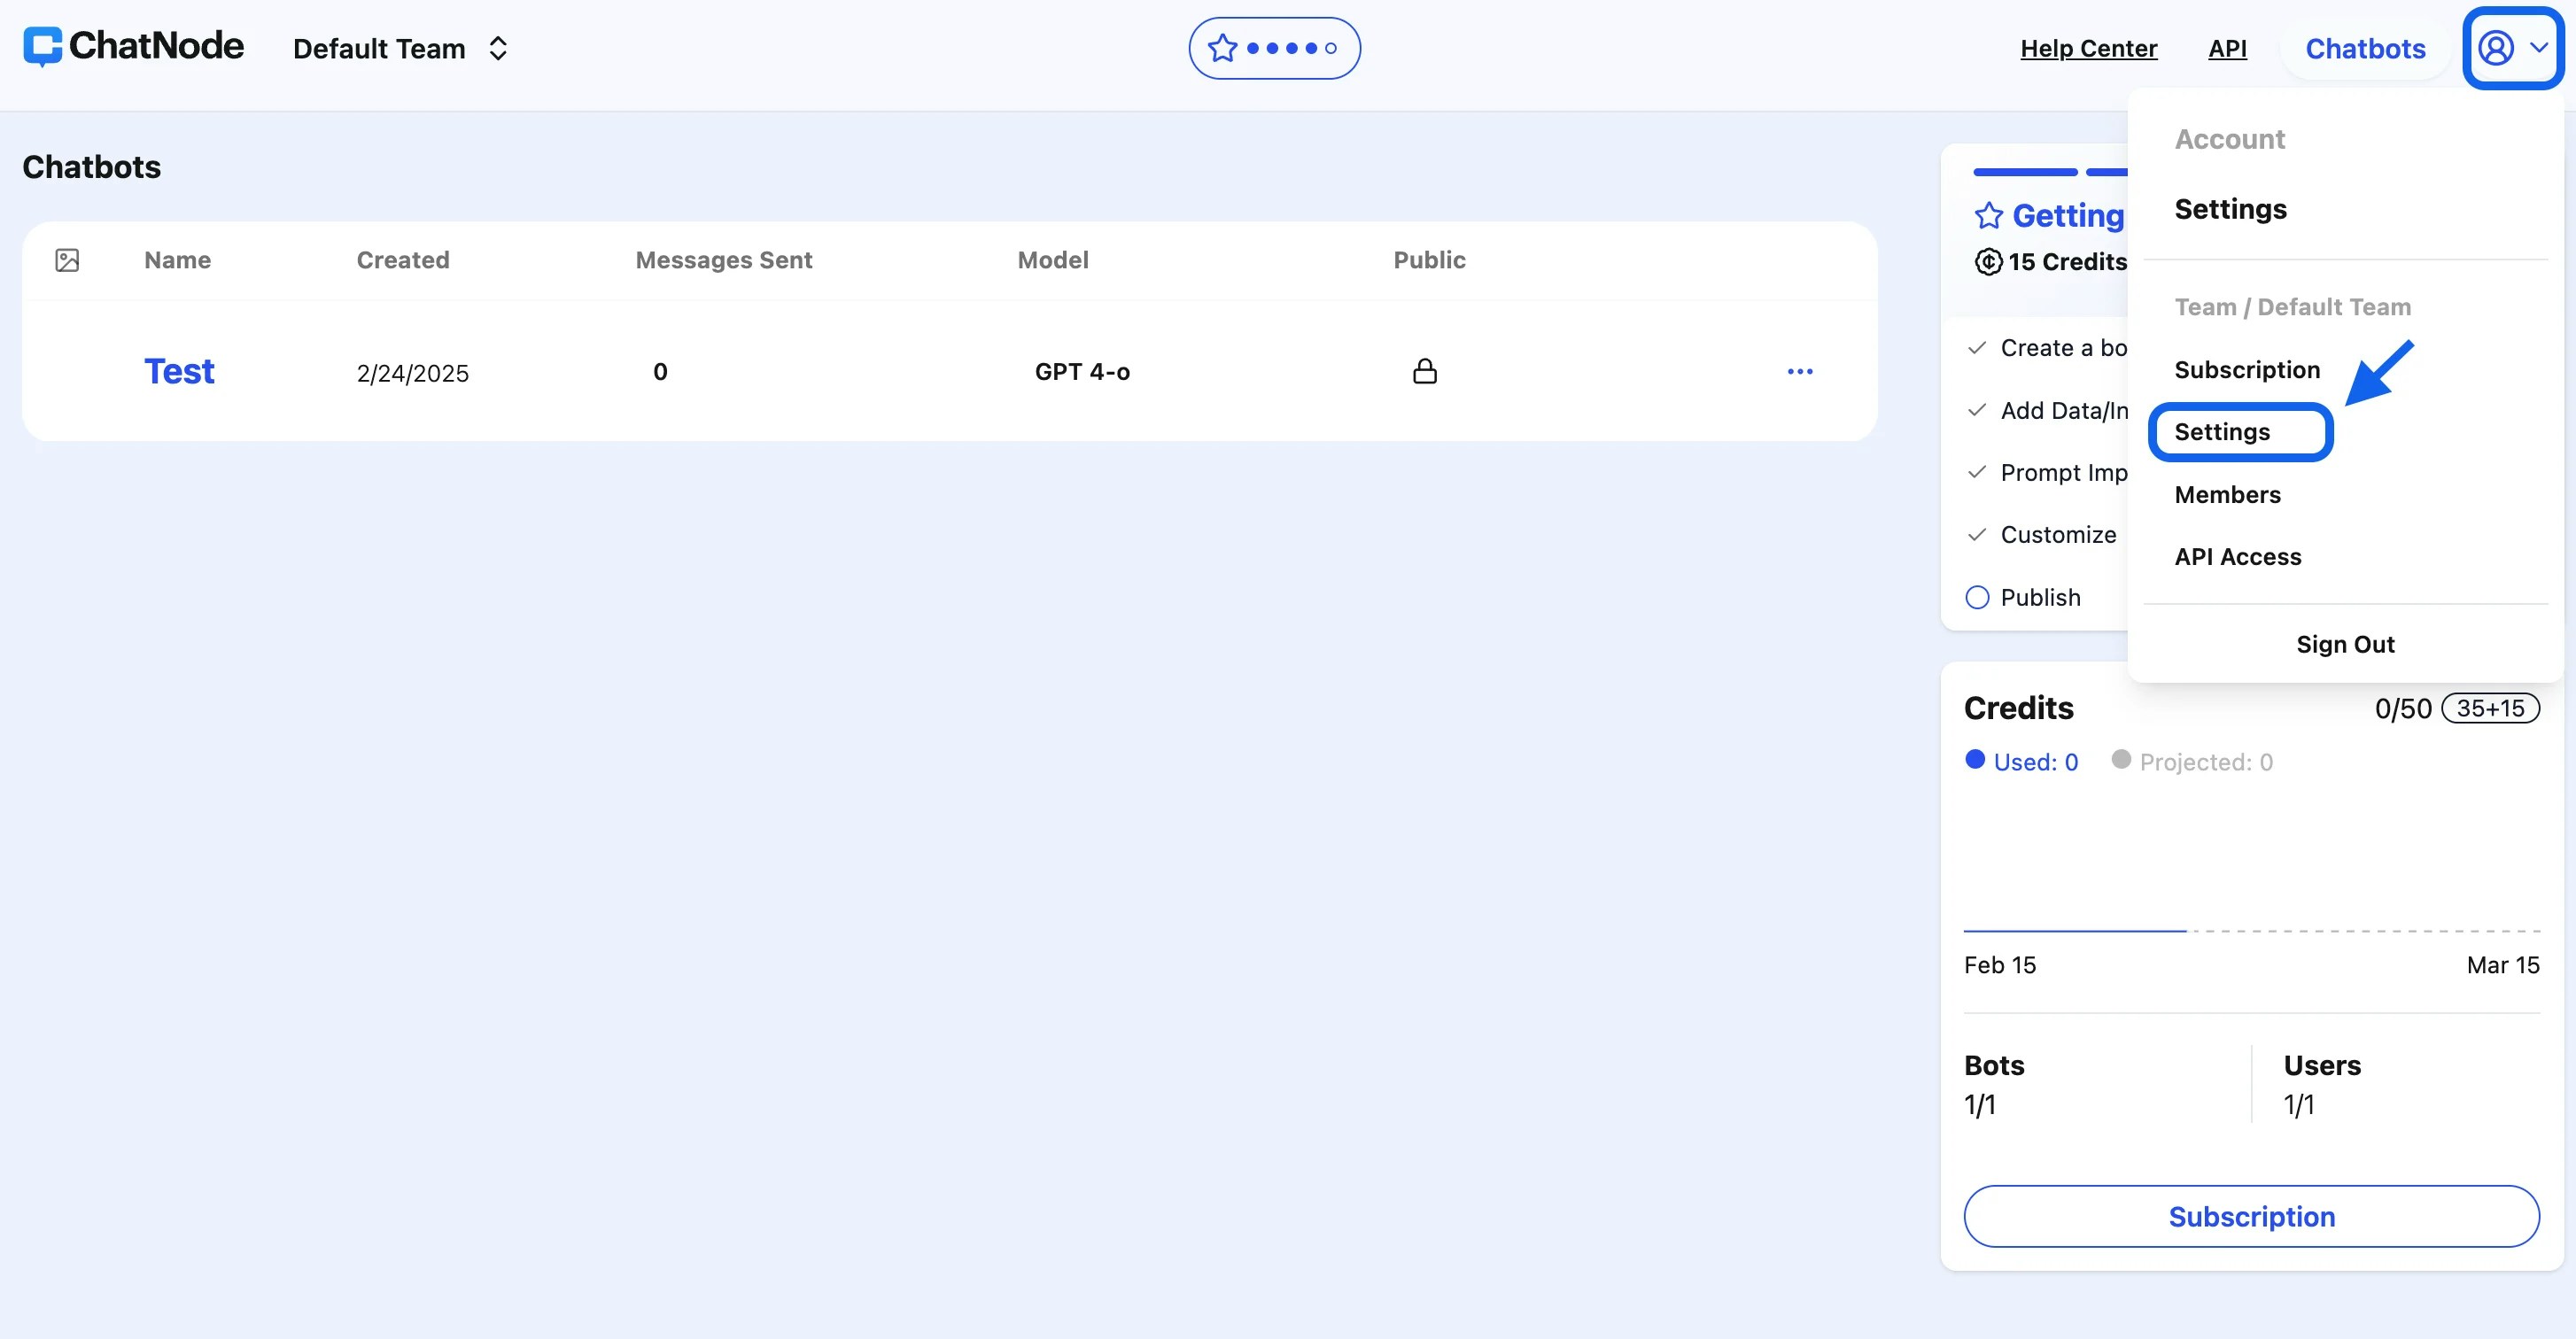
1. **Login to ChatNode**: Start by logging into your ChatNode account.
2. Click on your **profile icon** in the top right corner.
3. Select **Settings** from the dropdown menu.
4. Choose **Manage**.
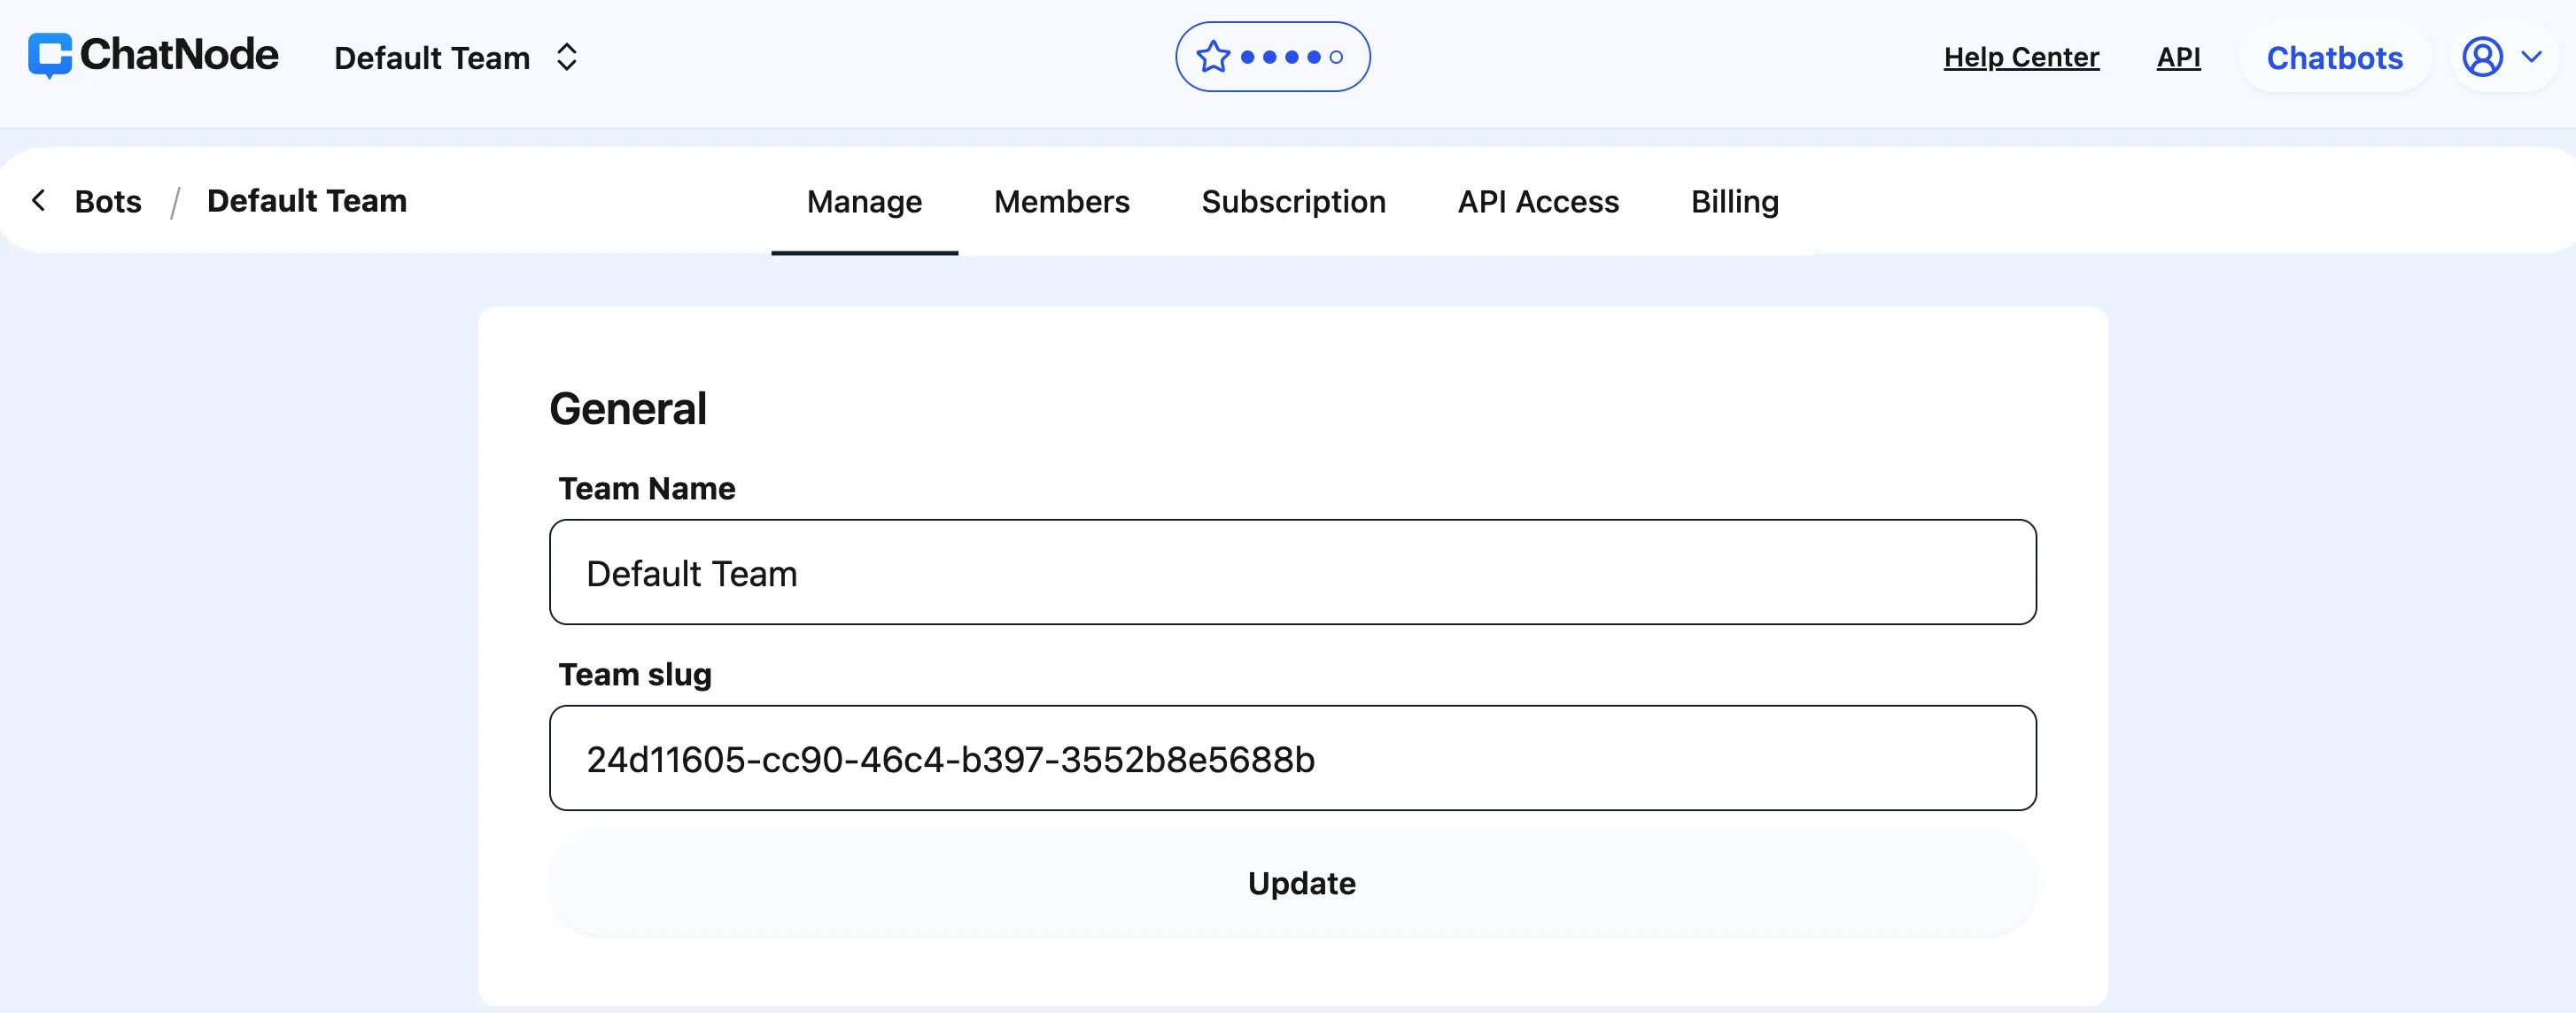
 ### Step 2: Managing Team Information
In the **Manage** tab:
1. **Team Name**: You can view and edit your team's name. Simply enter the new name and click **Update** to save changes.
2. **Team Slug**: This is a unique identifier for your team. It's auto-generated and typically used for internal referencing.
### Step 2: Managing Team Information
In the **Manage** tab:
1. **Team Name**: You can view and edit your team's name. Simply enter the new name and click **Update** to save changes.
2. **Team Slug**: This is a unique identifier for your team. It's auto-generated and typically used for internal referencing.
 ### Step 3: Deleting a Team
If you need to delete a team, you'll need to email support to request it.
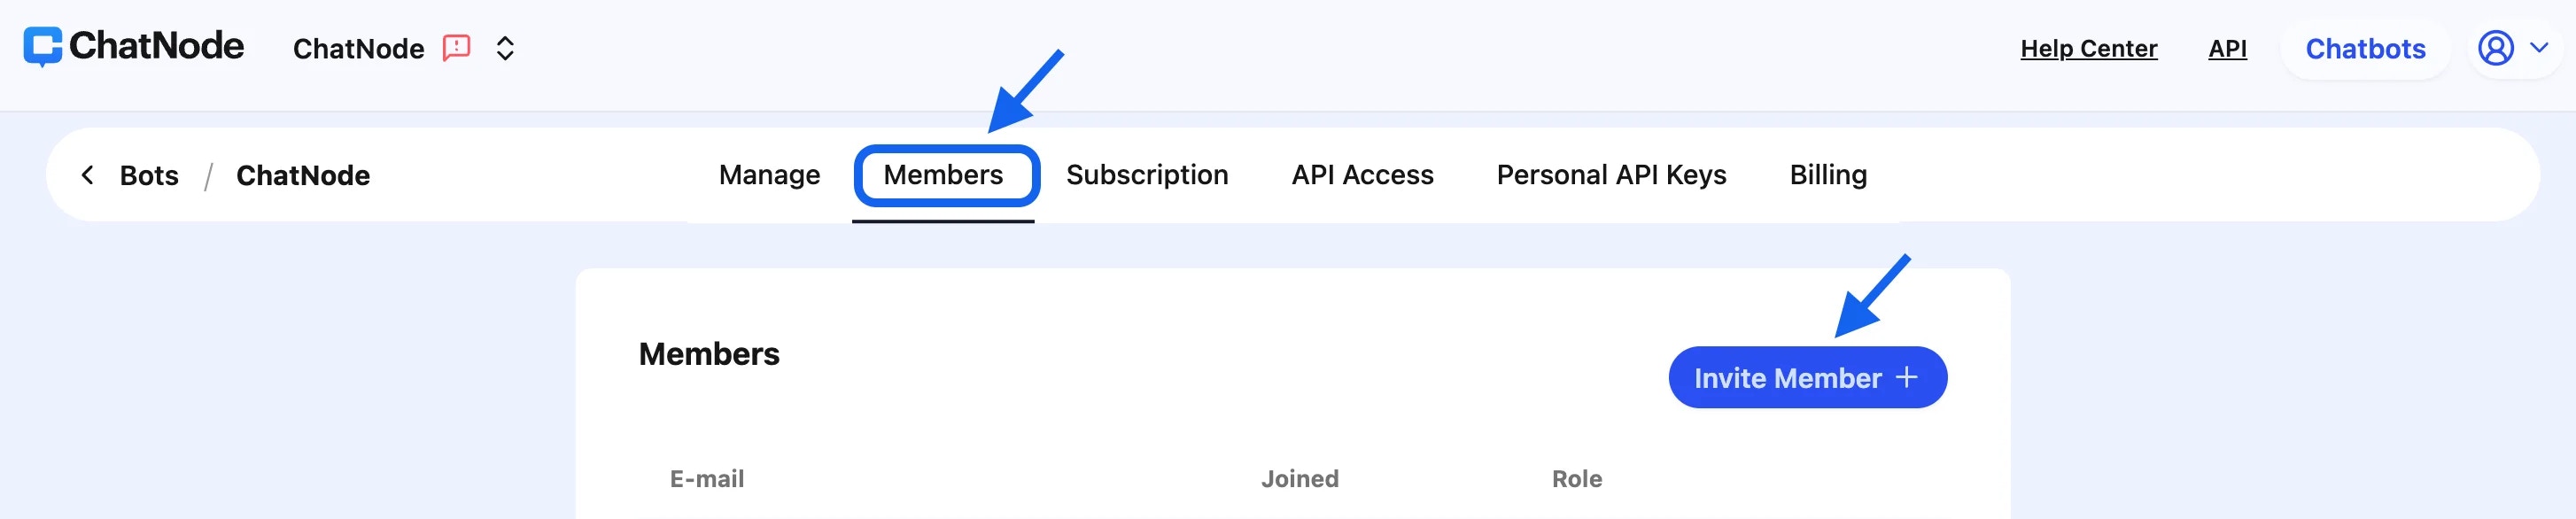
### Step 4: Managing Team Members
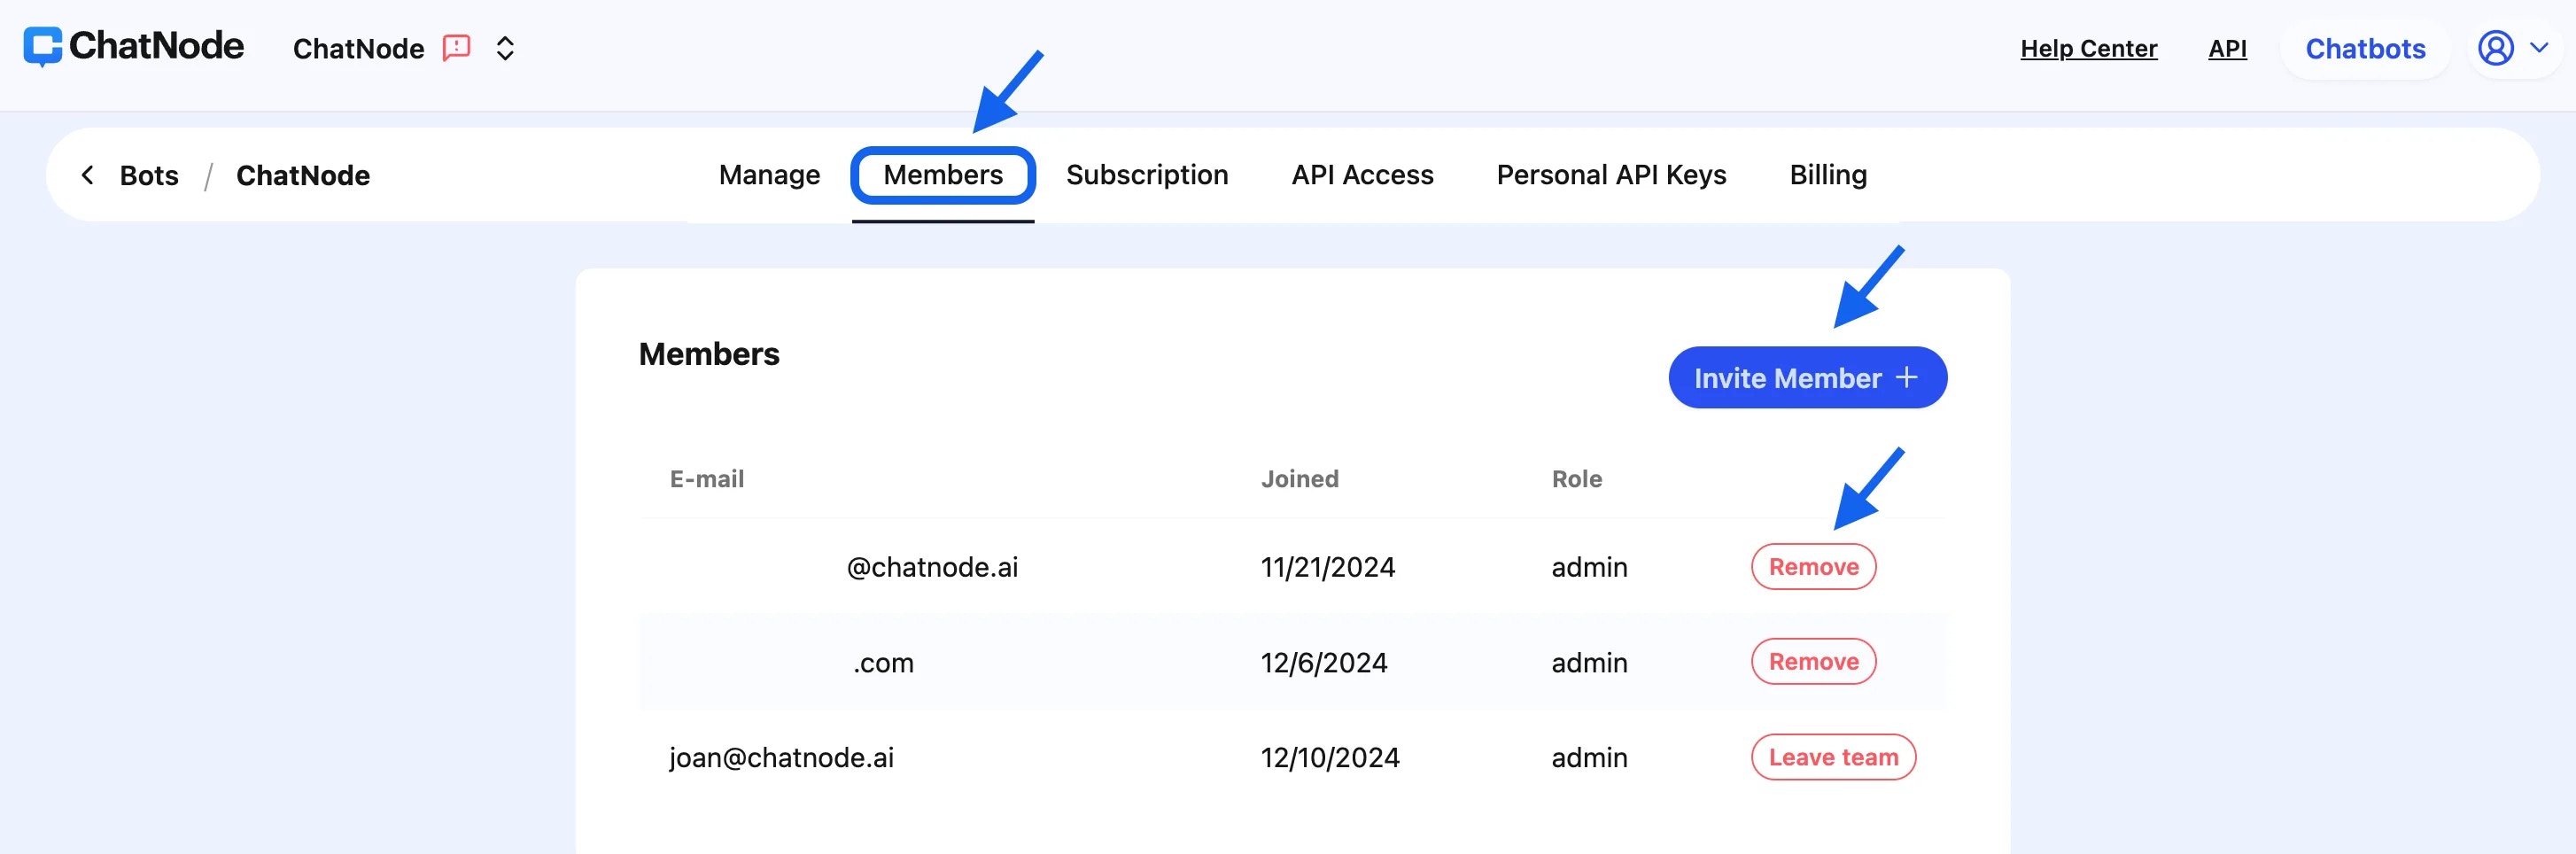
1. **Navigate to the Members Tab**: In the top menu, switch to the **Members** tab.
2. **Invite Members**:
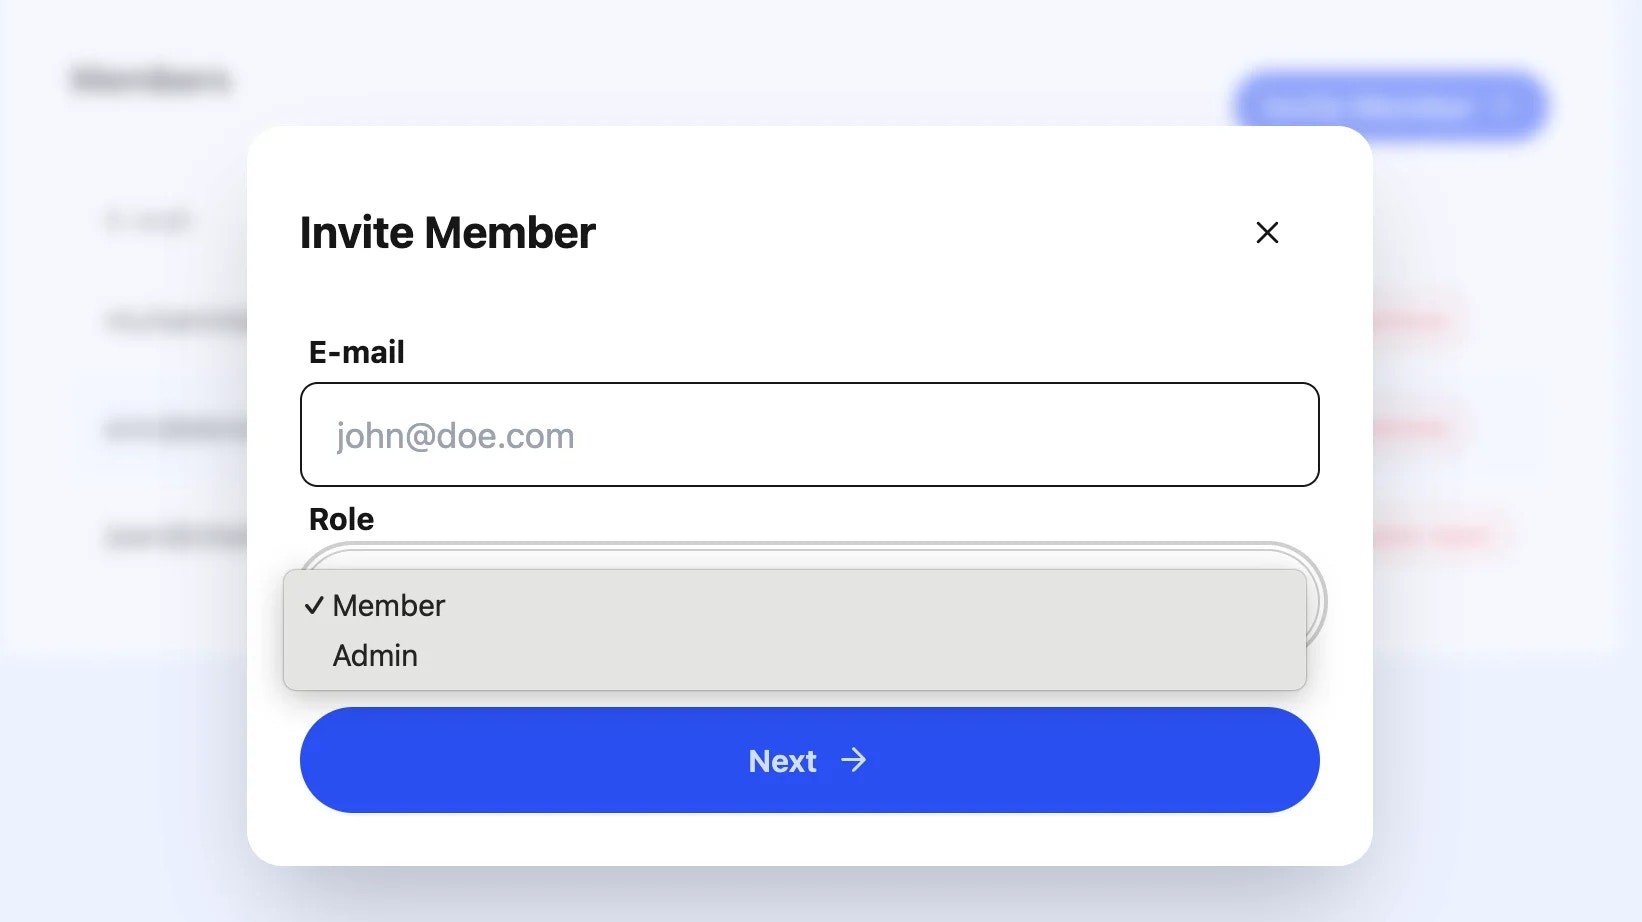
* Click the **Invite Member** button.
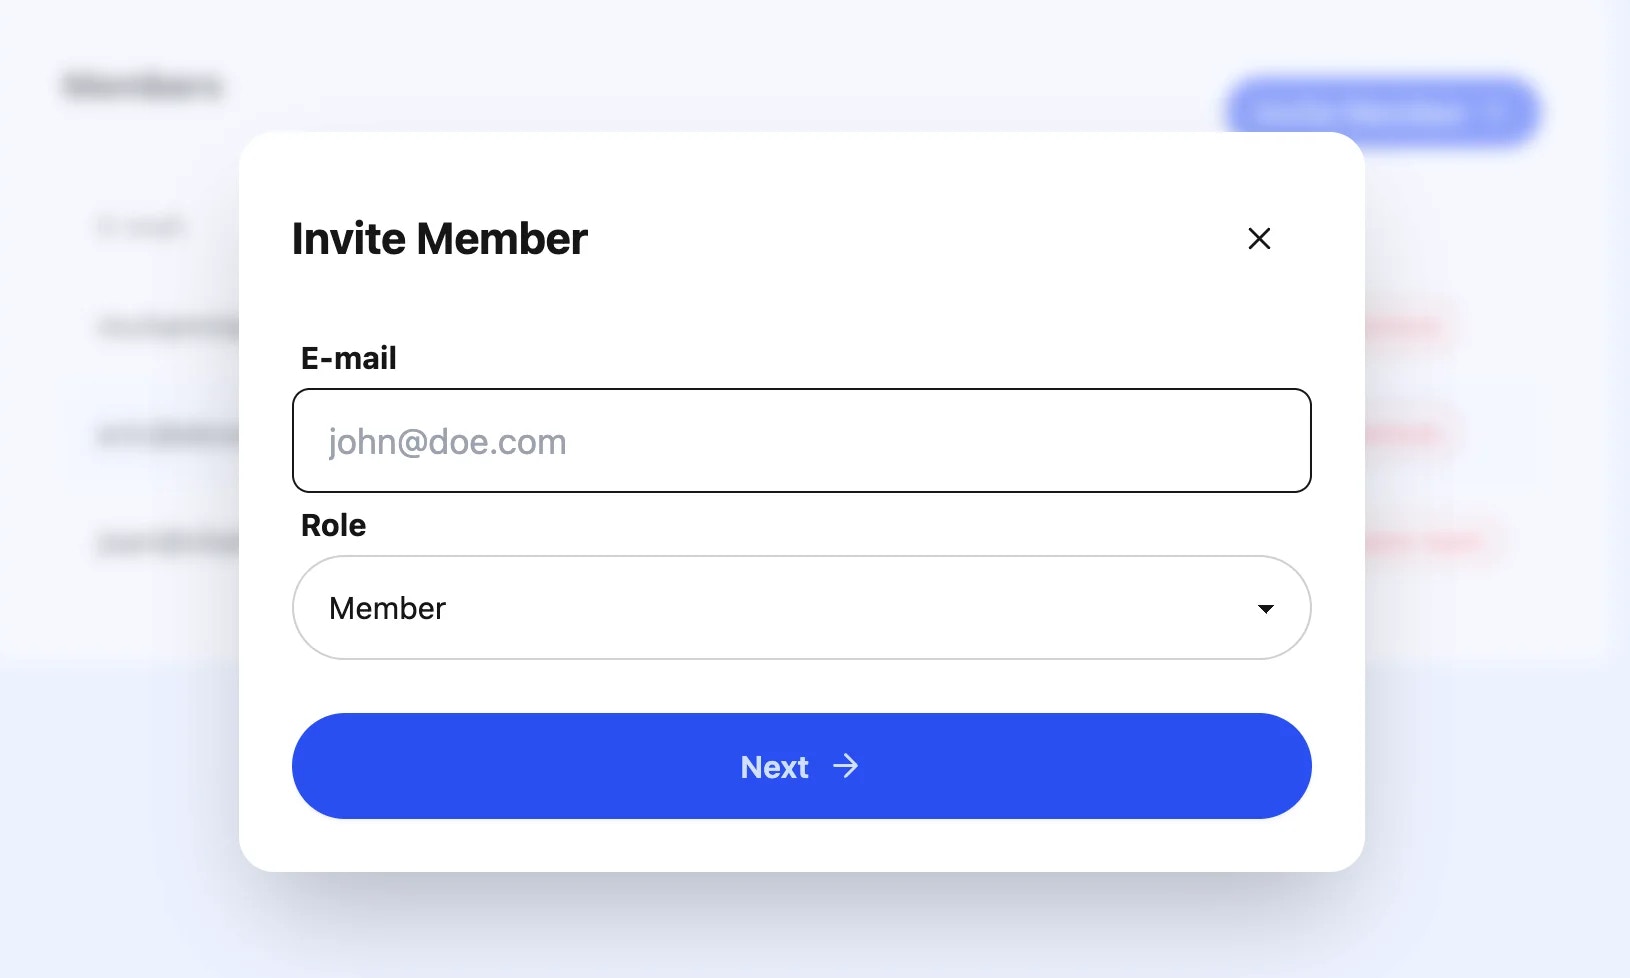
* In the **Invite Member** pop-up:
* Enter the email address of the person you wish to invite in the **E-mail** field.
* Select the appropriate role (e.g., Member or Admin) from the **Role** dropdown.
* Click **Next** to proceed with the invitation
### Step 3: Deleting a Team
If you need to delete a team, you'll need to email support to request it.
### Step 4: Managing Team Members
1. **Navigate to the Members Tab**: In the top menu, switch to the **Members** tab.
2. **Invite Members**:
* Click the **Invite Member** button.
* In the **Invite Member** pop-up:
* Enter the email address of the person you wish to invite in the **E-mail** field.
* Select the appropriate role (e.g., Member or Admin) from the **Role** dropdown.
* Click **Next** to proceed with the invitation
 3. **View Members**: You can see the list of current team members, their roles, and the date they joined.
4. **Remove Members**:
* Under the **Members** tab, as an Admin, you have the option to remove a member from the team. Simply select the member you wish to remove and follow the prompts.
5. **Leave Team**: If you wish to leave the team, use the **Leave team** button next to your role.
3. **View Members**: You can see the list of current team members, their roles, and the date they joined.
4. **Remove Members**:
* Under the **Members** tab, as an Admin, you have the option to remove a member from the team. Simply select the member you wish to remove and follow the prompts.
5. **Leave Team**: If you wish to leave the team, use the **Leave team** button next to your role.
 ### Step 5: Understanding Roles
* **Admin**: Has full access to all team settings and can manage other members.
* **Member**: Has access to all agents and features, except for subscription, team management, and billing.
### Step 5: Understanding Roles
* **Admin**: Has full access to all team settings and can manage other members.
* **Member**: Has access to all agents and features, except for subscription, team management, and billing.
 ### Step 6: Additional Settings
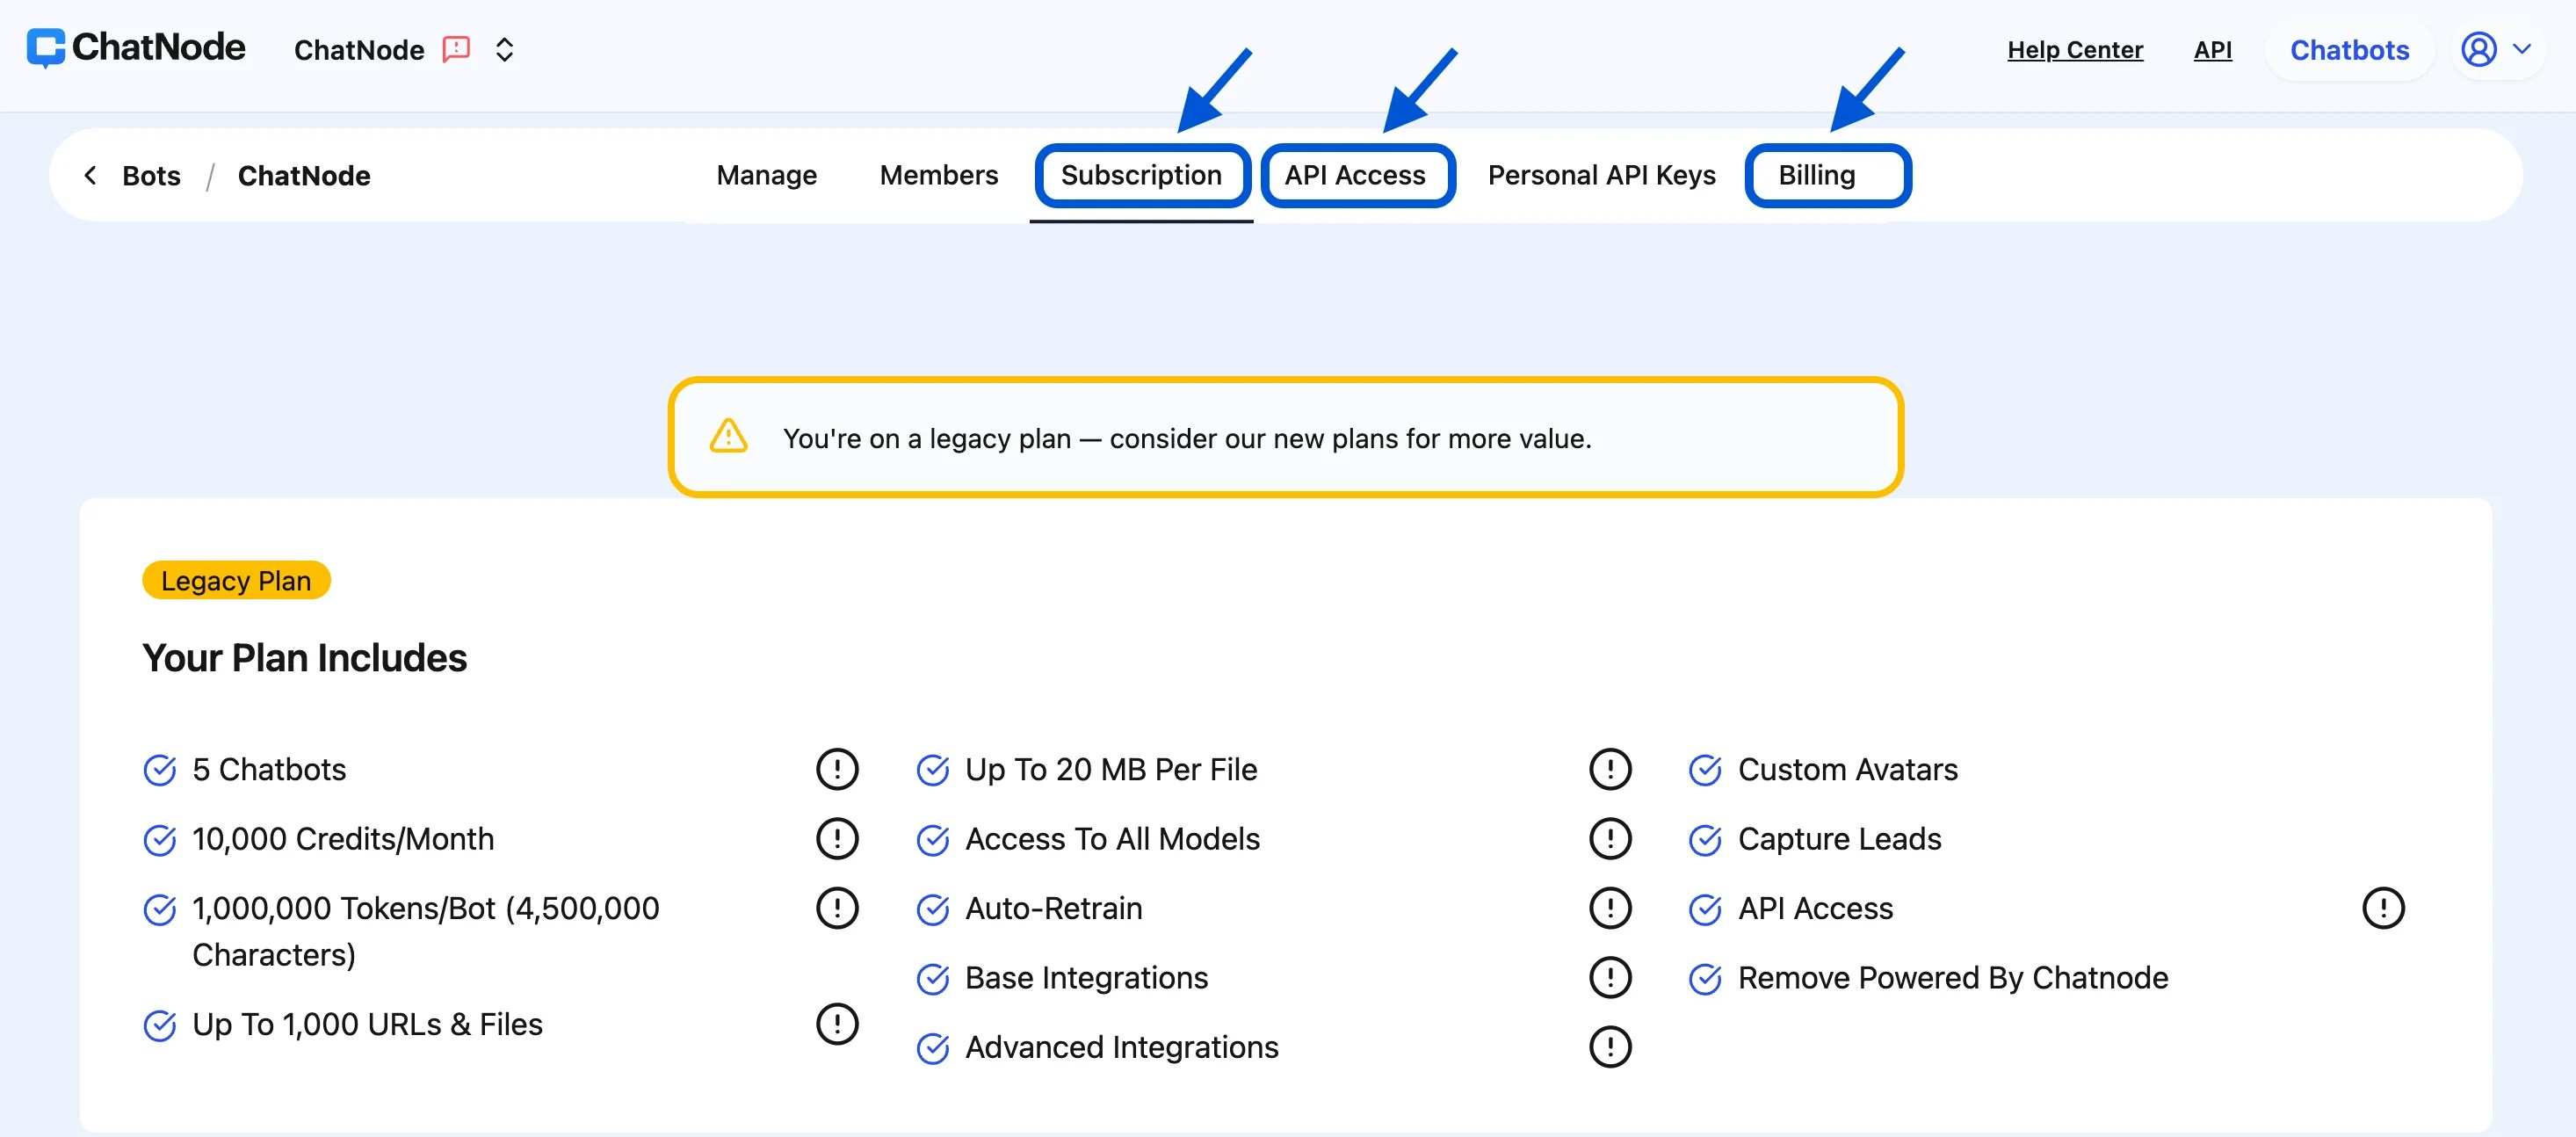
1. **Subscription**: Manage your team's subscription details.
* **Add-Ons**: Click **Subscription** if you would like to add extra team members or explore more add-on options.
2. **API Access**: Configure API settings for integration purposes.
3. **Billing**: View and update billing information.
### Step 6: Additional Settings
1. **Subscription**: Manage your team's subscription details.
* **Add-Ons**: Click **Subscription** if you would like to add extra team members or explore more add-on options.
2. **API Access**: Configure API settings for integration purposes.
3. **Billing**: View and update billing information.
 ### Best Practices
* **Regularly Update Team Information**: Keep your team details up-to-date to avoid confusion.
* **Assign Appropriate Roles**: Ensure team members have the correct permissions to maintain security.
* **Monitor and Manage Member Access**: Periodically review the list of team members and their roles.
This guide should help you navigate the team management features efficiently.
### Best Practices
* **Regularly Update Team Information**: Keep your team details up-to-date to avoid confusion.
* **Assign Appropriate Roles**: Ensure team members have the correct permissions to maintain security.
* **Monitor and Manage Member Access**: Periodically review the list of team members and their roles.
This guide should help you navigate the team management features efficiently.