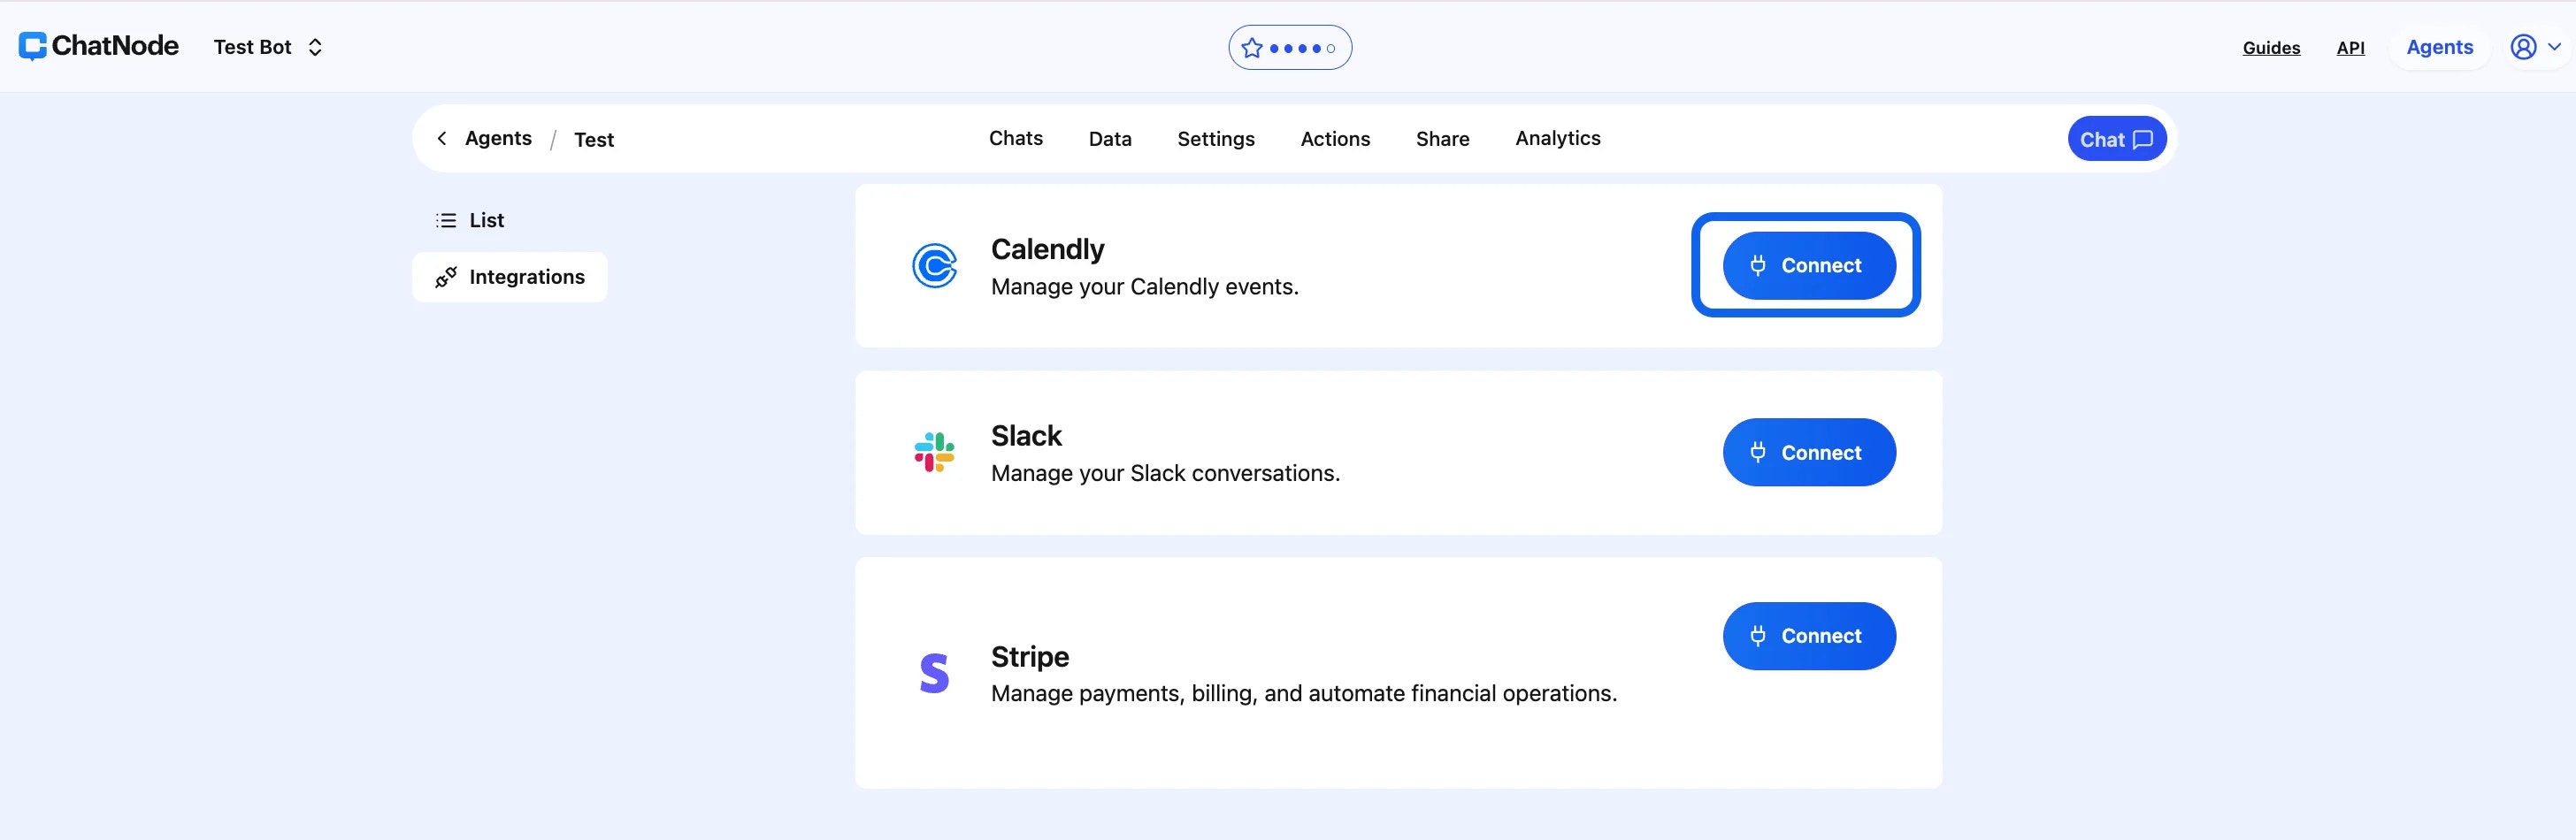
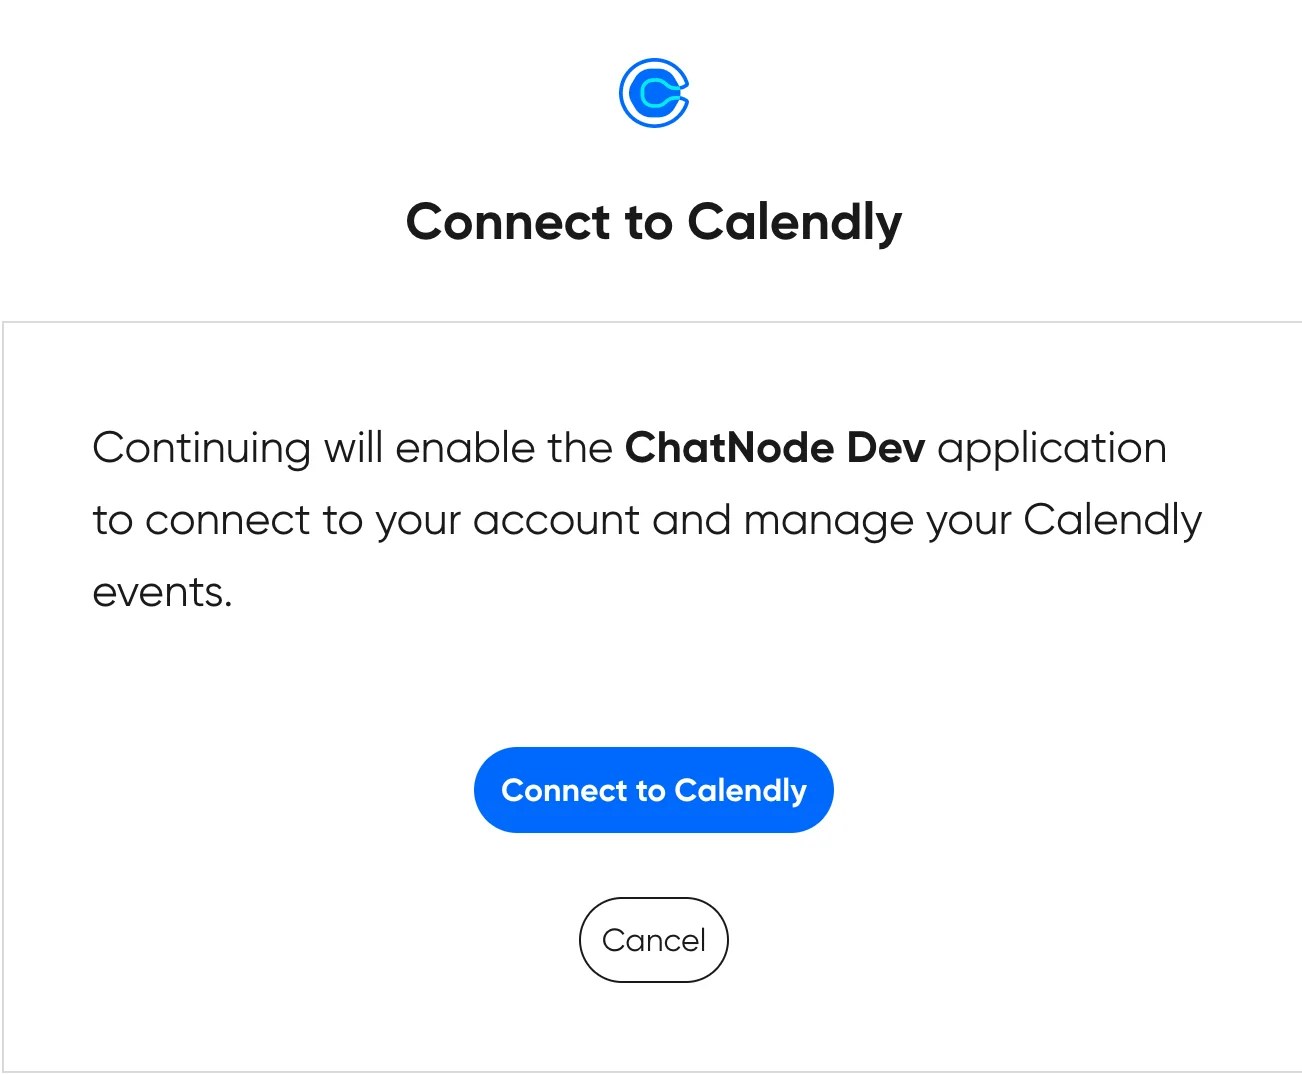
1. Connect Your Account
- Before creating this action, link your Calendly account.
- Once the integration is complete, return to the Actions page to set up your Calendly action.
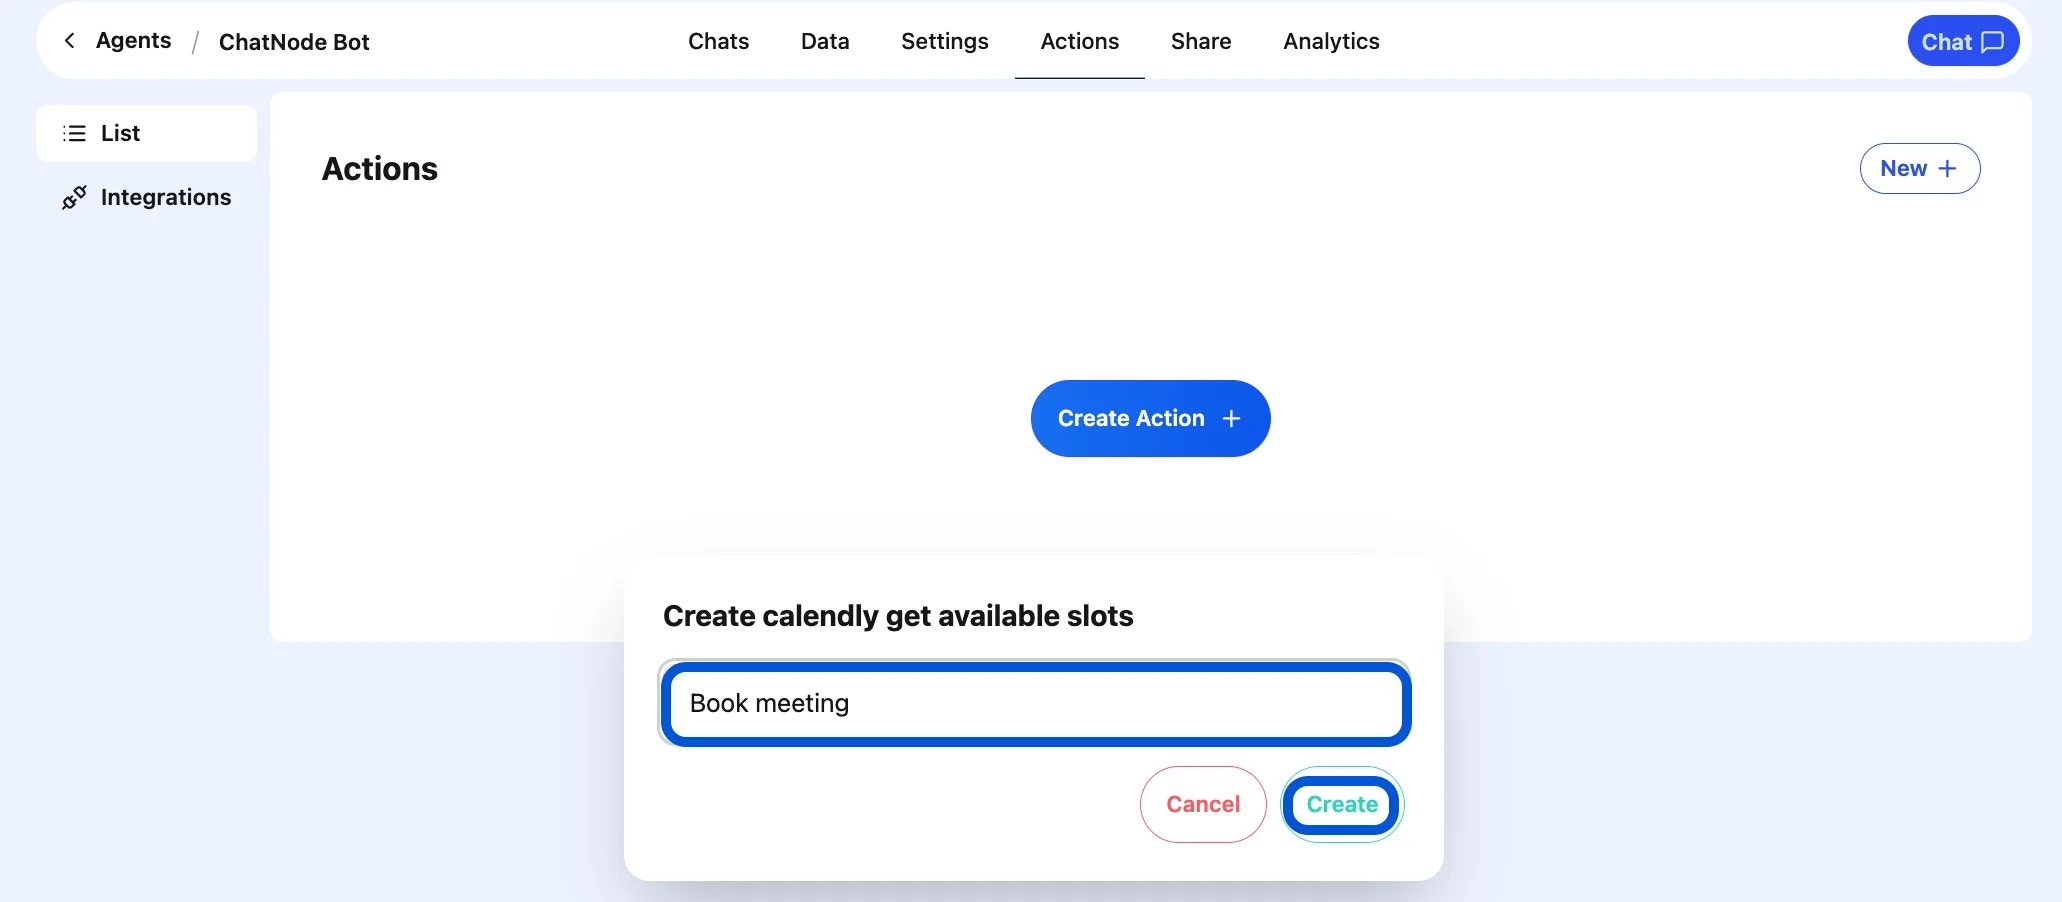
2. Create the Action
- Go to List under the Actions tab.
- Scroll down and click Calendly → Create.
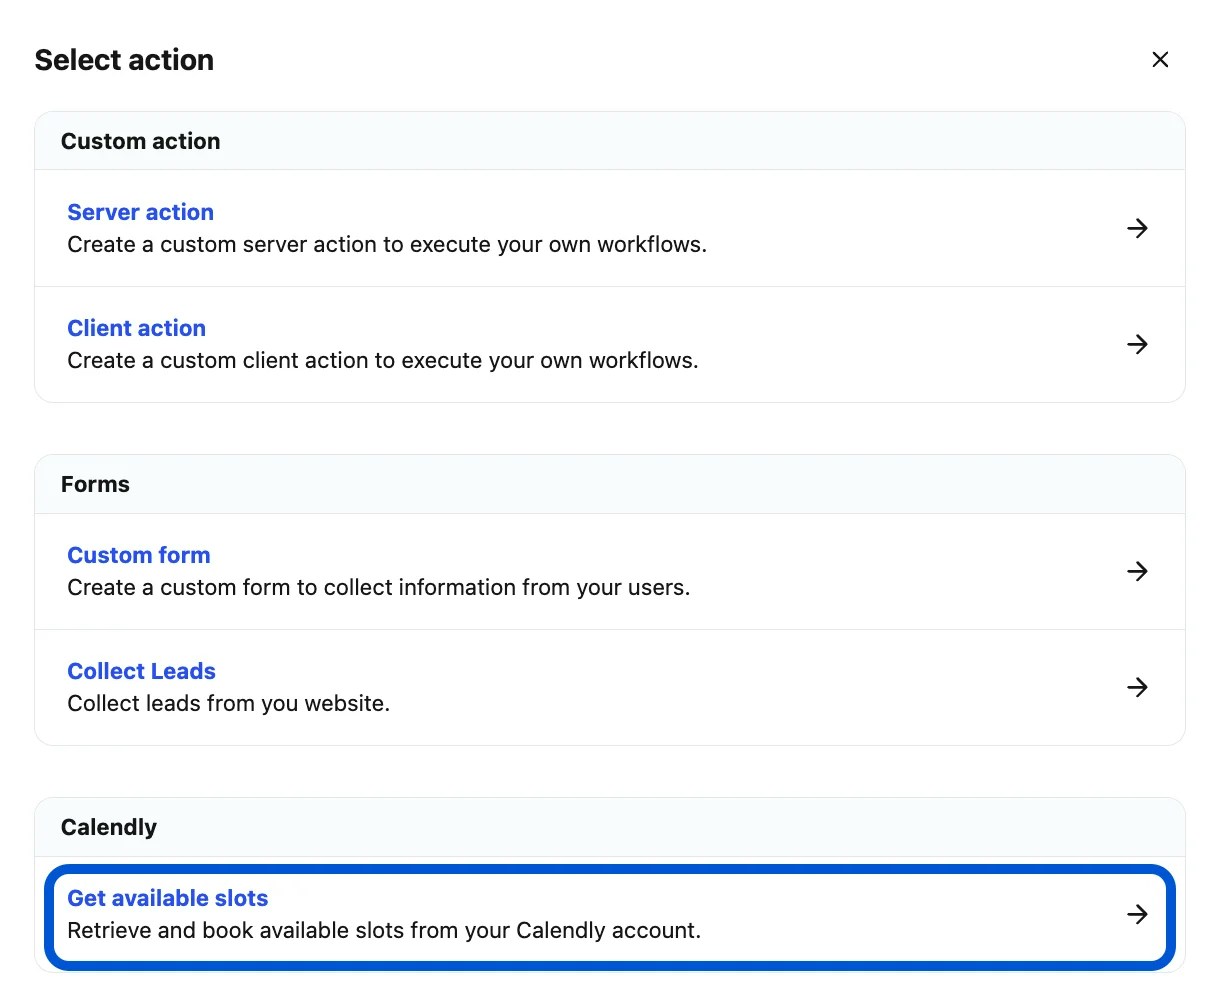
- Enter an Action Title (e.g., Book Meeting).
- Fill out the Basic Settings field.
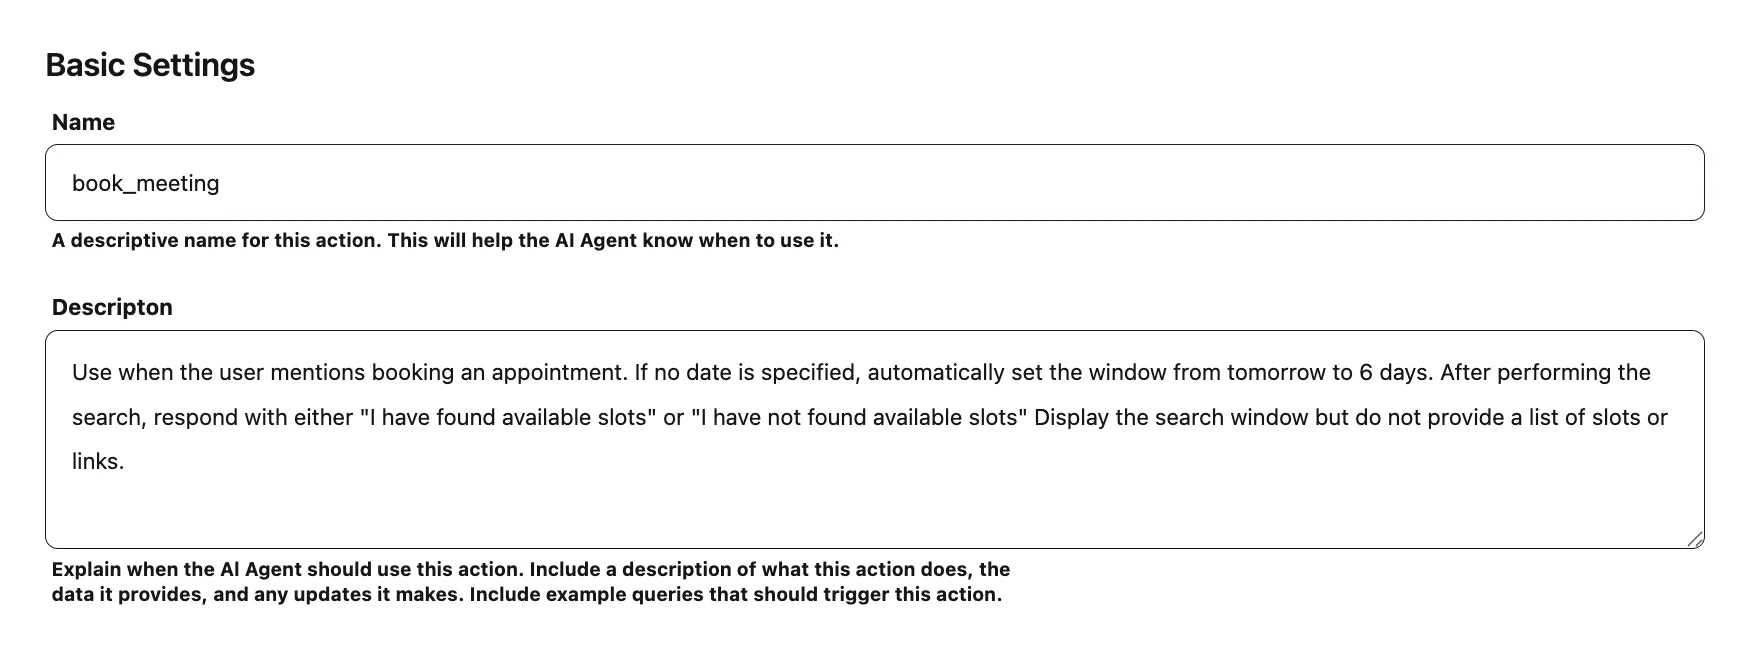
3. Define When to Use It
- Describe the situations or customer requests that should trigger this action.
- Add clear instructions for how the agent should behave when the action is called.
4. Choose an Event
- Select the specific event from which the AI agent should pull available time slots.
- This step is required to proceed.

5. Enable the Action
- Once the action has been created and configured, toggle Enable to activate it.

6. Final Step
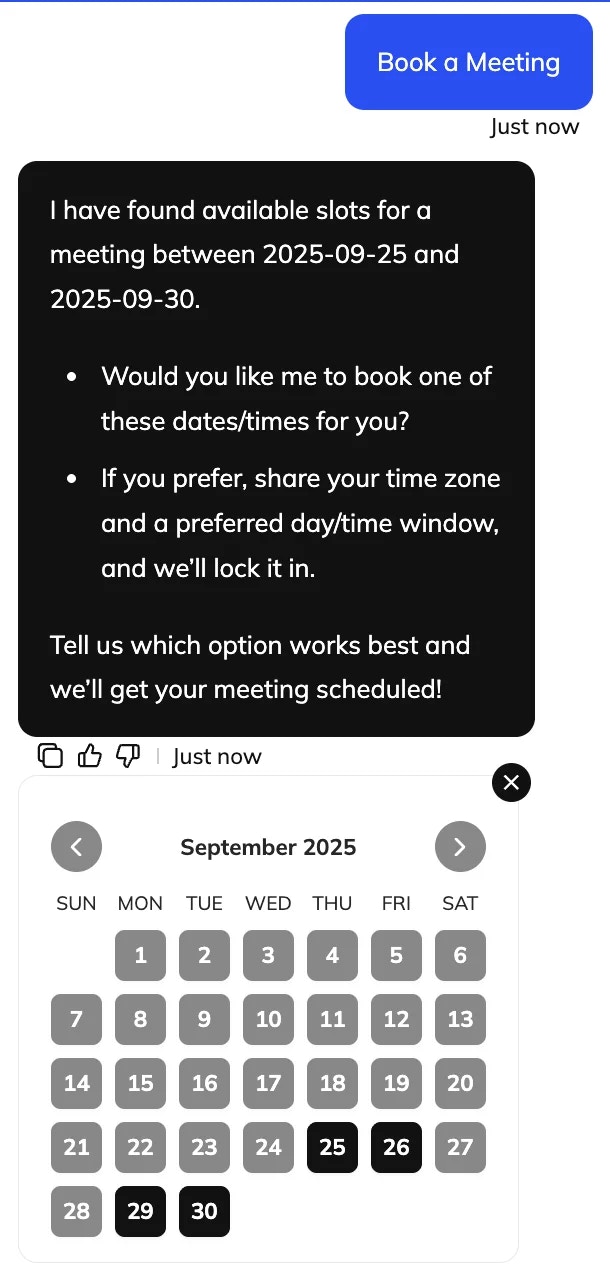
Once enabled, your AI agent will be able to:- Display available slots from Calendly
- Help users book appointments directly in the chat
Examples:
- “Trigger this action when a user says they’d like to book an appointment.”
- The booking window should not exceed 1 week. If a user requests a longer timeframe, keep the same start date but set the end date 1 week later. Let the user know that the maximum booking window is 1 week.”