Steps to Integrate Notion with ChatNode:
-
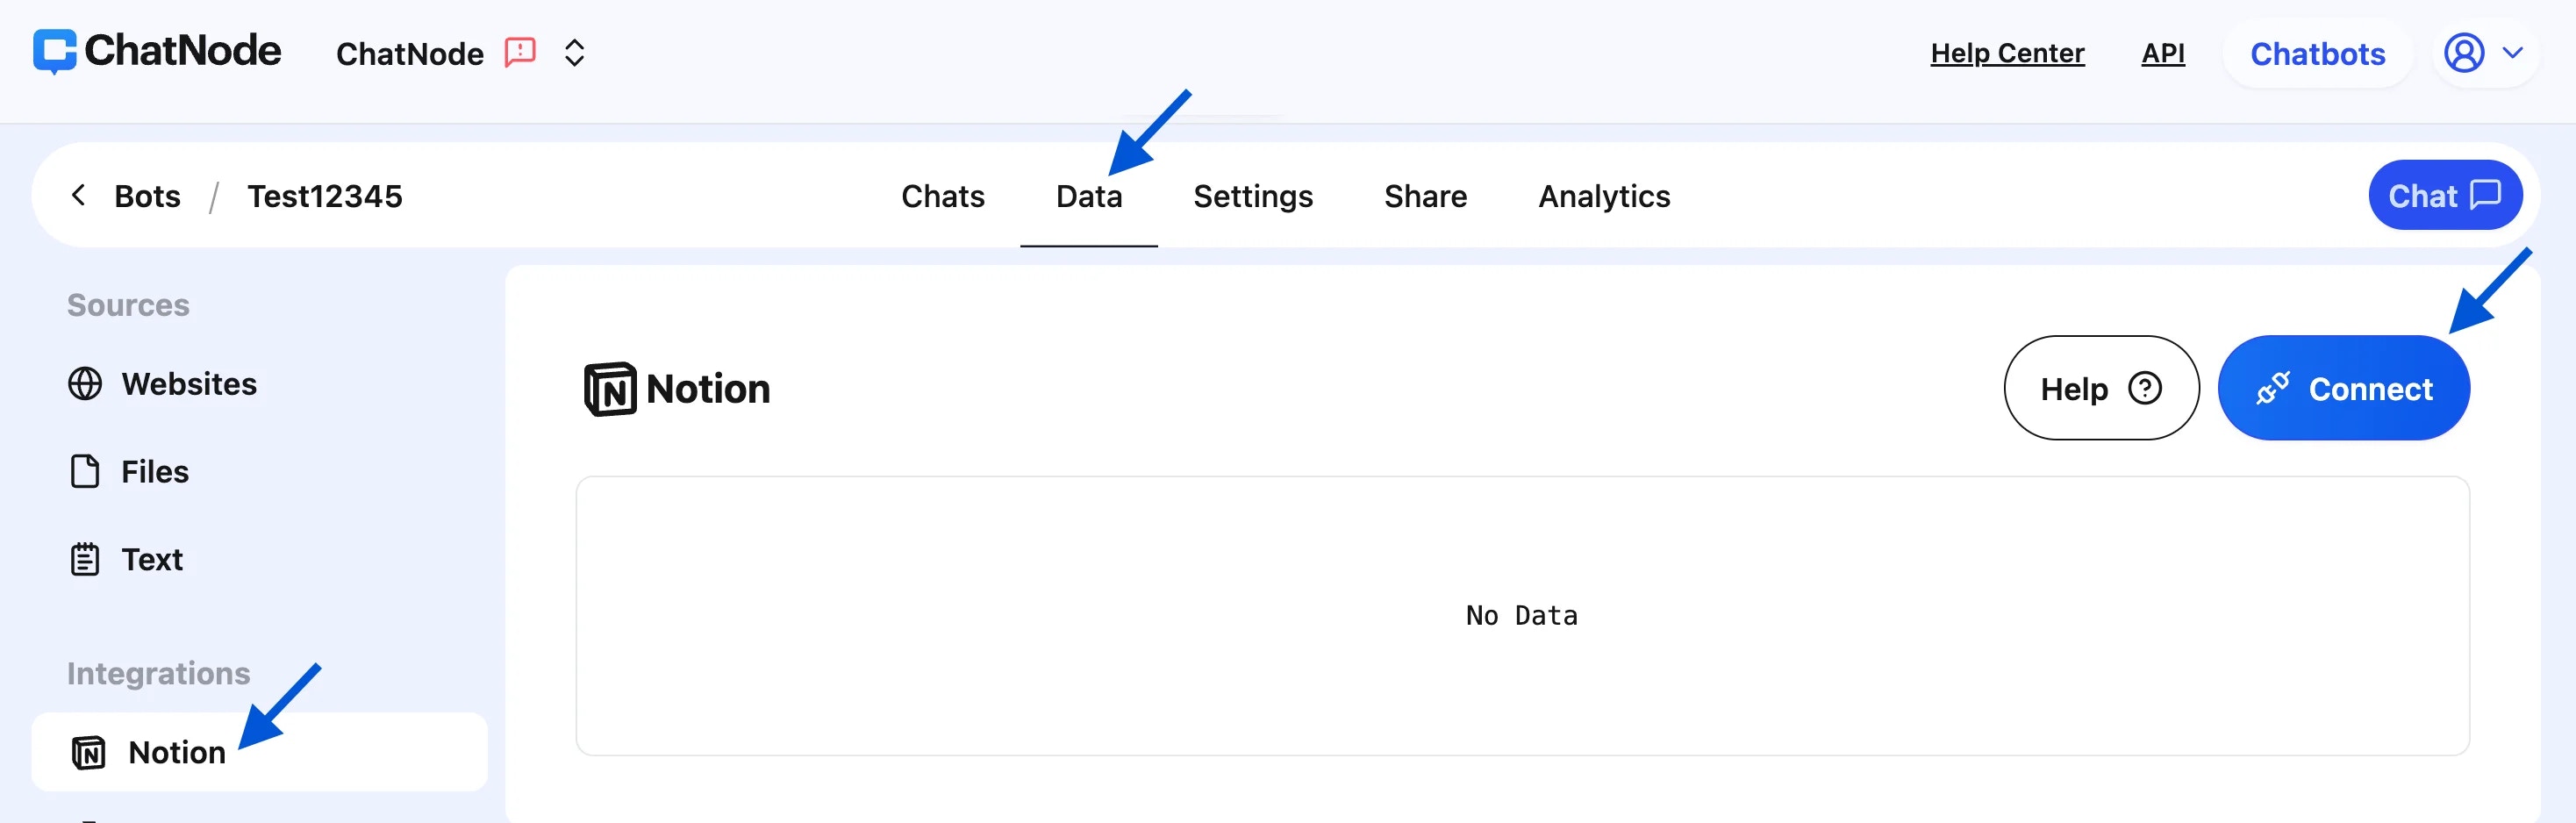
Navigate to the Data Section:
- Open your ChatNode dashboard and go to the Data tab.
- Under the Integrations section on the left menu, click on Notion.
-
Connect Your Notion Workspace:
- Click the Connect button on the Notion integration panel.
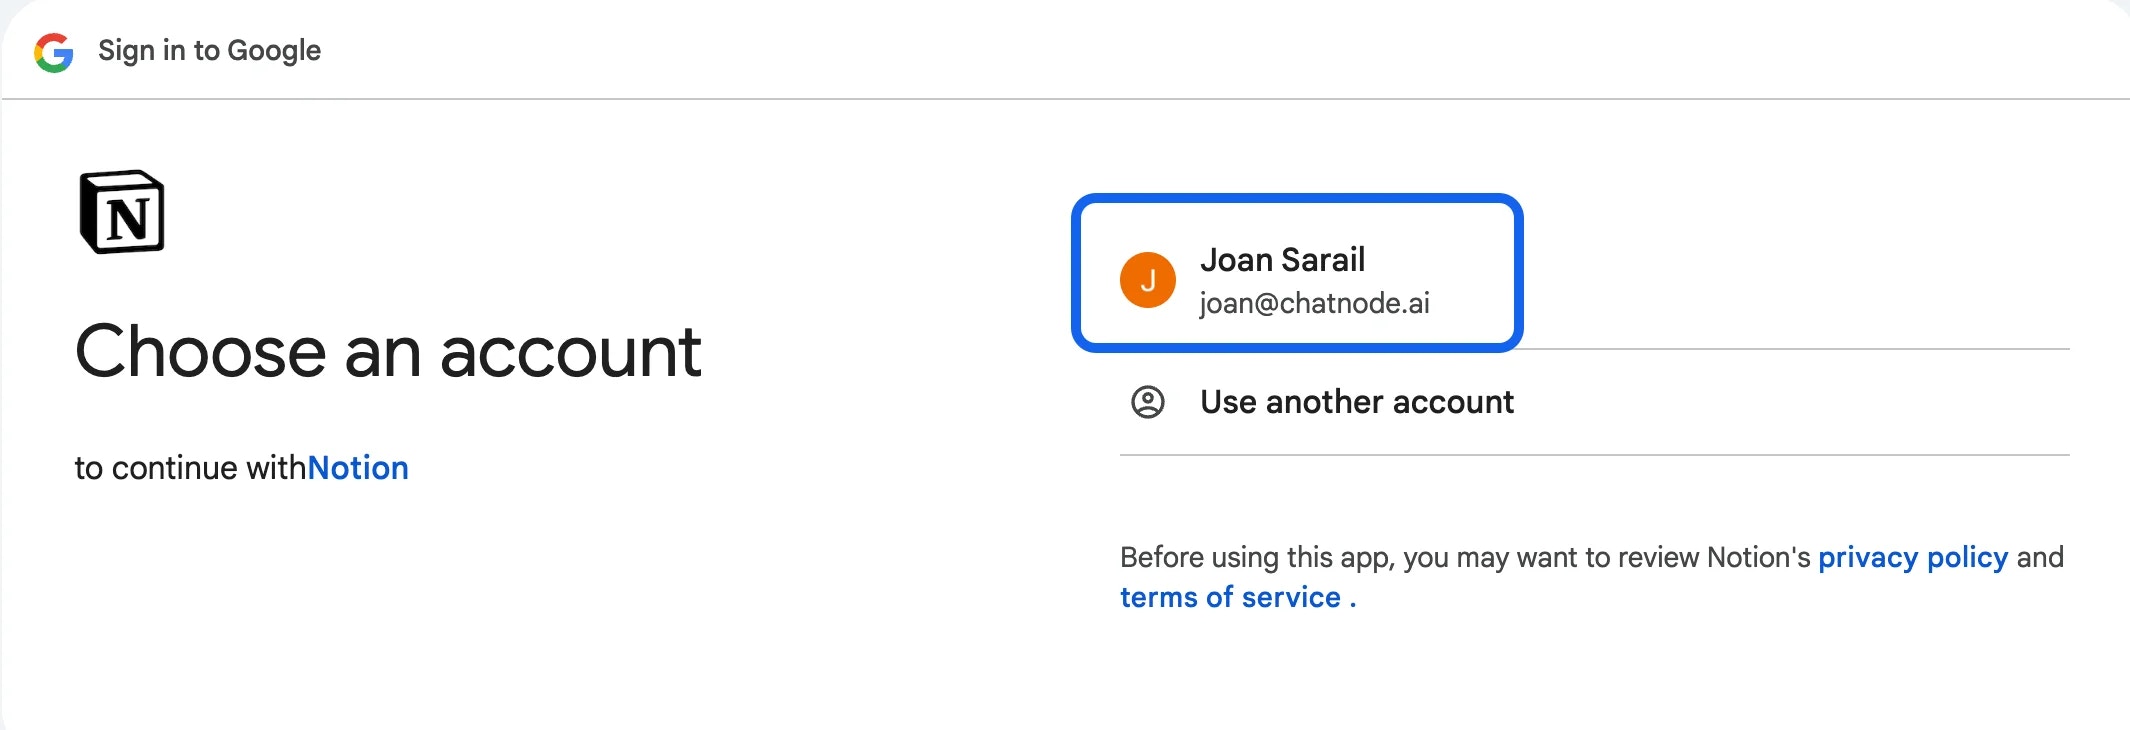
- A popup will appear, requesting permission for ChatNode to access your Notion workspace. Select the pages you want ChatNode to use.
-
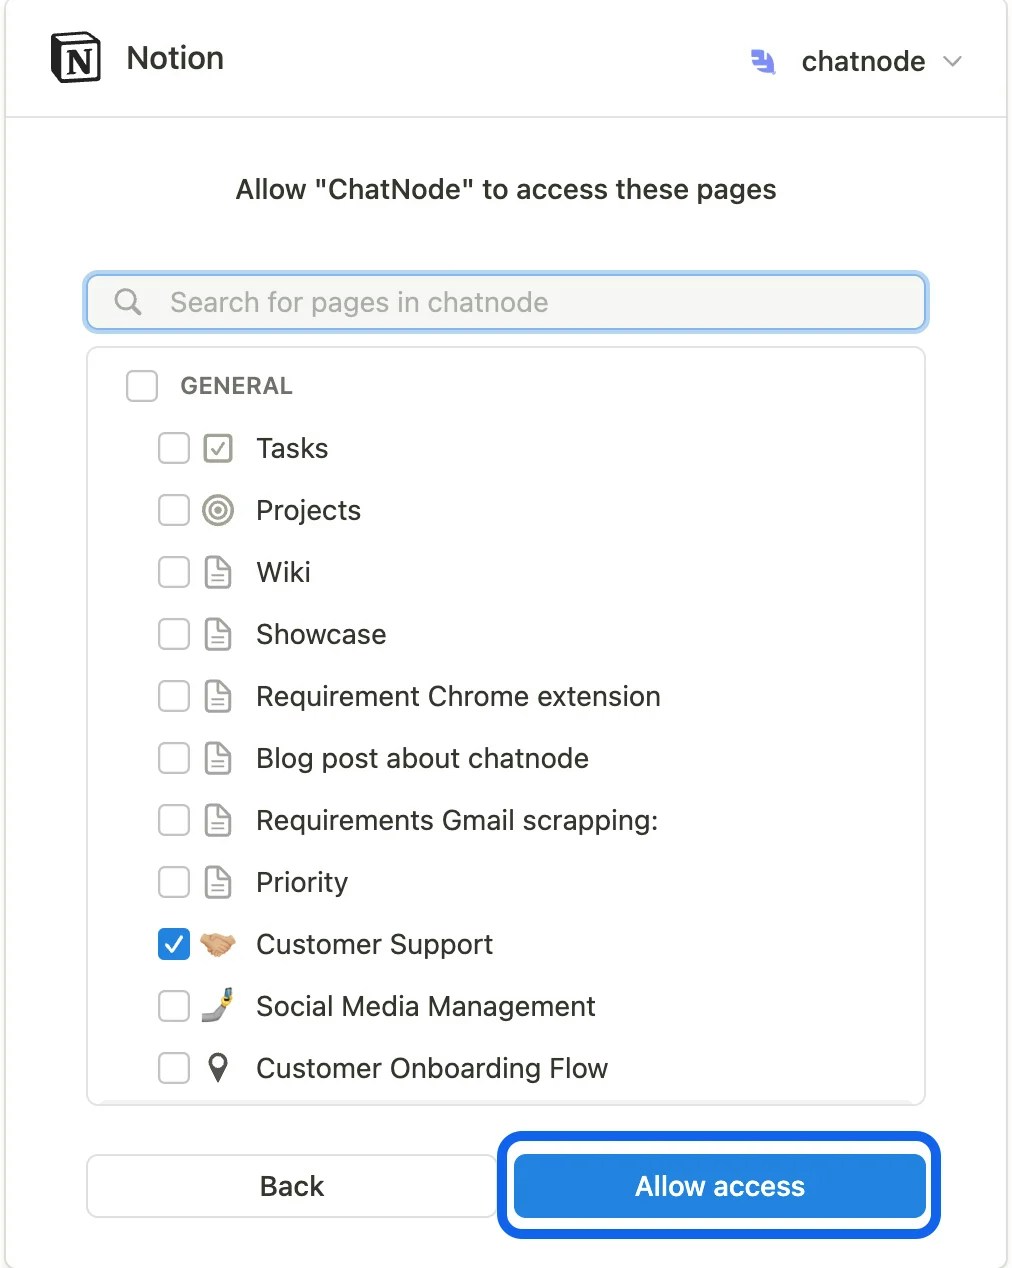
Select Pages:
- In the Notion permissions screen, browse through your workspace and tick the specific pages or databases you want to integrate.
- After selecting the pages, click Select Pages to confirm your choices.
- Once the selection is complete, click Allow Access to grant permissions.

-
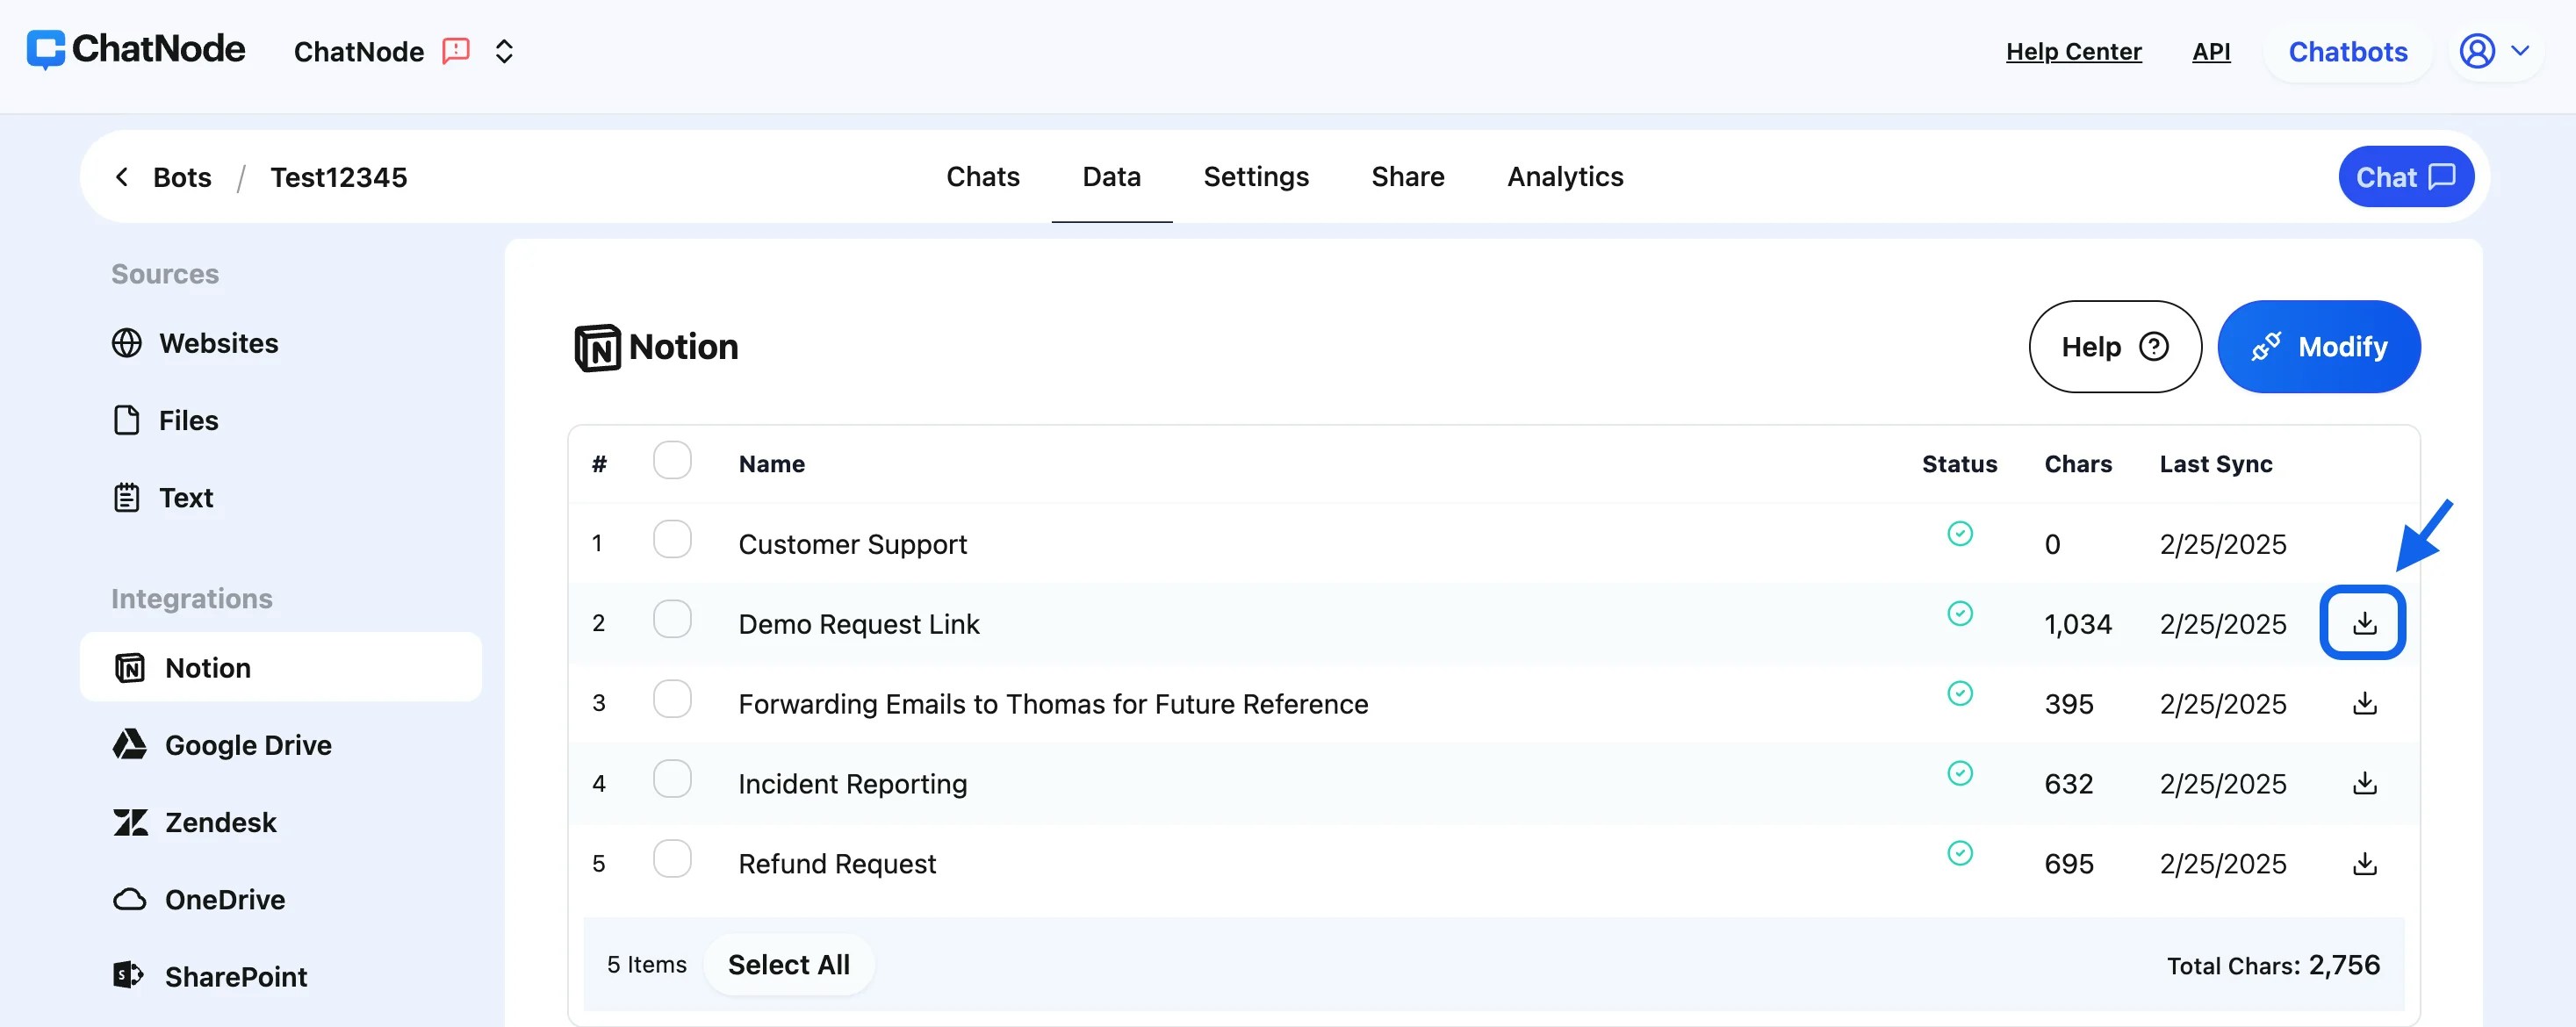
Training Data:
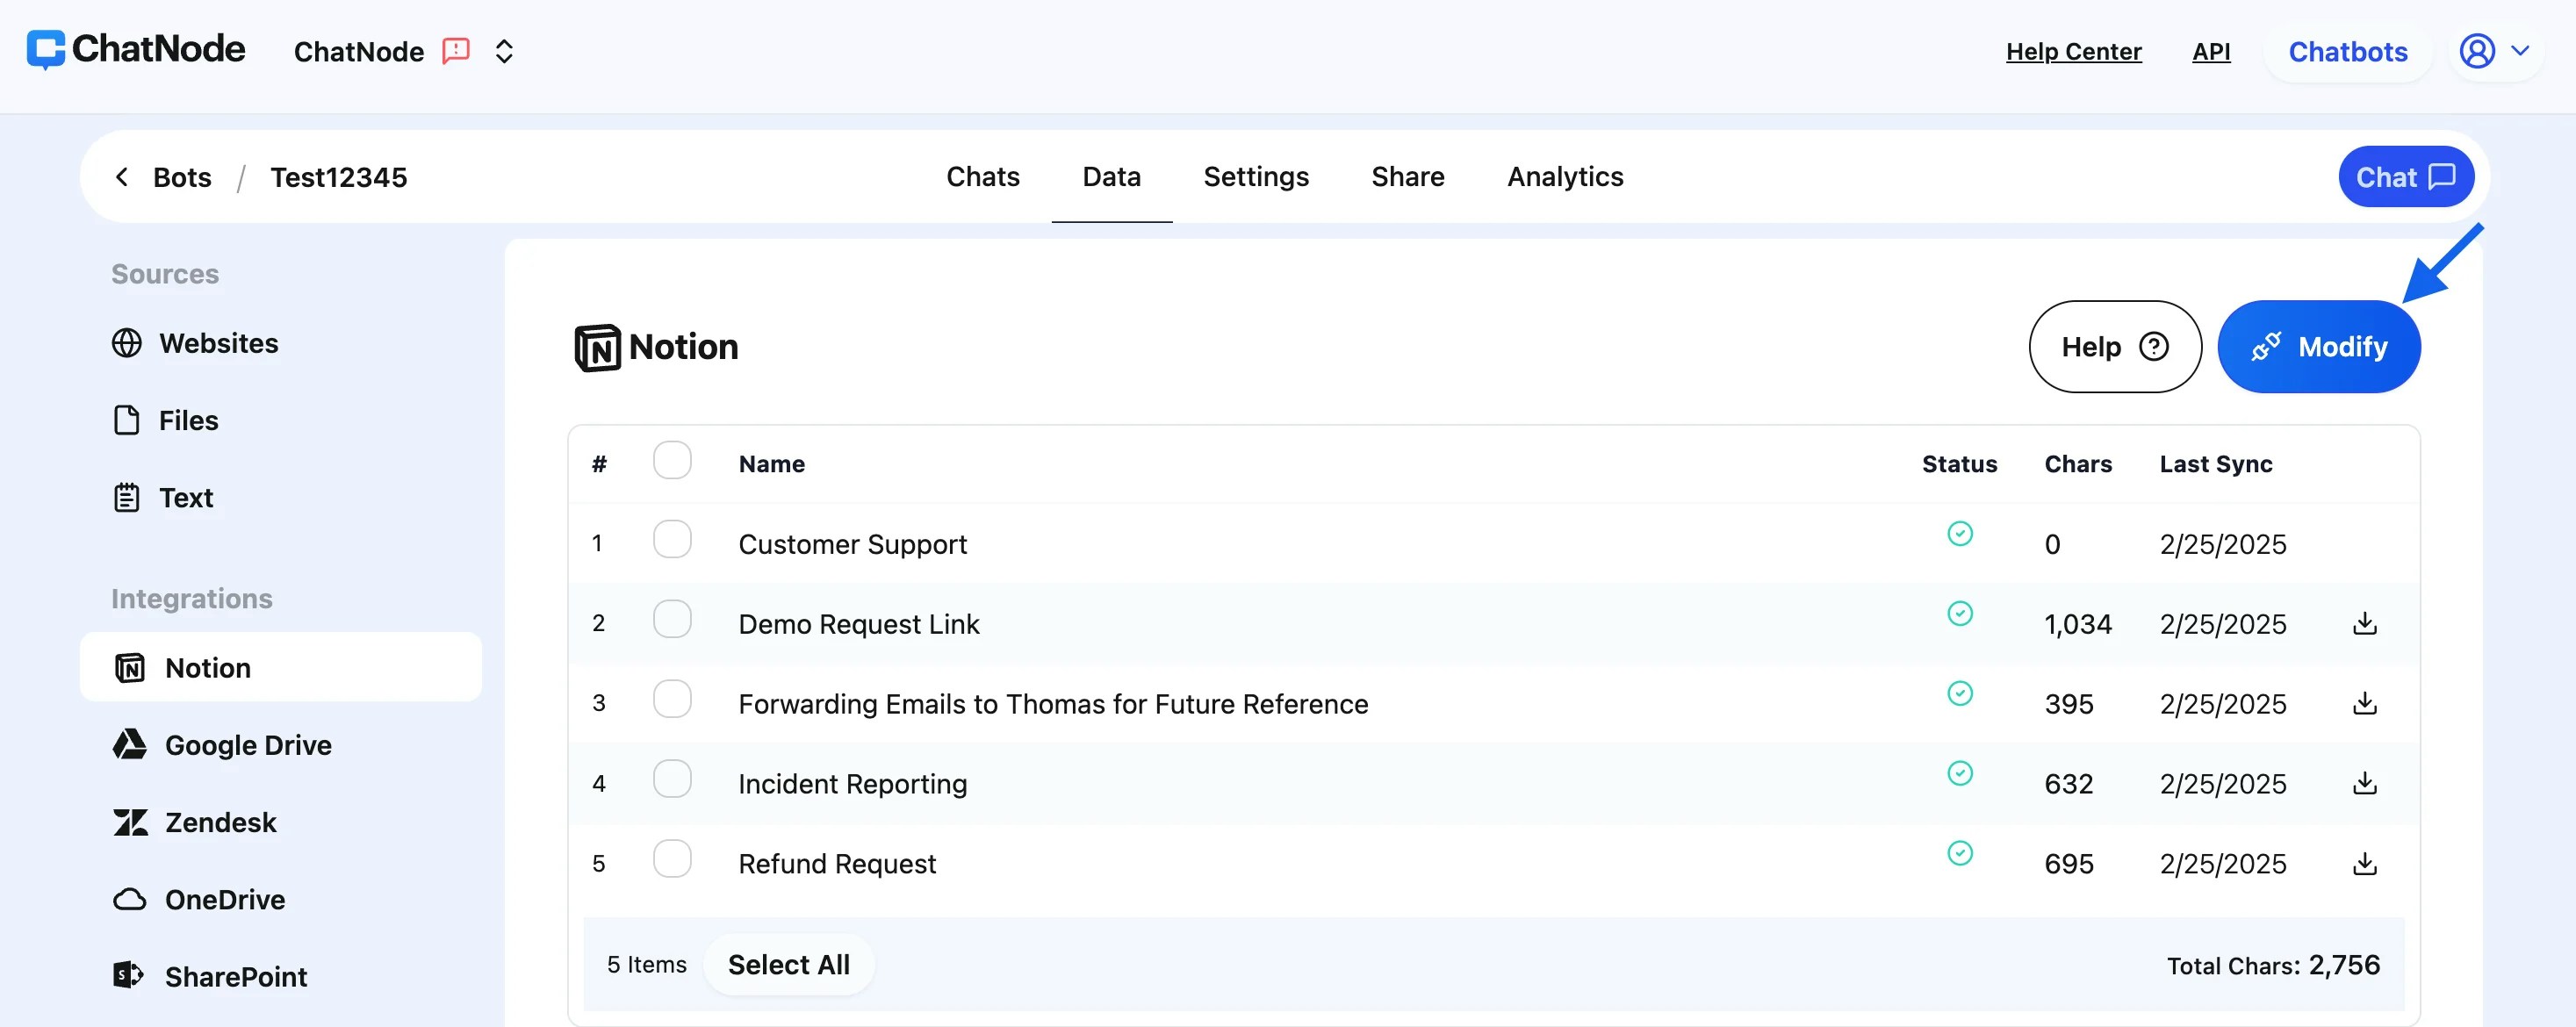
- After granting access, your selected pages will appear in the Notion integration section on ChatNode.
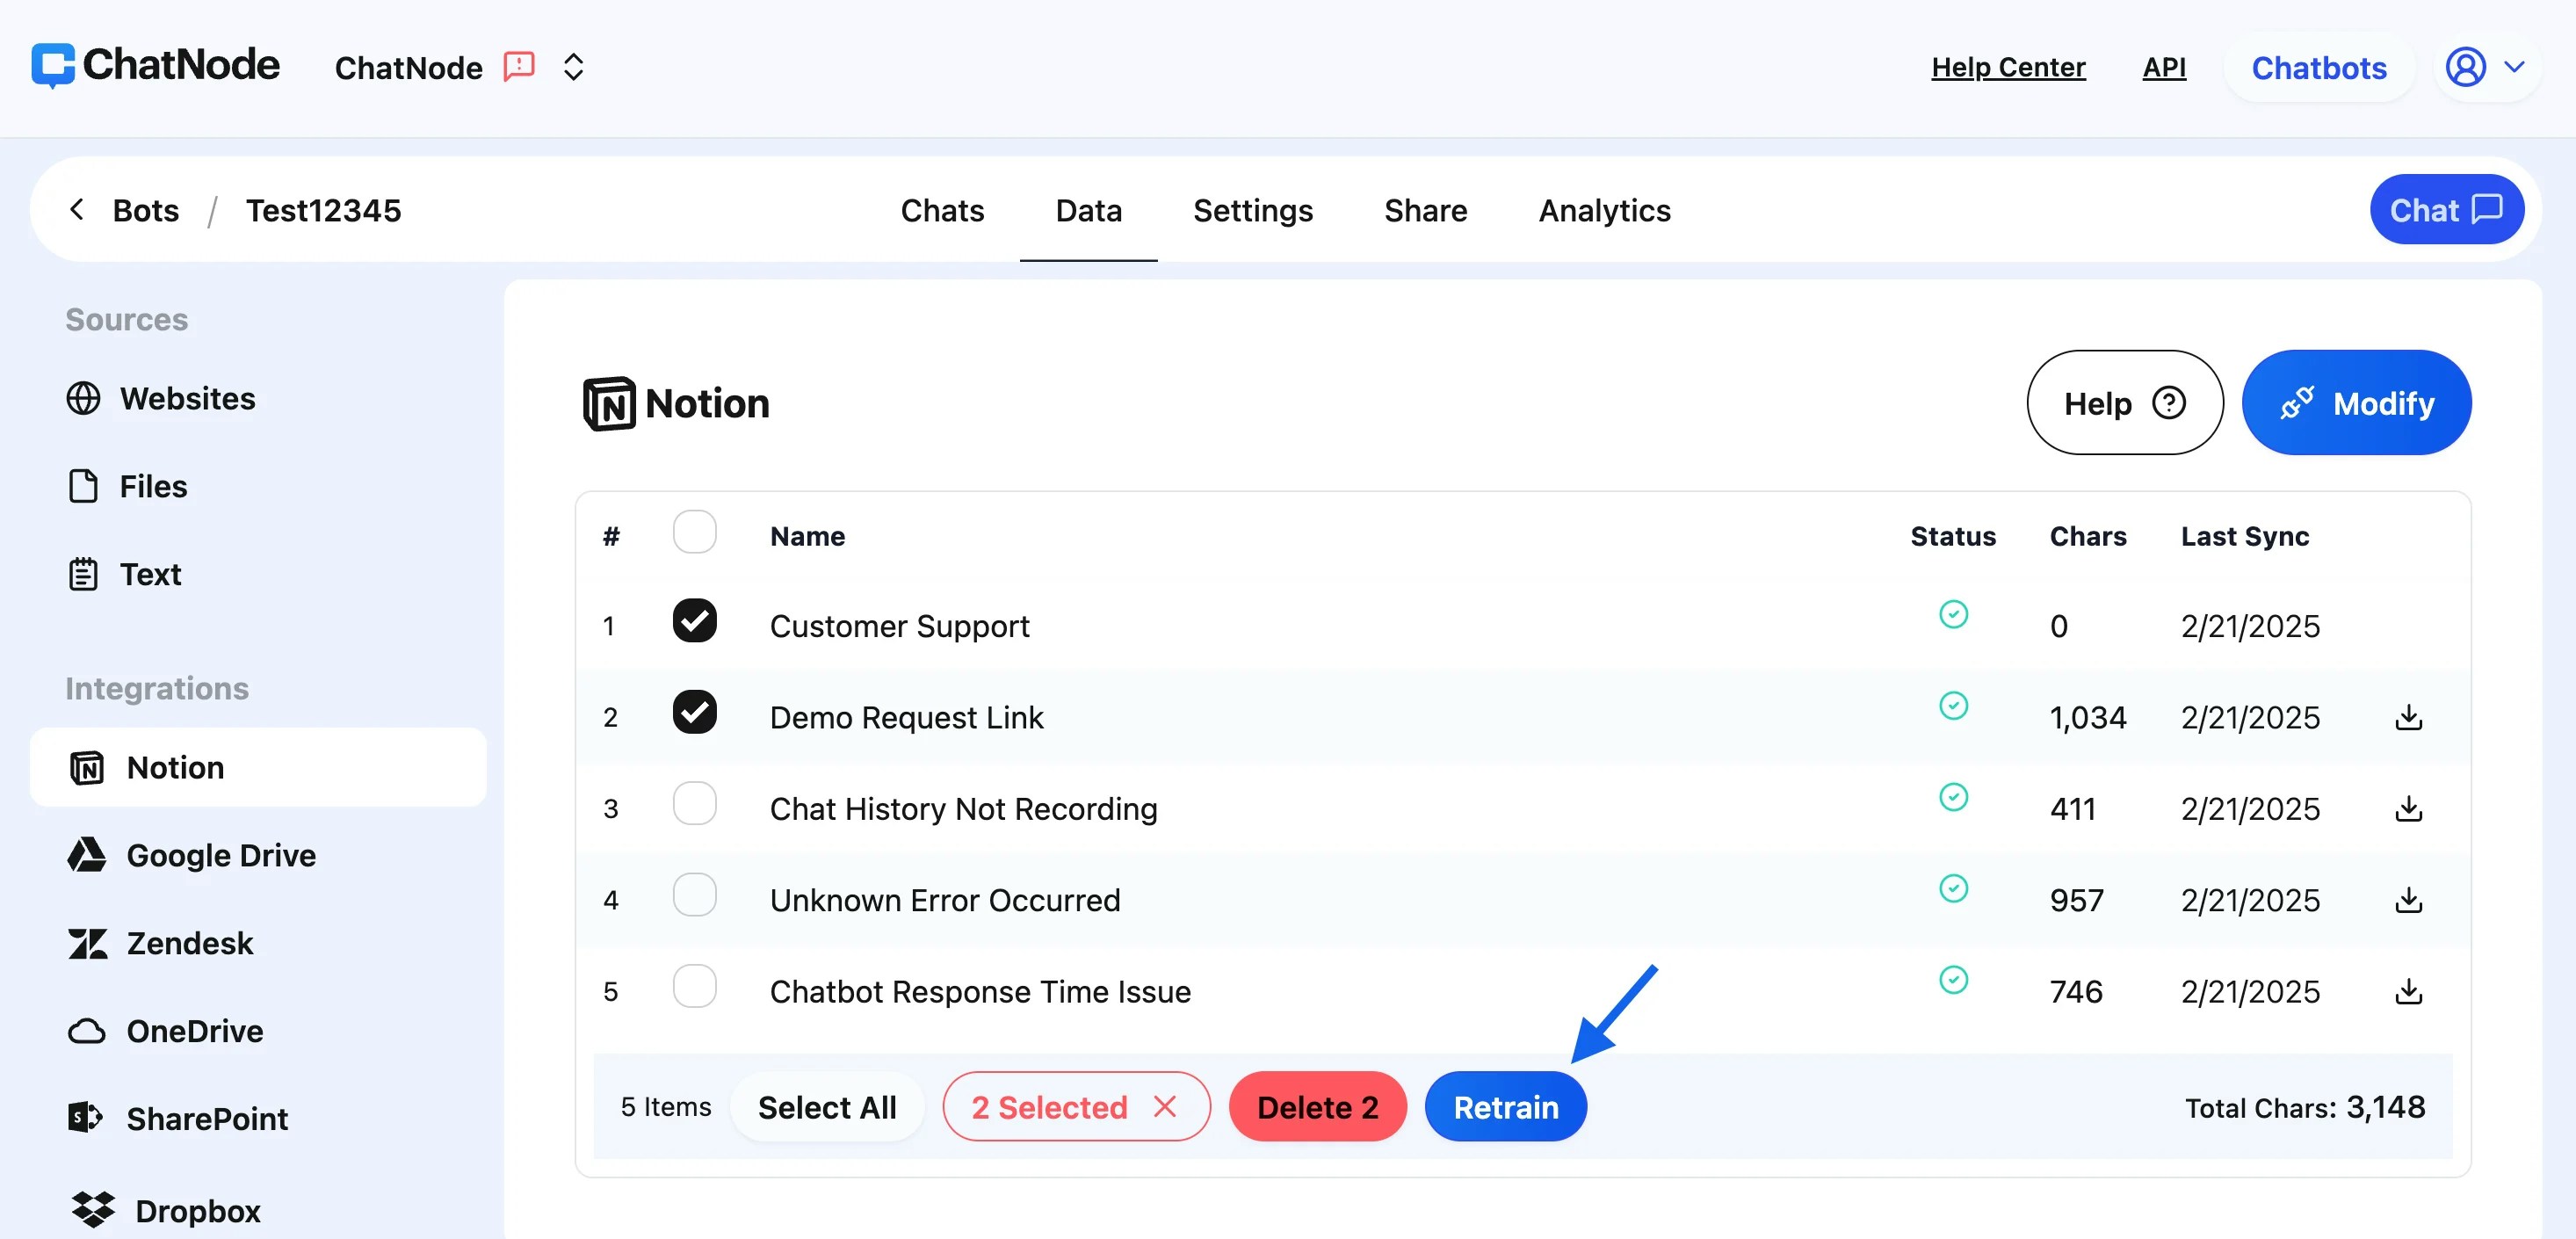
- Each page or article is listed with its training status and the character count of the content.
- To train your agent on the selected data, ensure that the articles are listed and properly synced.
Managing Your Integrated Data:
-
Download Articles:
- Beside each integrated article, you’ll find an option to download its content as a
.txtfile. This is useful for offline reviews or backups.
- Beside each integrated article, you’ll find an option to download its content as a
-
Retrain Specific Pages:
- If you’ve added new information or updated existing content in your Notion pages, tick the box beside the relevant articles and click Retrain. This ensures your agent reflects the latest updates.
-
Modify Integration:
- To add new pages or remove existing ones, use the Modify button. This will take you back to the Notion permissions page, where you can adjust the page selection.
-
Track Training Progress:
- Monitor the training status for each article. You may see statuses like Training, Waiting, or Completed. Wait for the training process to finish before testing the agent with the new data.
Benefits of Notion Integration:
- Dynamic Updates: Keep your agent knowledge base updated in real time by syncing changes from Notion.
- Streamlined Data Management: Easily manage which Notion pages are integrated and retrain only the necessary parts.
-
Content Download: Export Notion pages in
.txtformat for additional flexibility and use cases.