Skip to main contentGuide to Integrating SharePoint with ChatNode
Integrating SharePoint with ChatNode allows you to easily upload and train agent data using files stored in your SharePoint sites. Follow this step-by-step guide to set up and manage the integration.
Steps to Integrate SharePoint with ChatNode:
-
Access the Integration:
-
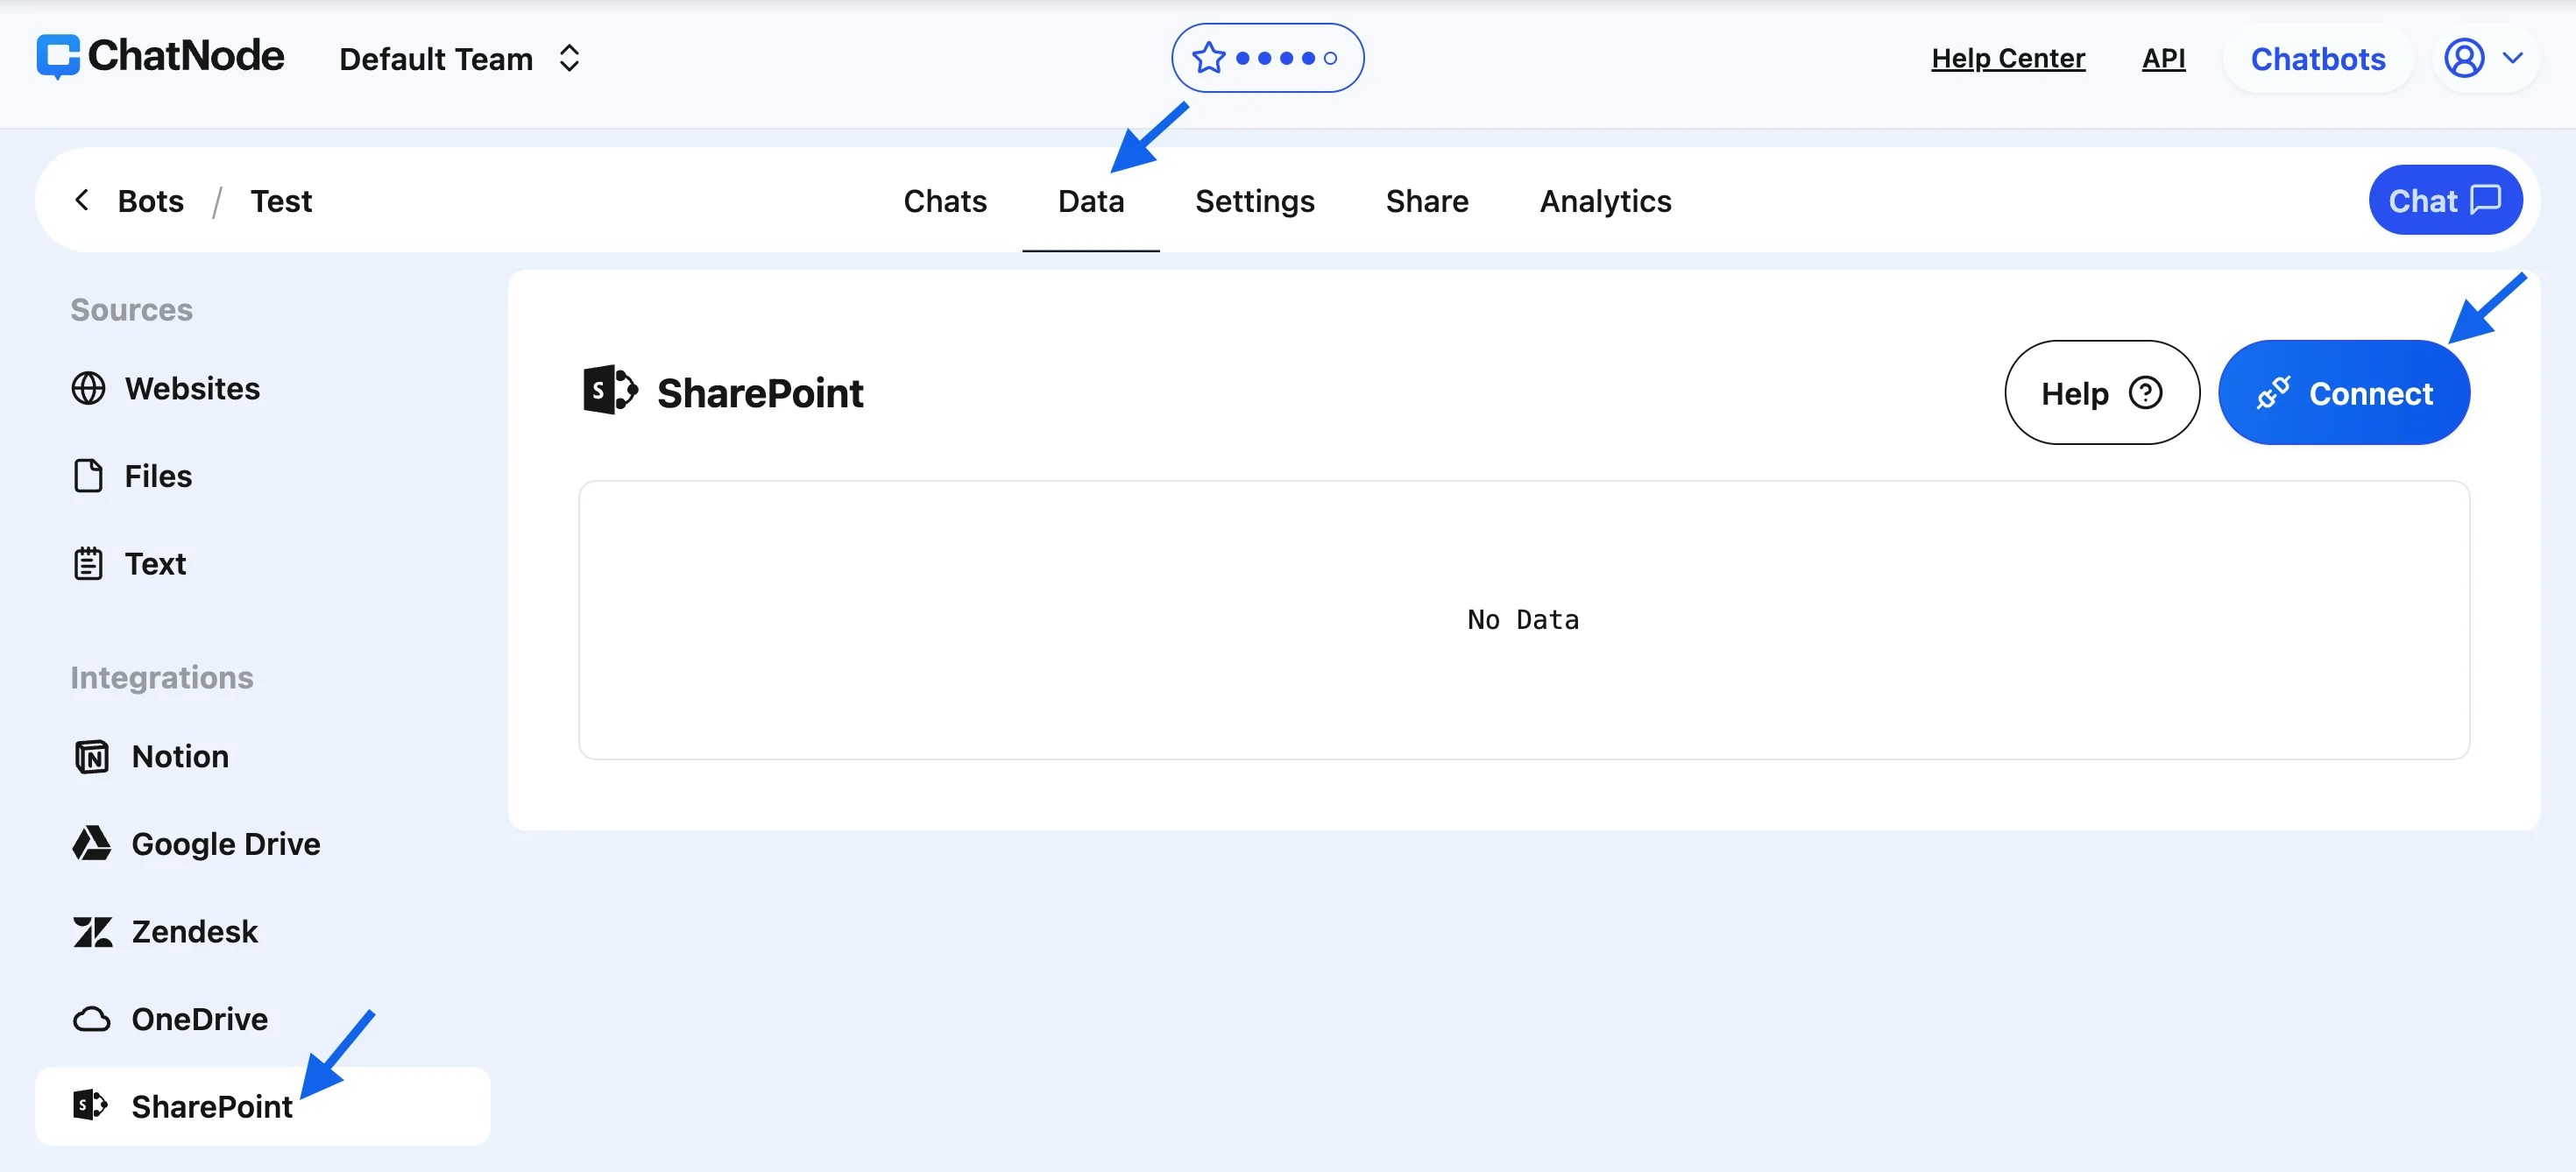
Navigate to the Data section in your ChatNode dashboard.
-
Under Integrations, select SharePoint.

-
Connect Your SharePoint Account:
-
Click the Connect button on the SharePoint panel.
-
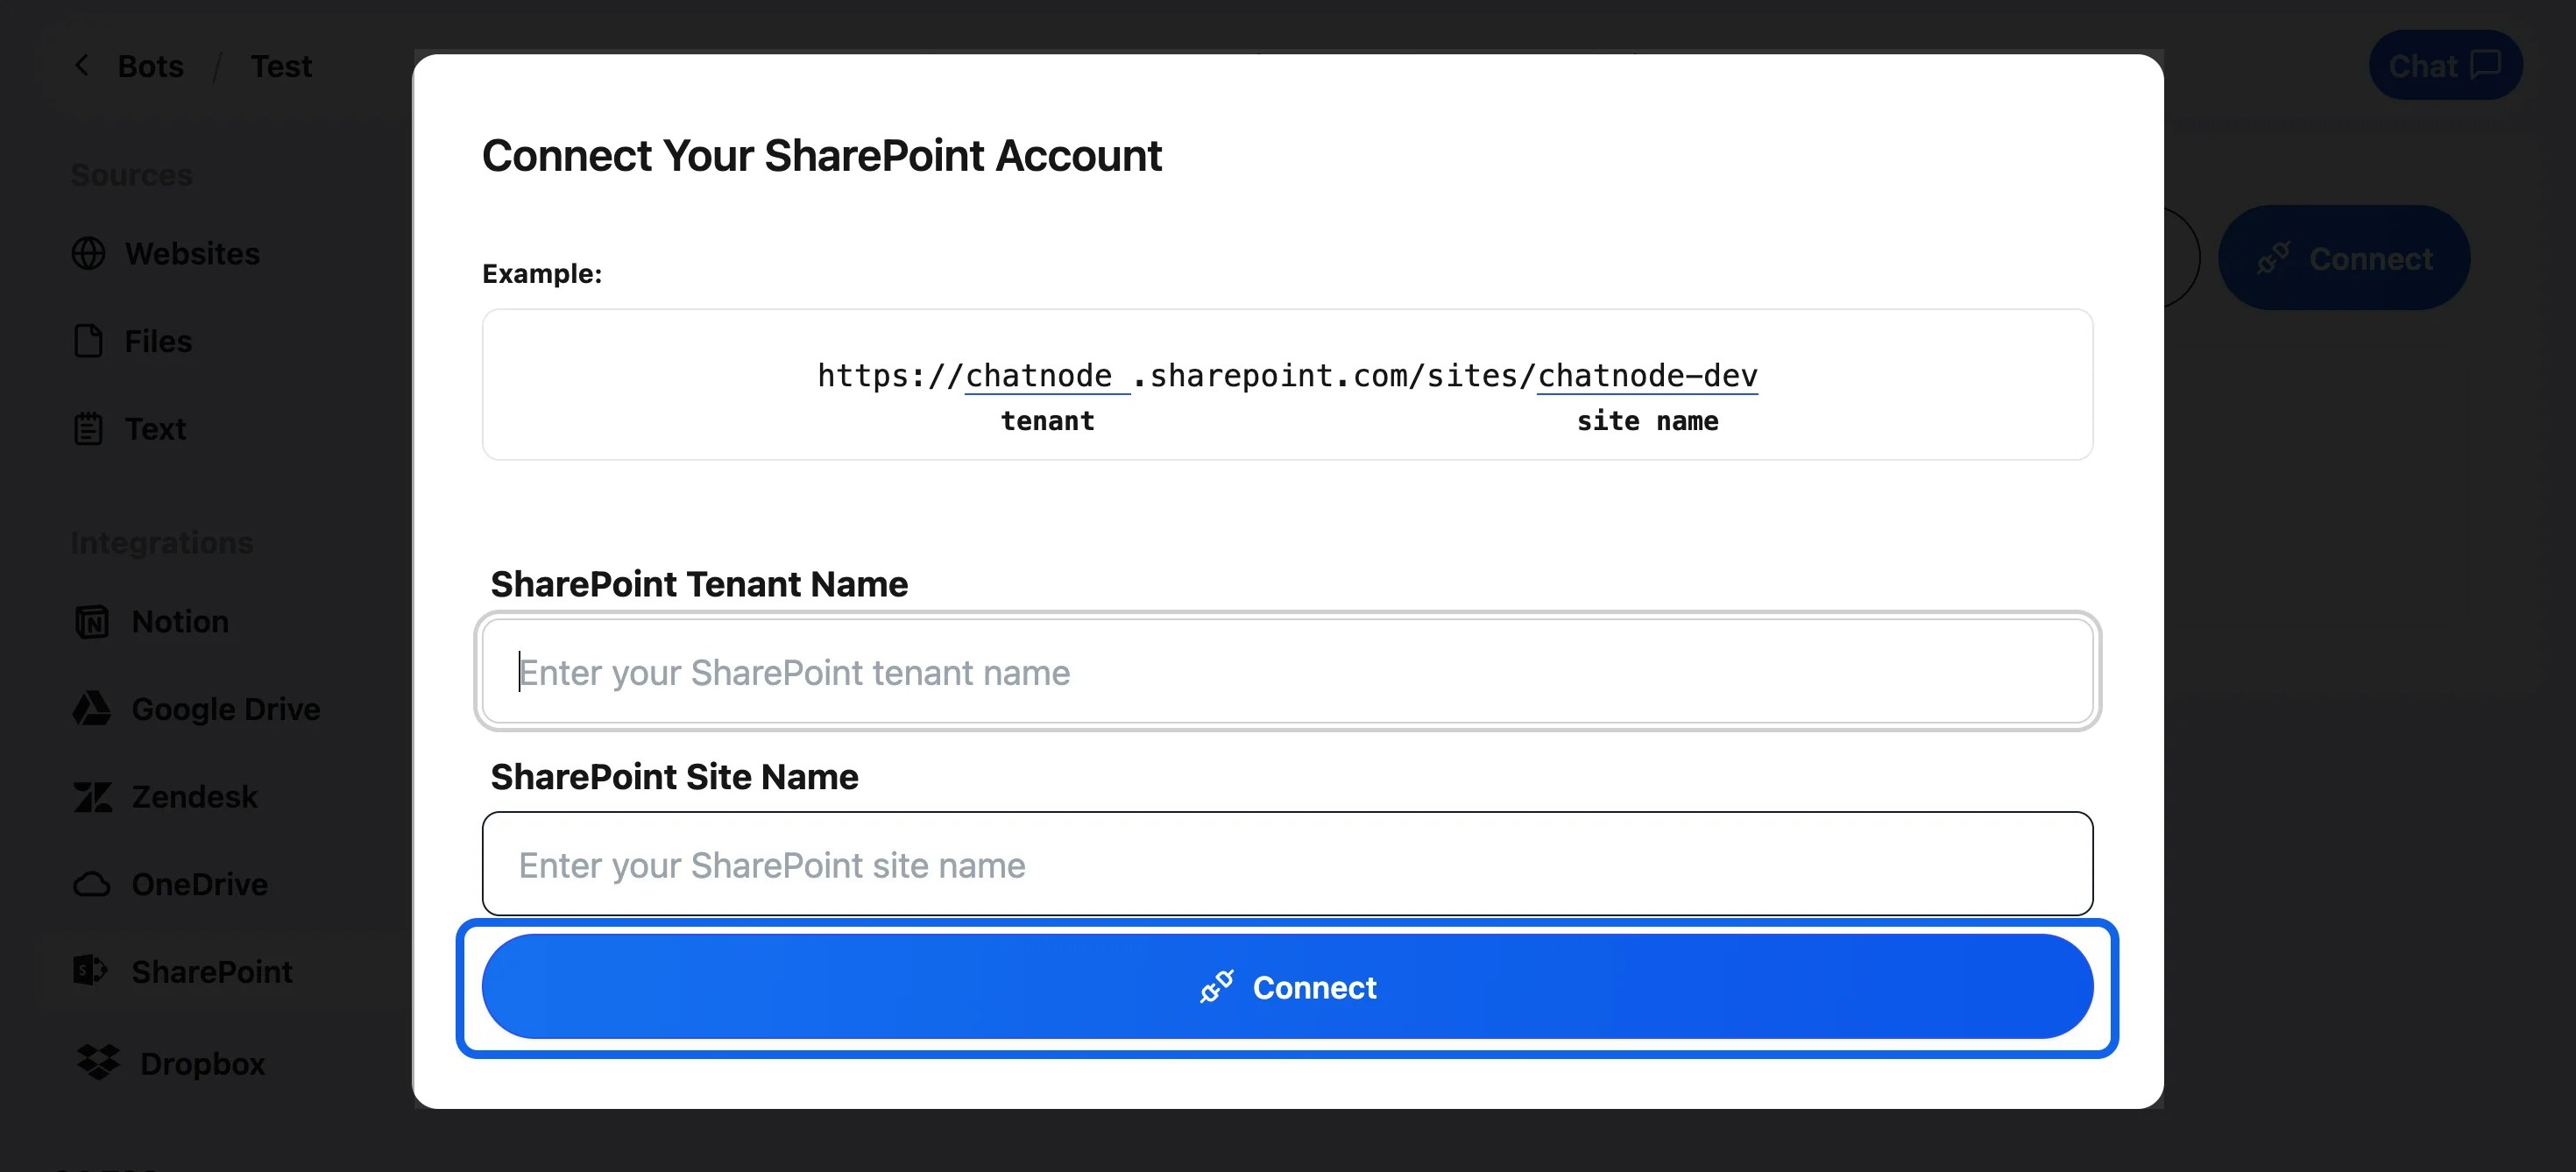
A pop-up window will appear, prompting you to enter the following details:
-
SharePoint Tenant Name: The name of your SharePoint tenant (e.g.,
yourcompany.sharepoint.com).
-
SharePoint Site Name: The specific site name where your files are located.
-
After entering the details, click Connect.

-
Confirm Connection:
- Once the connection is successful, a confirmation pop-up will notify you that your SharePoint account is connected to ChatNode.
-
Select Files for Training:
-
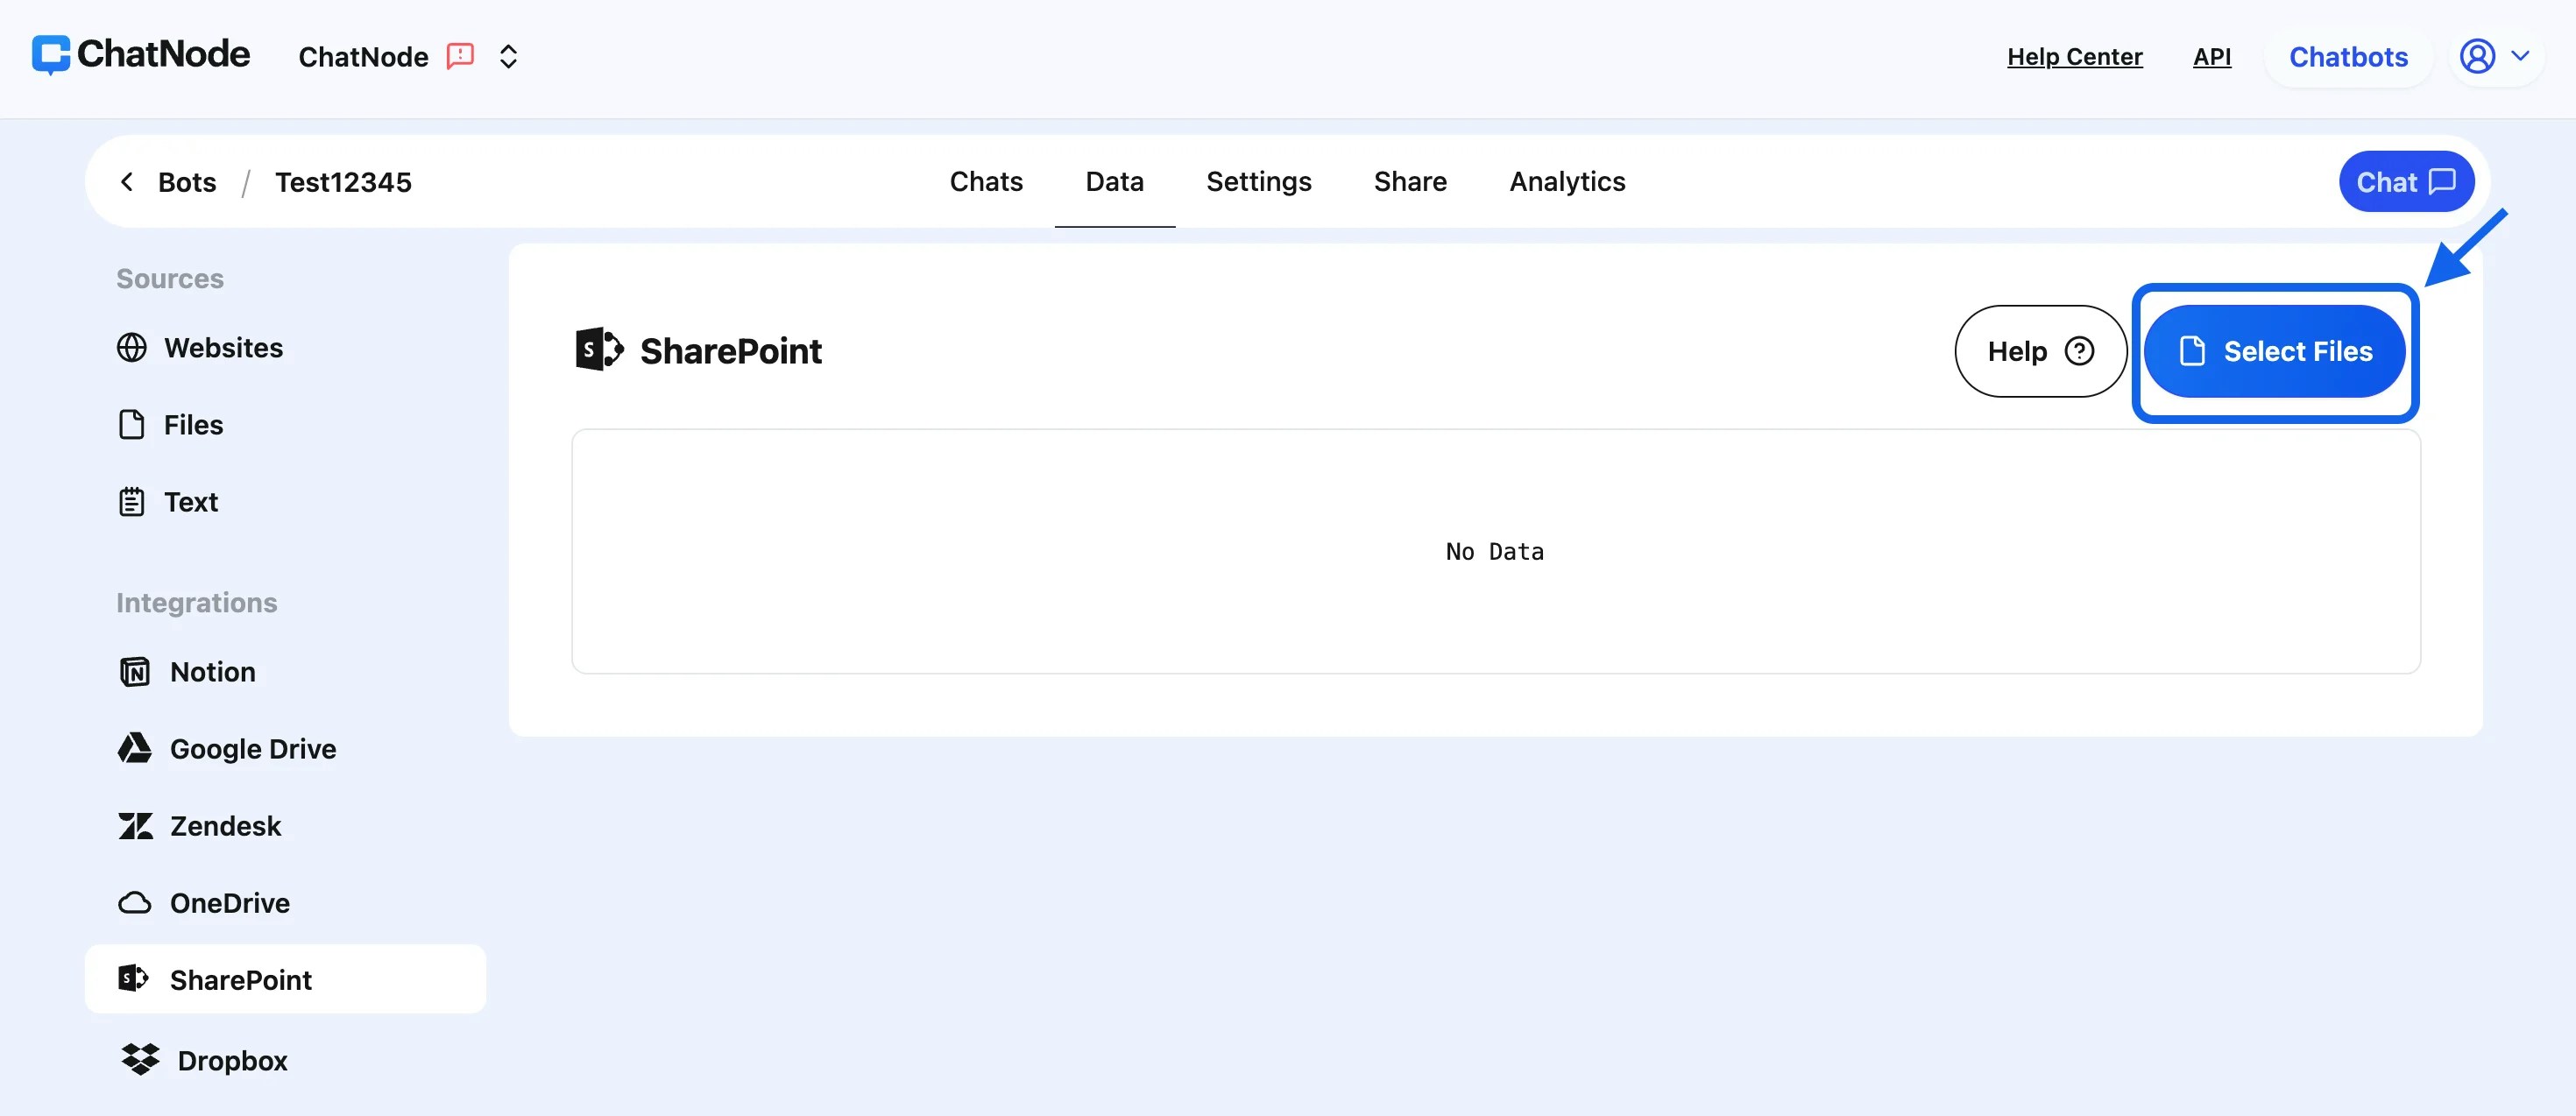
Click Select Files to browse through the files in your SharePoint site.
-
Tick the checkboxes next to the articles or files you want to upload and train.
-
After selecting the files, click Select.

-
Automatic Upload and Training:
-
The selected files will be uploaded to ChatNode and automatically trained for agent use.
-
You can monitor the training status in the SharePoint panel.
Managing Your Integrated Files:
-
Download Files:
- Each uploaded file includes an option to download its content in
.txt format, making it easy to review or archive the data.
-
Retrain with Updated Information:
- If you’ve updated a file in SharePoint, tick the checkbox next to the file in ChatNode and click Retrain. This ensures your agent reflects the latest data.
-
Add or Remove Files:
-
To Include New Files: Repeat the Select Files process to add more data to your agent.
-
To Remove Files: Tick the checkbox next to the file you want to delete, and click Delete. This will remove the file from ChatNode’s training dataset.
Benefits of SharePoint Integration:
-
Efficient File Access: Directly browse and upload files from your SharePoint site to ChatNode.
-
Real-Time Updates: Keep your agent data current by quickly retraining with updated files.
-
Backup Flexibility: Download files in
.txt format for offline use or secure storage.


