Step 1: Set Up ChatNode on Your WordPress Site
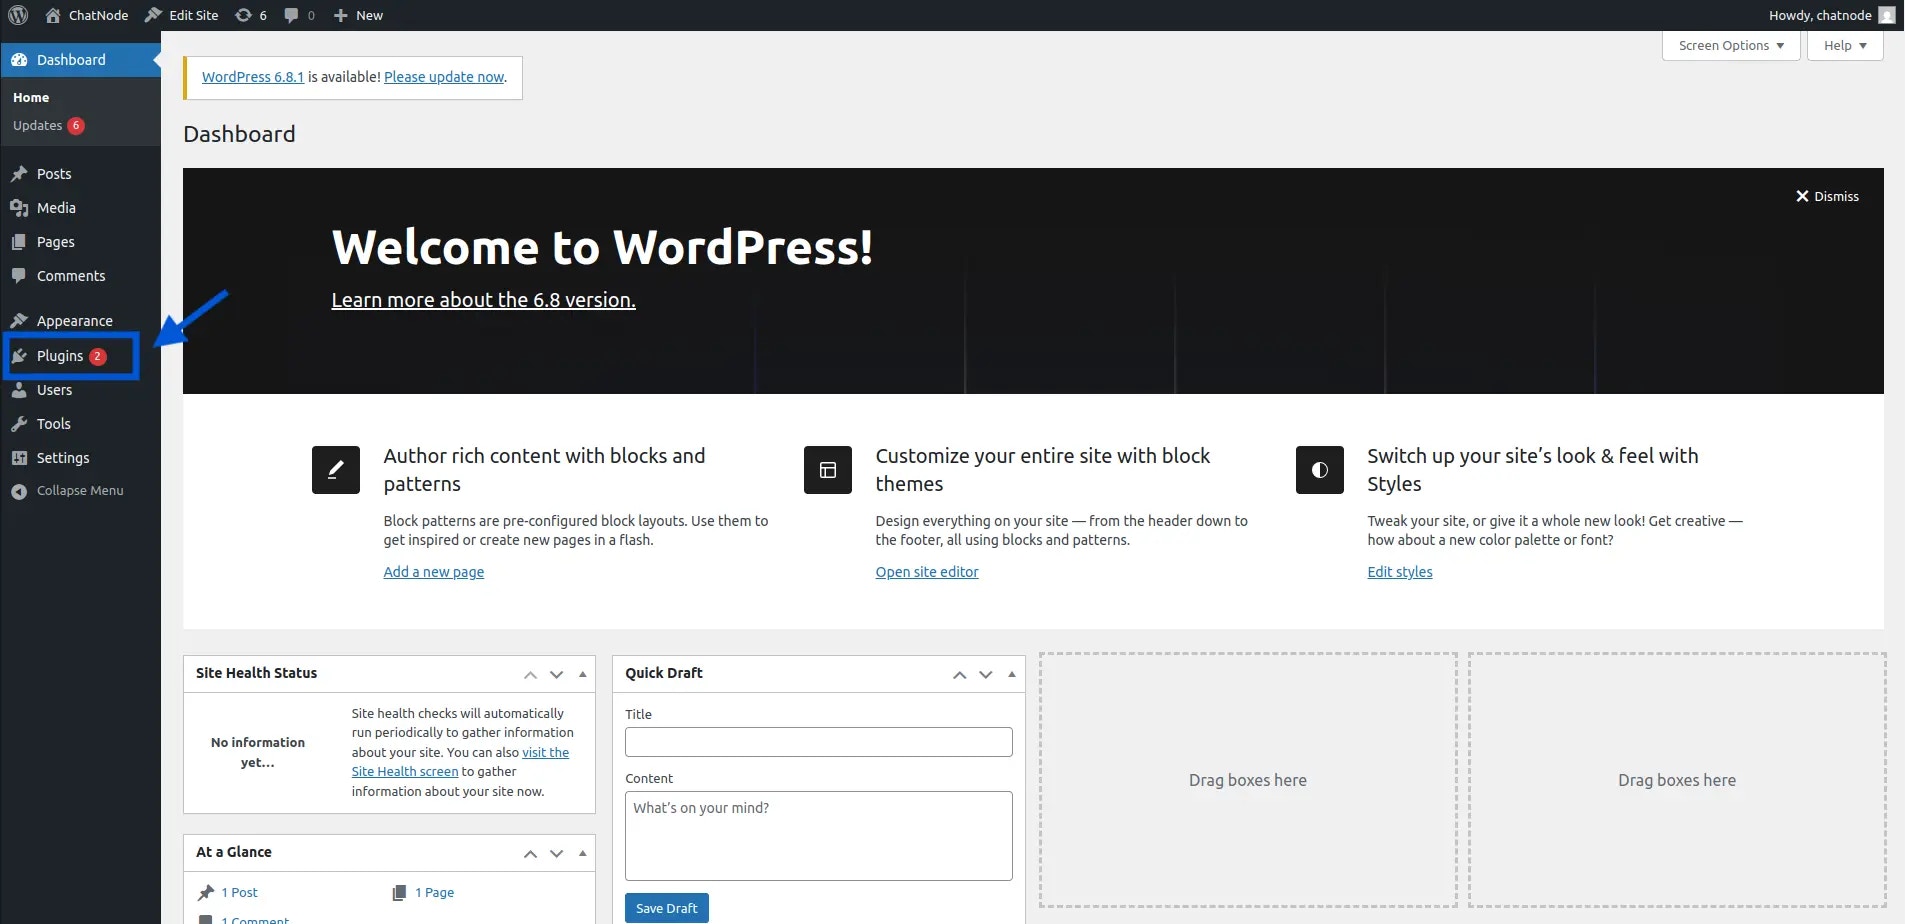
1. Log into your WordPress Admin Go to your WordPress dashboard by visiting: yourdomainname.com/wp-admin You can also access it through your web hosting control panel.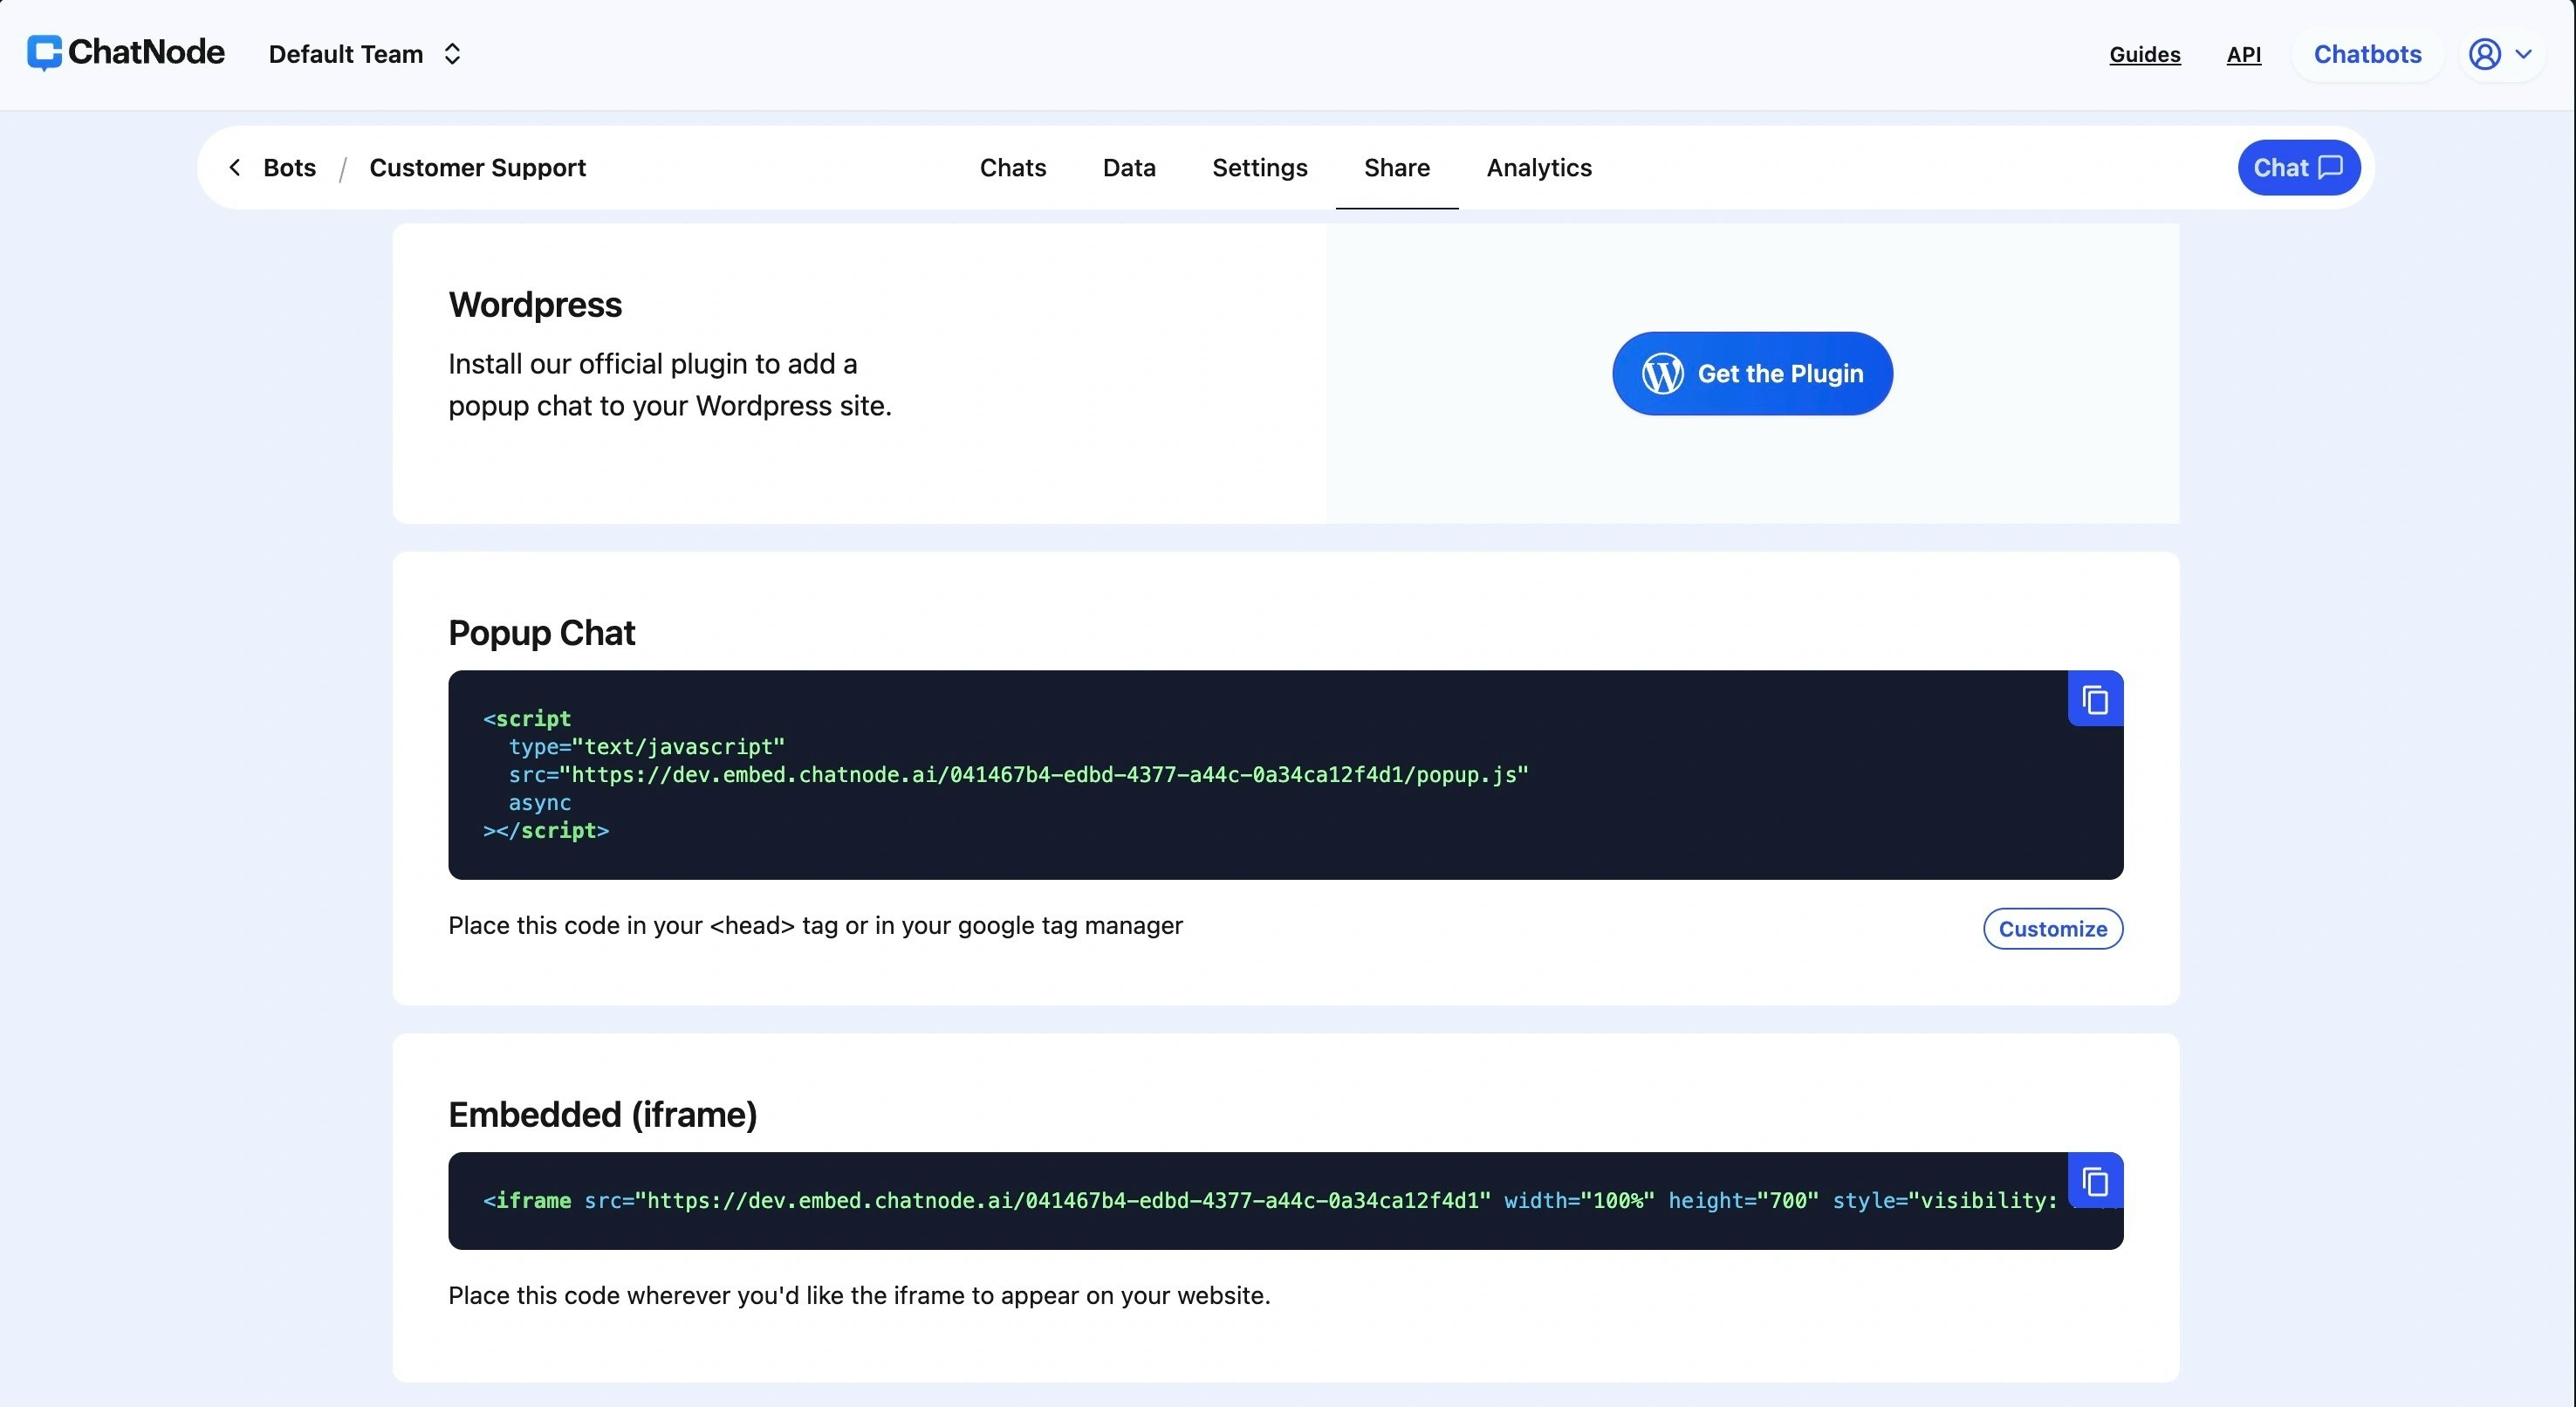
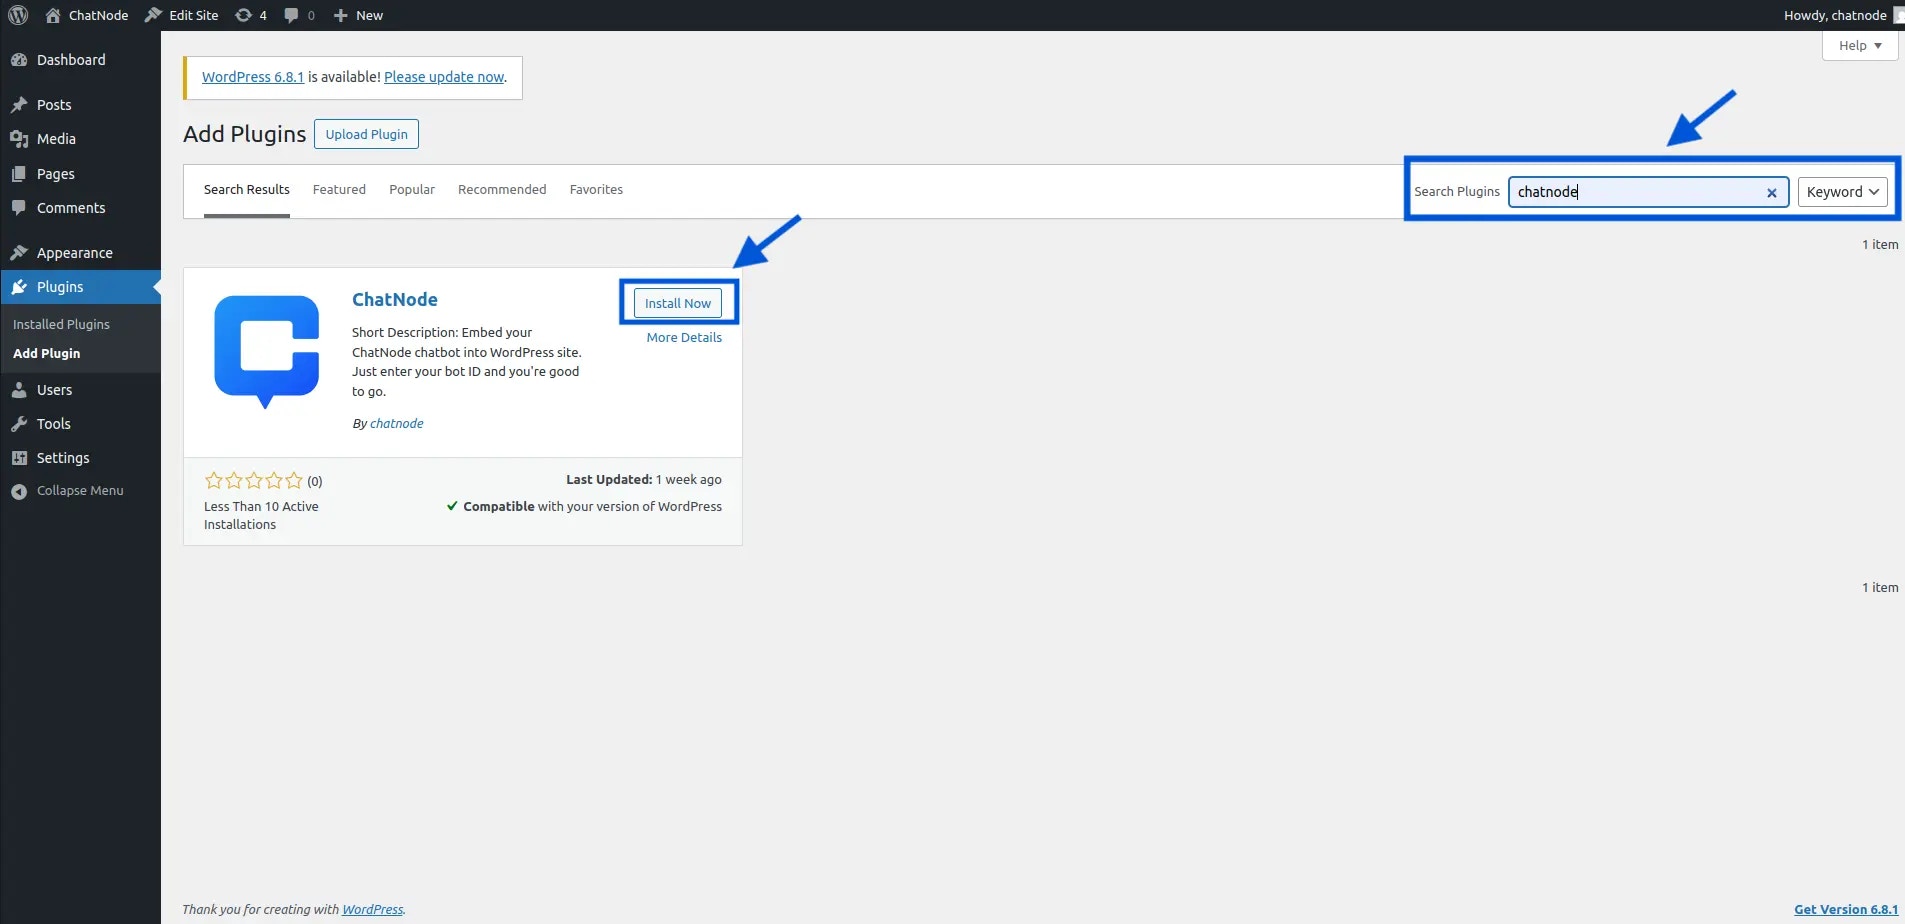
- In your WordPress dashboard, go to the Plugins section from the left sidebar.
- Click Add New at the top of the page.
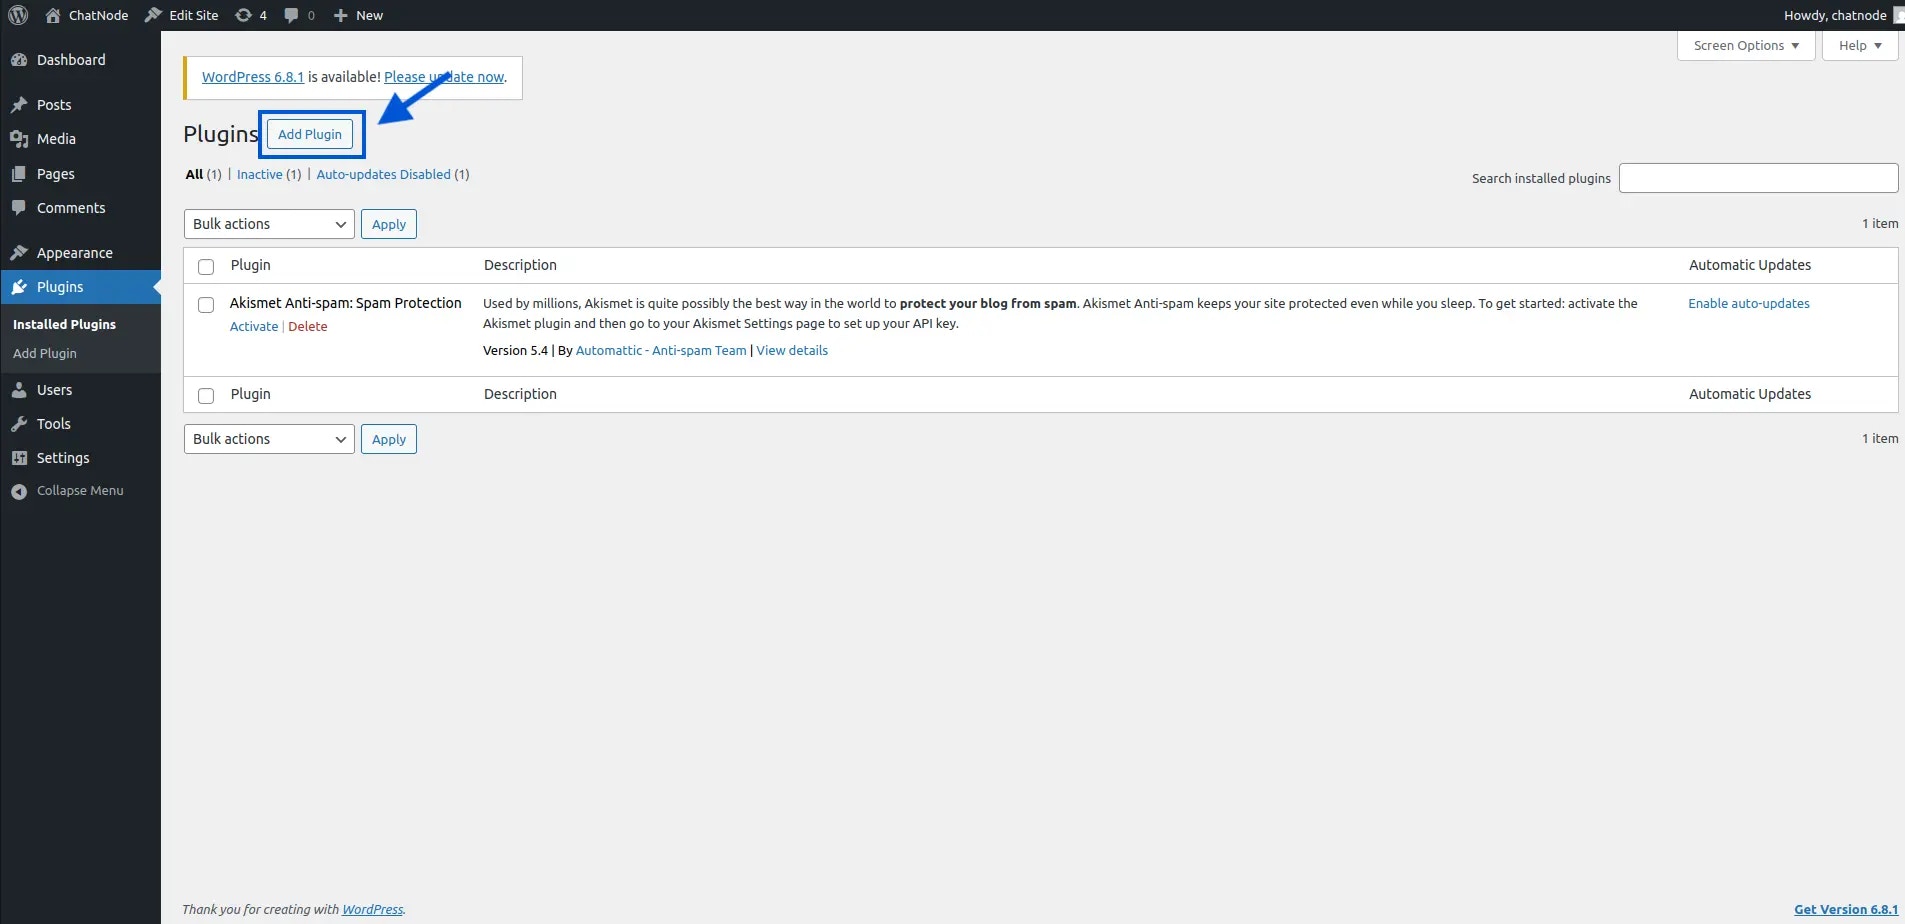
- Use the search bar to look for “ChatNode”.
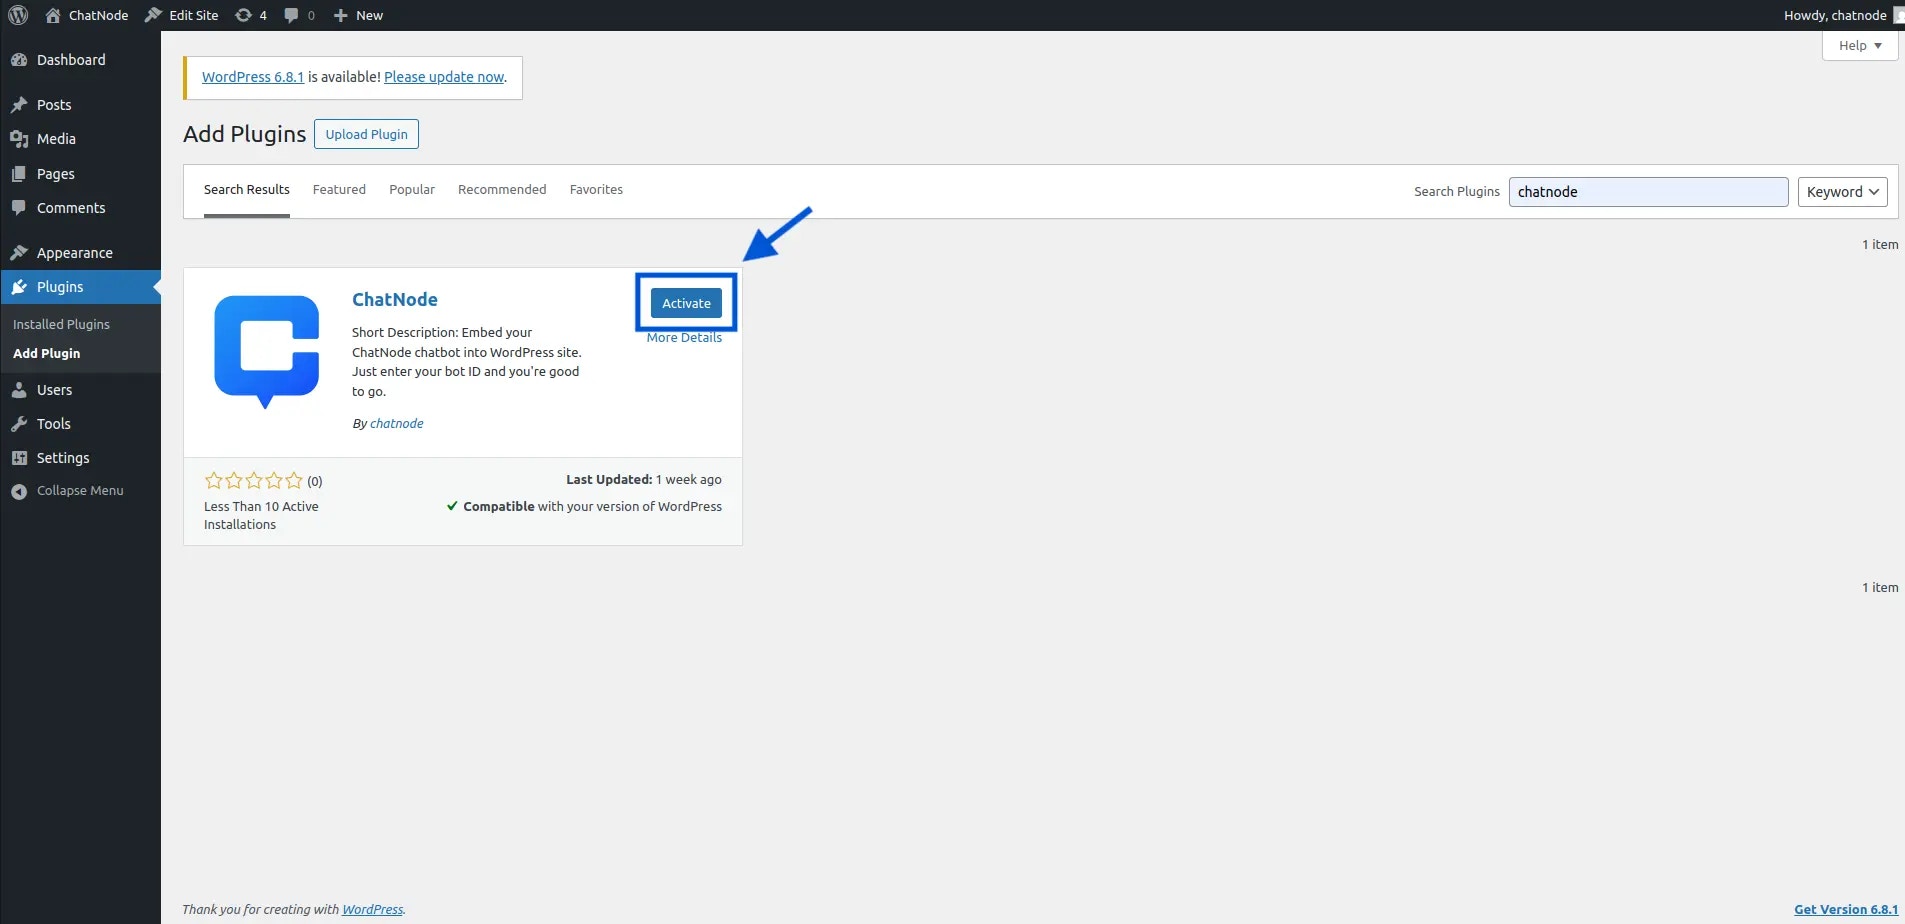
- Once the ChatNode plugin appears, click Install Now, then hit Activate.
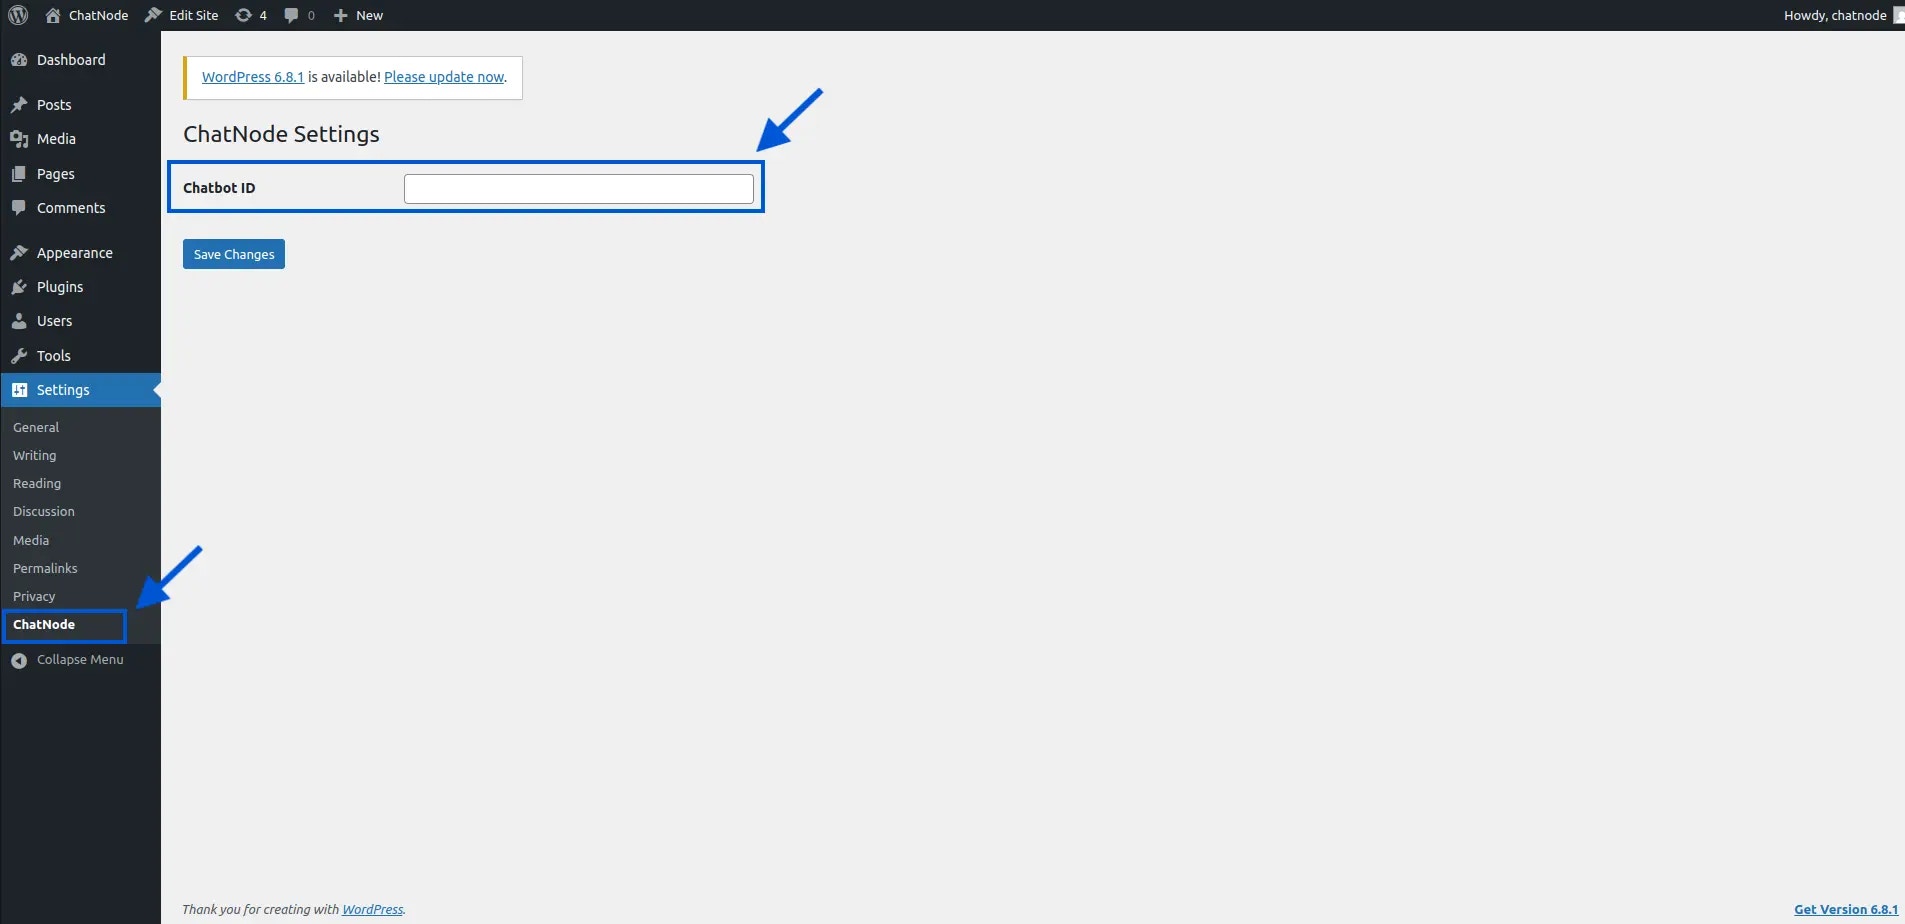
- In the left sidebar, click on Settings.
- Find and click on ChatNode from the list.
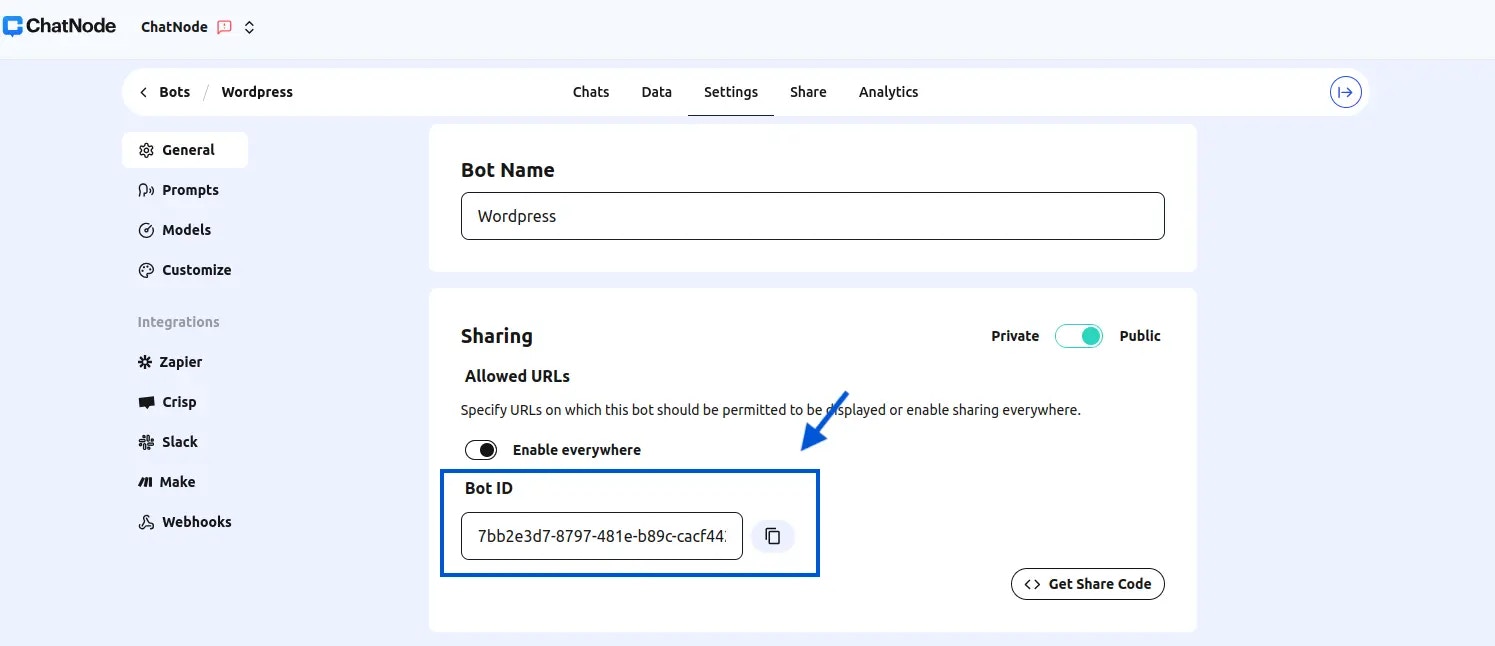
- Log into your ChatNode account and go to your Dashboard.
- Choose the agent you’d like to use.
- Click into it, then go to the Settings tab.
- You’ll find your botID — copy it.
- Paste this ID into the botID field in your WordPress ChatNode settings.
- Click Save Changes.
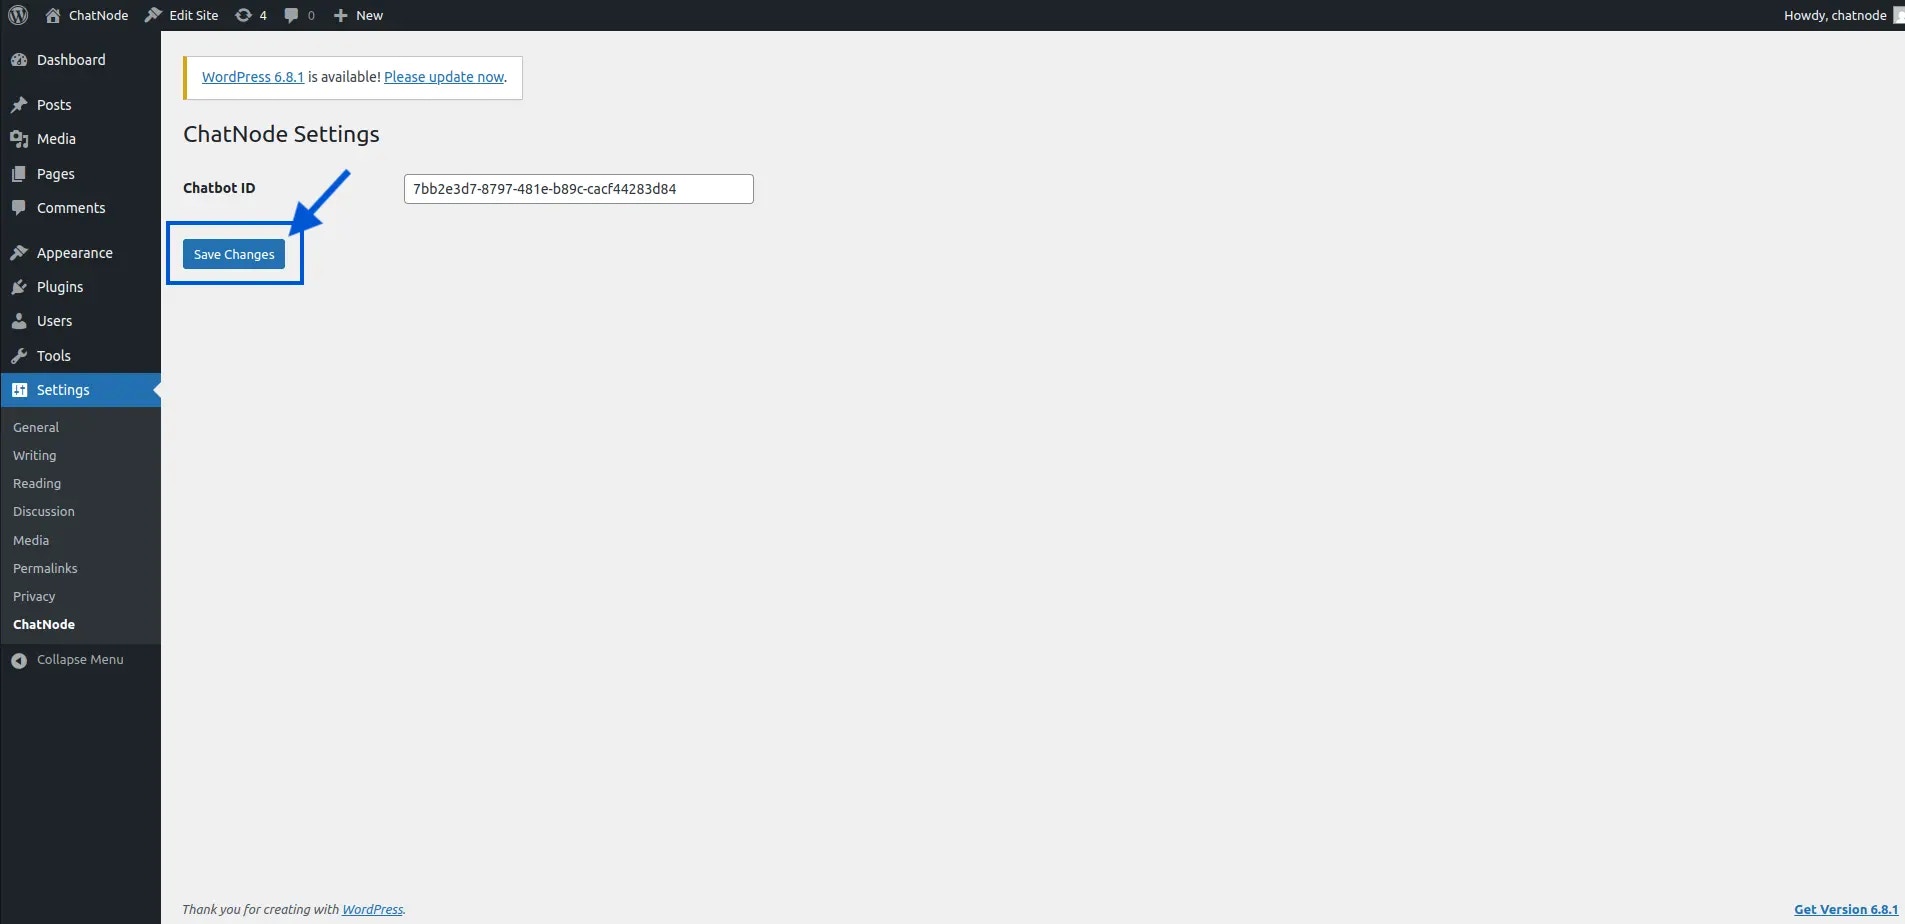
- Your ChatNode agent should now be live on your WordPress website!