Skip to main contentOverview
Traditionally, lead collection happens at the start of a agent conversation (e.g., asking for name, email, or phone). With smart lead collection, the agent can now detect intent mid-conversation — such as when a user requests a product demo, pricing, or more details — and automatically prompt for relevant contact details.
Example: When will Product X be back in stock?
How to Use Collect Leads
Step 1: Create a Collect Leads Action
-
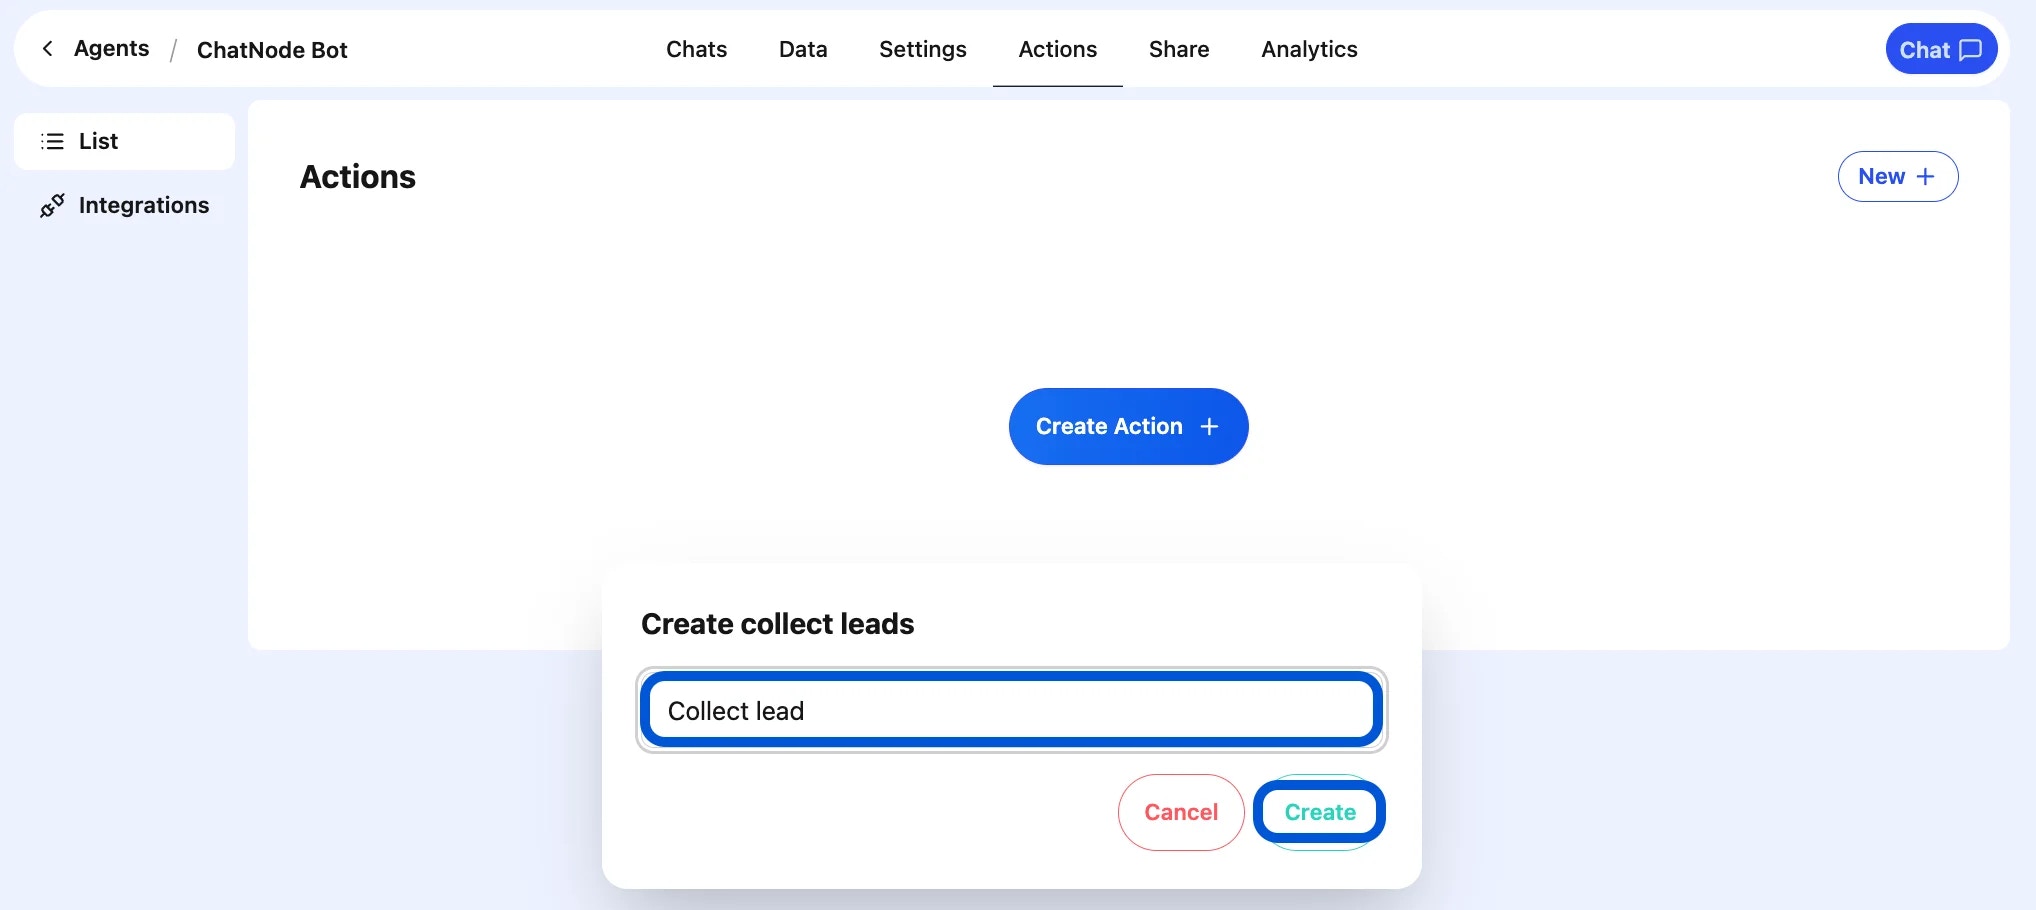
Go to the Actions tab.
-
Click List from the left-hand menu.
-
Select Create Action.

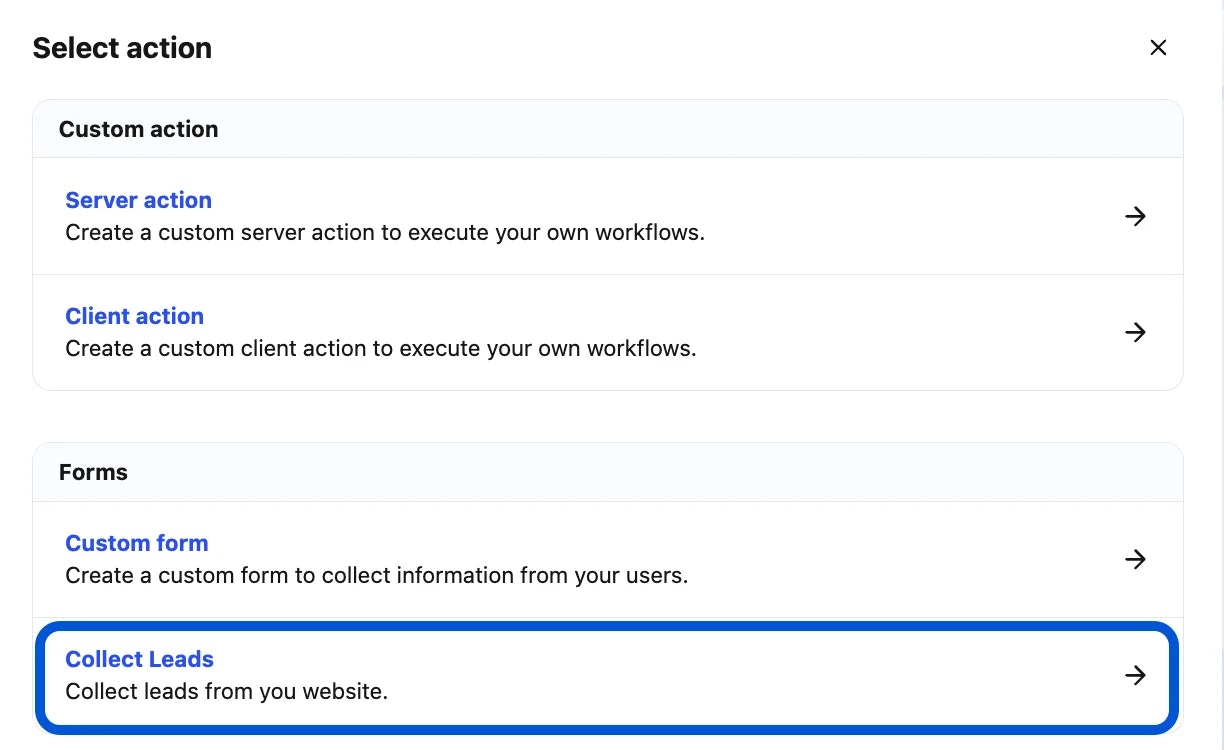
- Choose Collect Leads.

- Enter an Action Title in the pop-up window and click Create.

- You will be redirected to the configuration page.
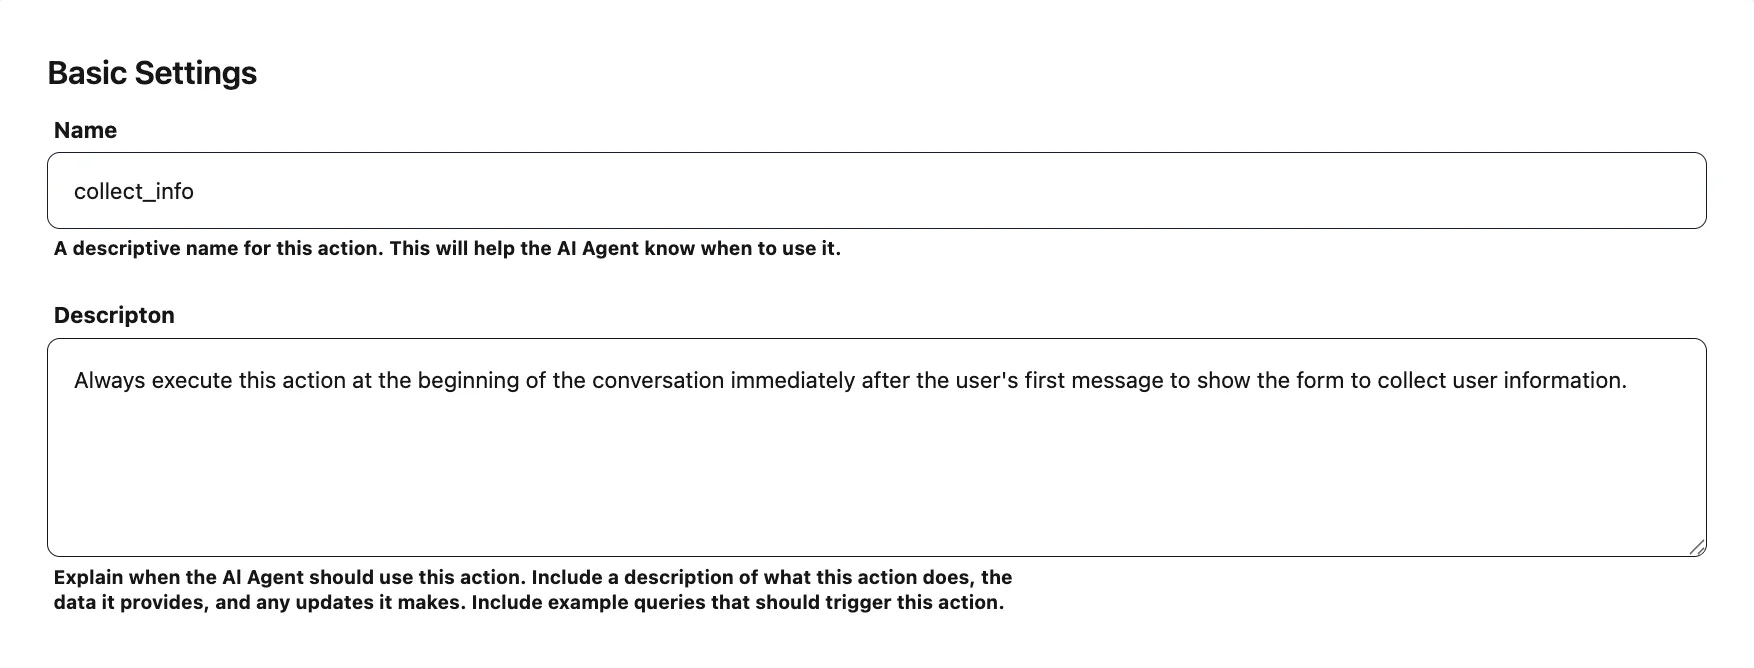
Step 2: Basic Settings
-
Name → Enter a descriptive name for this action. (e.g., collect_info)
-
Description → Provide a short explanation of when to use this action.
- Example: Collects user contact details for the sales team.

Step 3: Messages
You can customize the messages shown during the lead capture process:
-
Submit Button Message → Label for the submit button (e.g., Submit Details).
-
Submitted Message → Confirmation shown after the user submits their information (e.g., Thank you! We’ll be in touch soon.).
-
Dismissed Message → Message displayed if the user closes the form without submitting (e.g., You dismissed the form.).
 Inputs are the fields that make up your lead form.
By default, common fields are provided:
You can configure each field by editing:
-
Label → What the user sees (e.g., Your Email).
-
Placeholder → Example text inside the field (e.g., Enter your email address).
-
Required → Toggle whether the field must be filled out before submission.
Example Setup:
-
Name → Required text field.
-
Email → Required email field.
-
Phone → Optional text field.

Step 5: Webhook (Optional)
You can send collected lead data to an external system automatically.
-
Submissions are sent as a POST request in JSON format.
-
Configure your webhook endpoint in the settings tab.
-
Example Event Name: collect_info_lead_form
This is helpful if you want to sync leads with a CRM, Google Sheets, or another database.

Step 6: Enable the Action
At the top of the screen, switch from Disable → Enable to activate the lead collection action.

Example Workflow
-
Visitor says: I’d like more info.”
-
AI Agent triggers the Collect Leads form.
-
User enters Name, Email, and Phone Number.
-
AI Agent confirms: “Thanks! A team member will reach out to you shortly.”
-
(Optional) Data is automatically pushed to your webhook endpoint.
With the Collect Leads action, you can turn conversations into valuable contacts, helping you grow your pipeline and engage potential customers more effectively. 


