Overview
Custom Form lets you create forms with fields that the AI Agent can use to collect and validate user inputs. Example: A profile update form that asks for name, email, and preferences. This feature is useful for lead generation, surveys, customer support, and profile management.How to Create a Custom Form
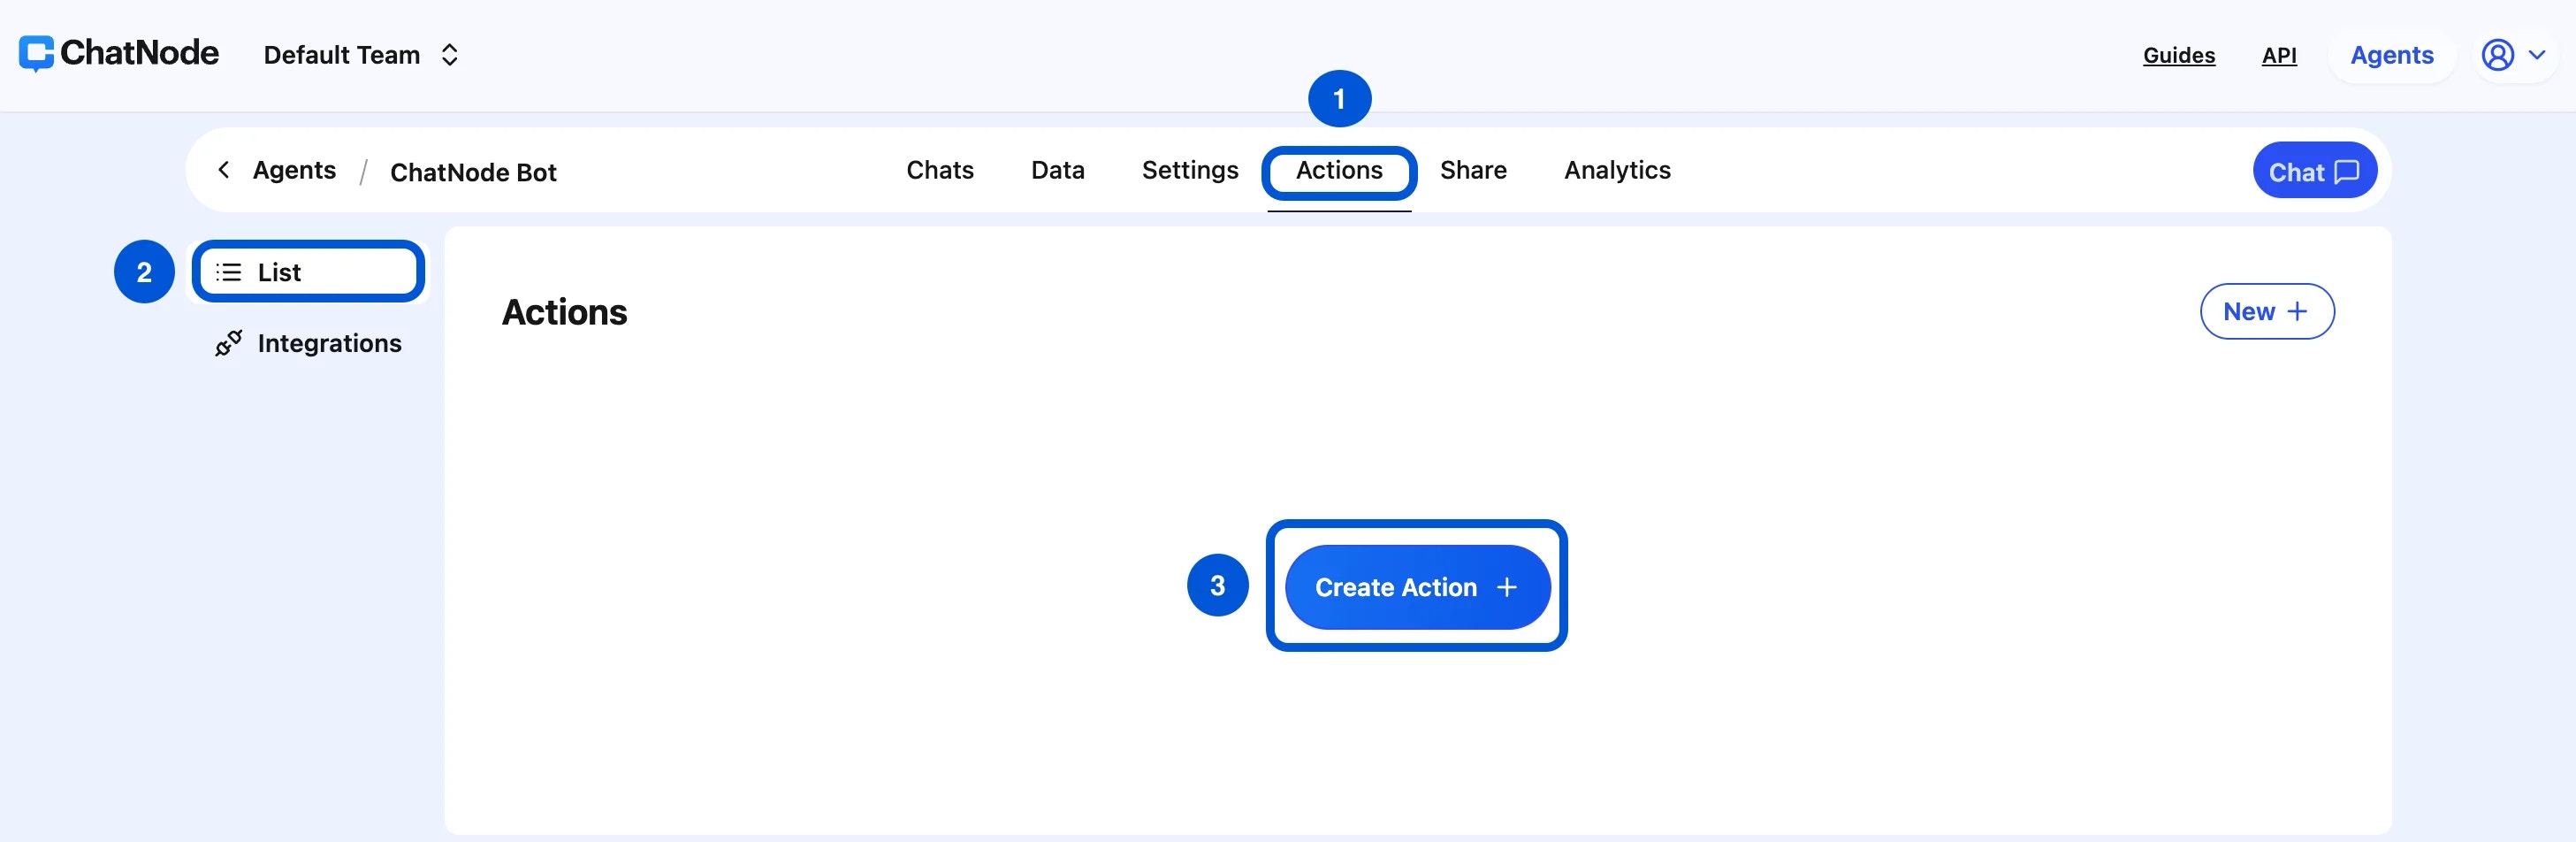
Step 1: Create a Custom Form
- Go to the Actions tab.
- Click List from the left-hand menu.
- Select Create Action.
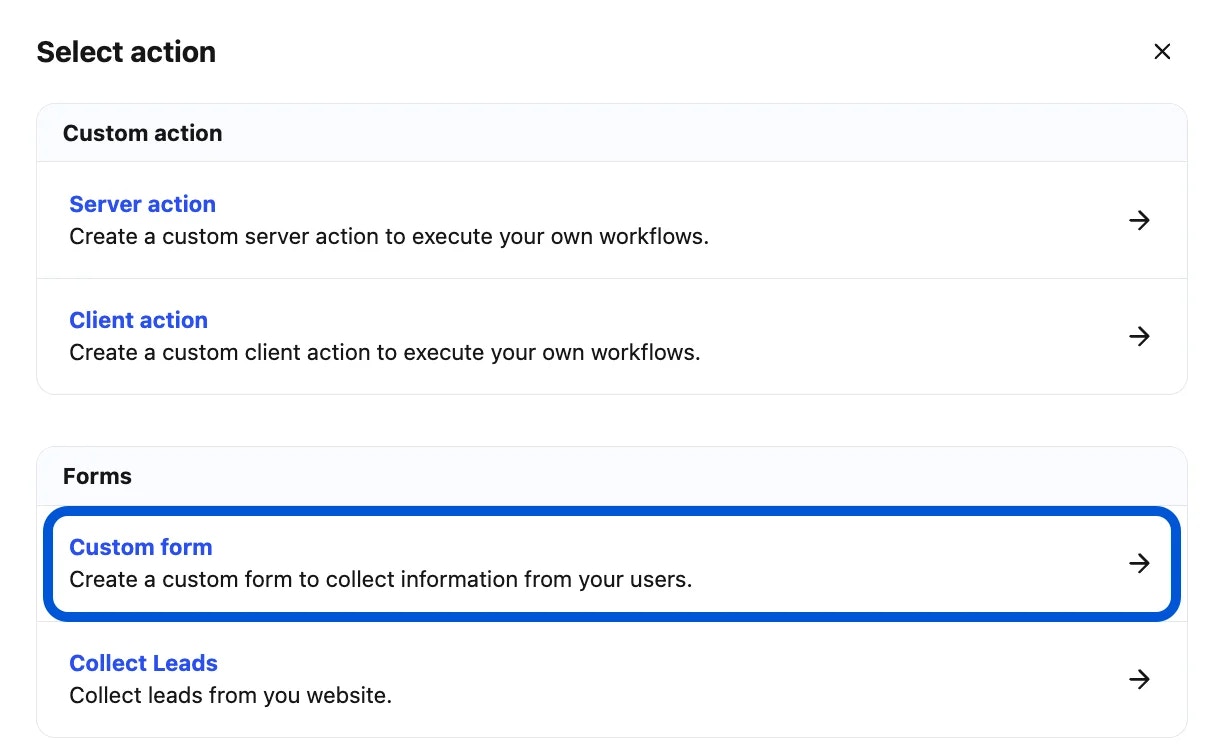
- Choose Custom Form under Forms.
- Enter an Action Title in the pop-up window and click Create.
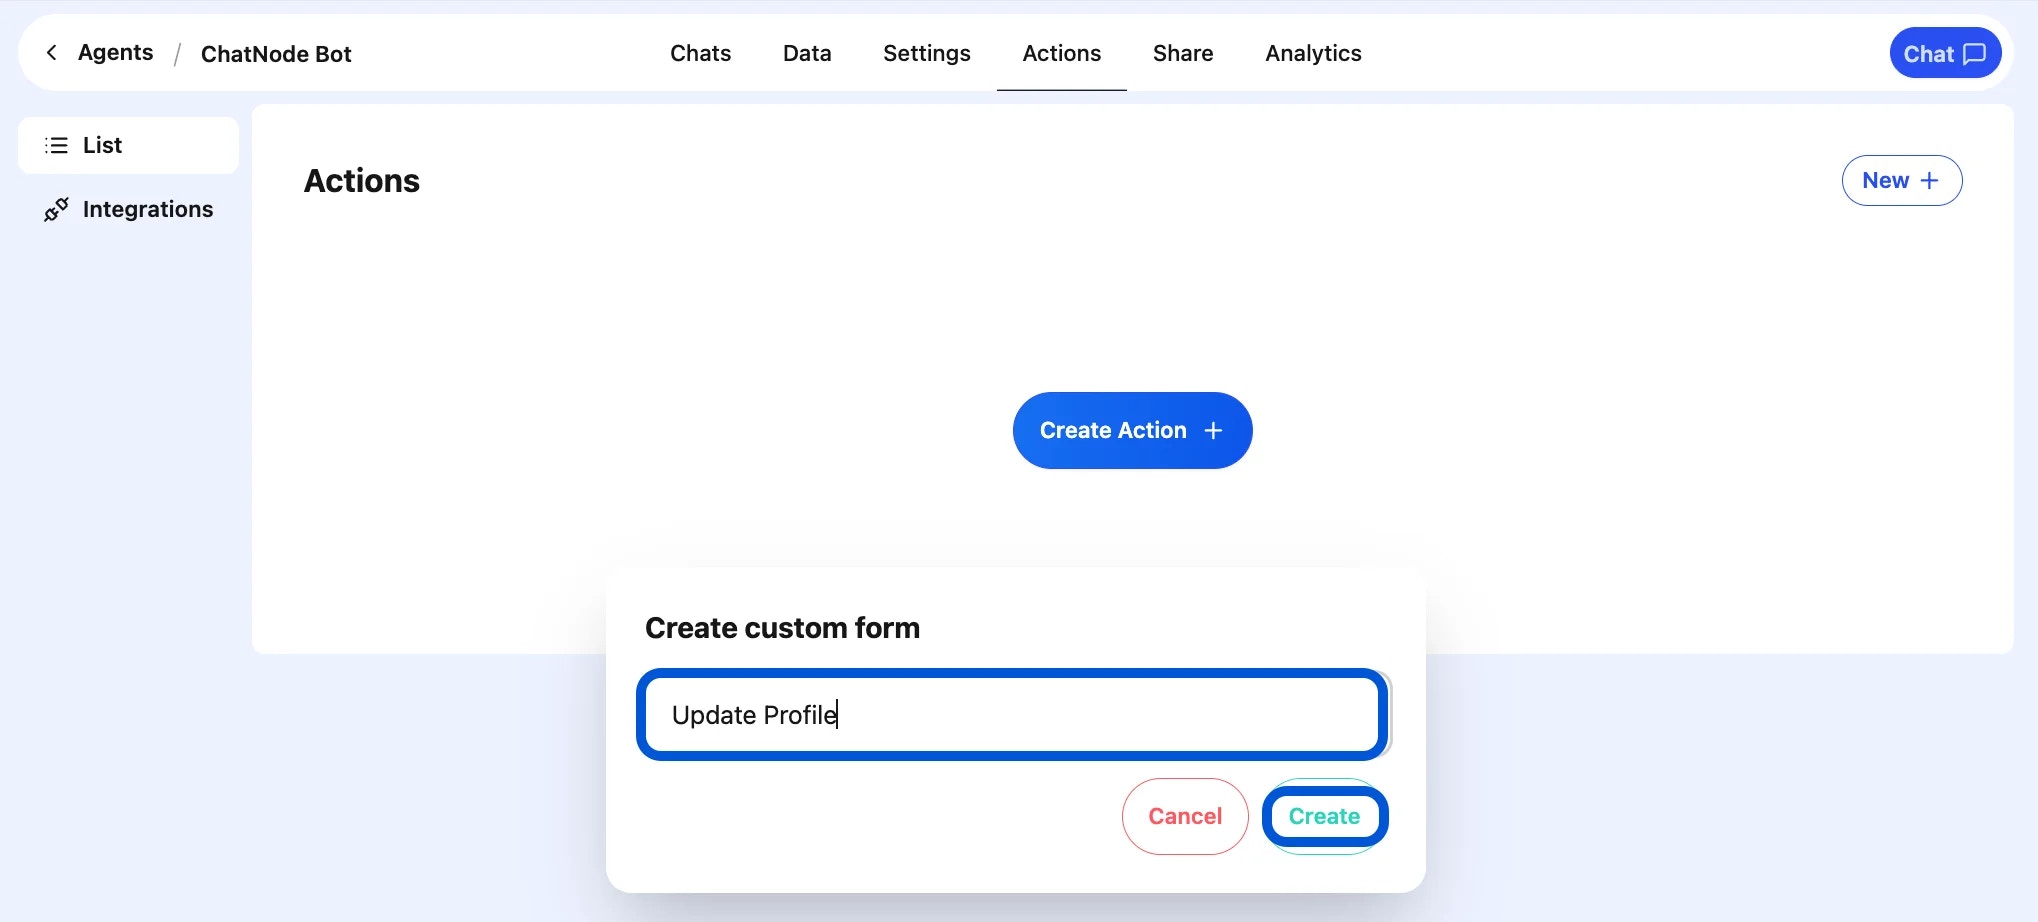
- You’ll now see the form configuration screen.
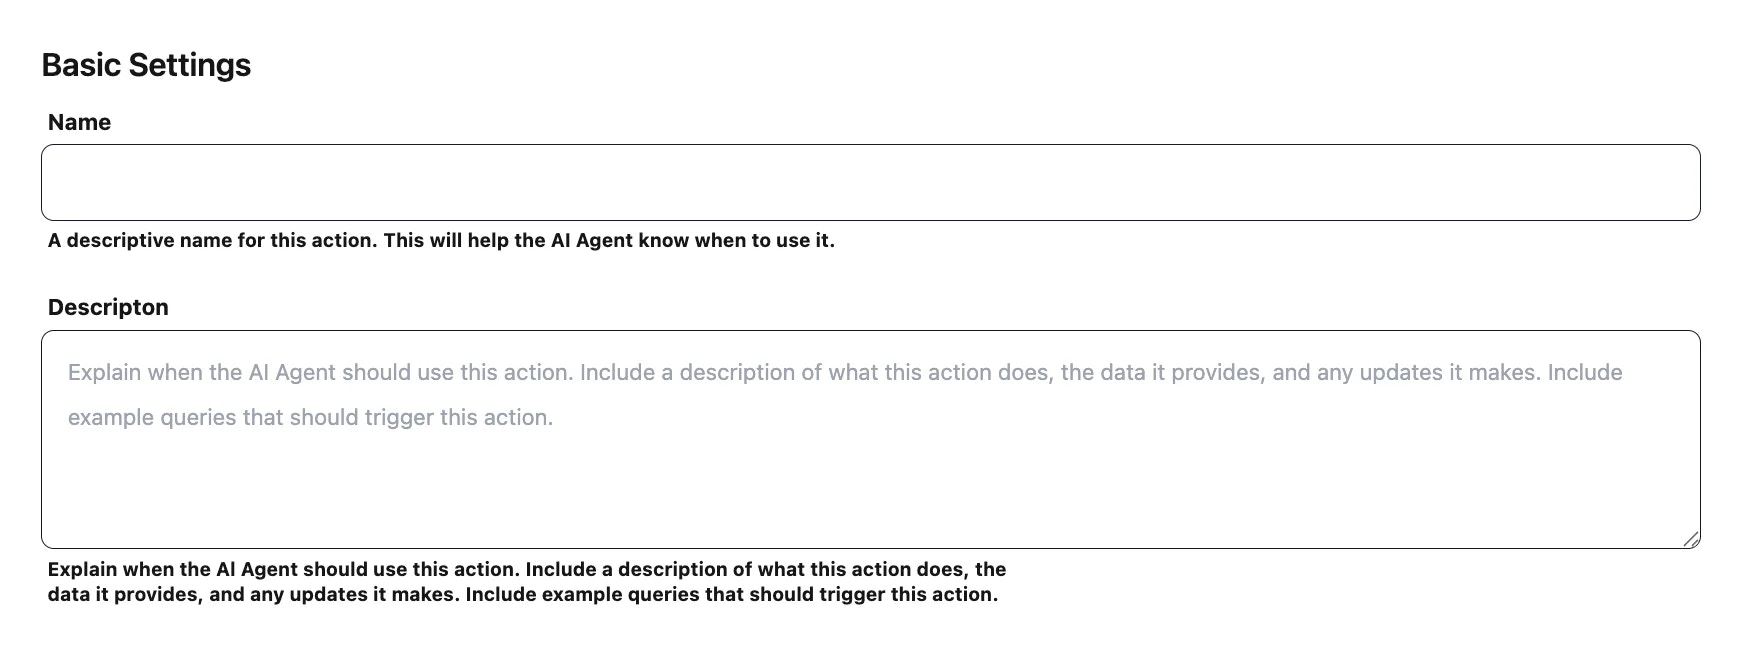
Step 2: Basic Settings
- Name → A descriptive name for the form. (e.g., update_profile)
- Description → Explain when this form should be used. (e.g., Collect user details to update their account.)
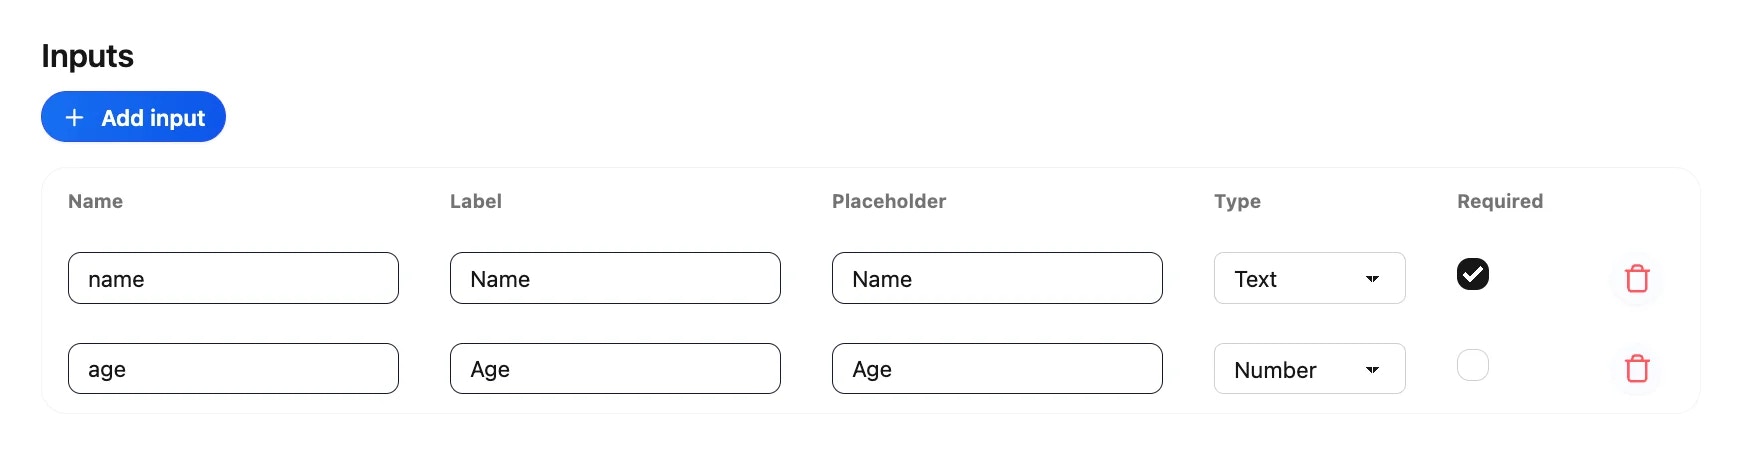
Step 4: Add Inputs
Each input represents a field in the form.- Click Add Input.
-
Define the field:
- Name → Internal field name (e.g., email).
- Label → User-facing text (e.g., Email Address).
- Placeholder → Hint text (e.g., Enter your email).
- Type → Select from Text, Email, Number, etc.
- Required → Mark if mandatory.
- Full Name → Required text field.
- Email Address → Required email field.
- Preferences → Optional text field.
Step 5: Webhook (Optional)
Send form submissions to an external system:- Form data is sent as a POST request in JSON format.
- Configure the webhook endpoint in the Settings tab.
- Example Event Name: update_profile_custom_form

Step 6: Enable the Form
At the top of the page, toggle from Disable → Enable to activate the form.
Example Workflow
- User: “I want to update my profile.”
- AI Agent triggers the Custom Form.
- User fills in their Name, Email, Preferences.
- AI Agent confirms: “Your profile has been updated successfully!”
- (Optional) Data is sent to your backend via webhook.